
Build Automated Checklists To Appear Wherever You Need Them
Make checklists appear in GitHub, Salesforce, or any other tool you can think of!
Checklists are essential for making sure you don't forget steps to a workflow, and checklist software is essential for quality control. But the problem is, sometimes, they are built in one place and then forgotten, rather than being a part of your workflow as you complete a task.
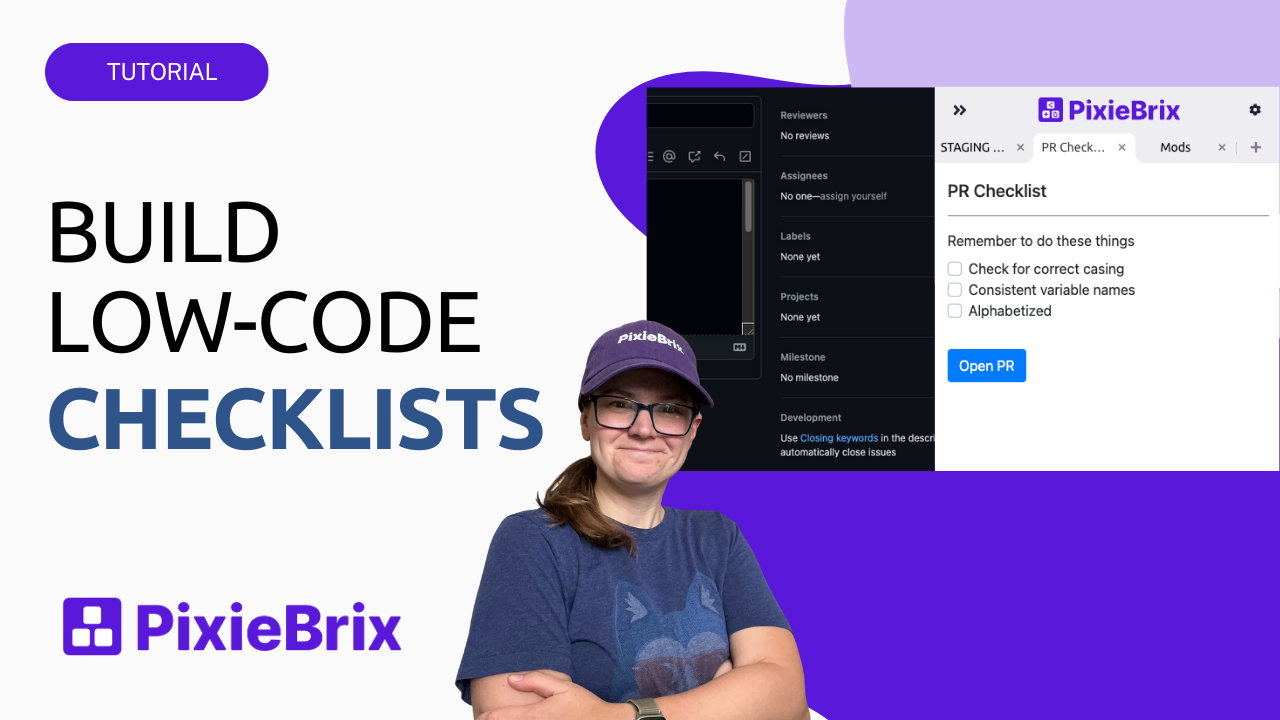
Ever wish you had a checklist that appeared exactly when you needed it? I did. As a developer, I often found myself making the same mistakes when opening pull requests and asking my team for code reviews. I know I was supposed to alphabetize new imports and localize content, but somehow, I'd always forget to do that, and I'd forget to reference the handy checklist I had in Trello.
So I built an automated checklist that appears as I open a pull request to remind me of what I need to do, and even better—I removed the button to pull the trigger until I checked off all those items. My code quality increased, and my team spent less time reviewing my PRs and catching silly mistakes. This meant no more workflow chart software - just one sidebar to guide me.
But PRs aren't the only place you or your team might want an automated checklist. For instance, maybe your marketing team needs a checklist when publishing a blog post in Ghost. Or your sales team needs a checklist when adding a new lead to your CRM. Or your support team needs a checklist when creating a ticket.
If you want to build a checklist, follow these steps to learn the mechanics behind building automated checklists and then you can apply it to anything! And the beauty of PixieBrix means you can build it on any website, so on top of any tool!
Let's Learn
Choose your path:
You can watch...
or, keep reading if you prefer the text version!
Create a PixieBrix account and open the Page Editor
You'll need a PixieBrix account to build your custom checklist tool. Sign up for free with your email address or a social account, and you'll be prompted to install the PixieBrix Chrome Extension.
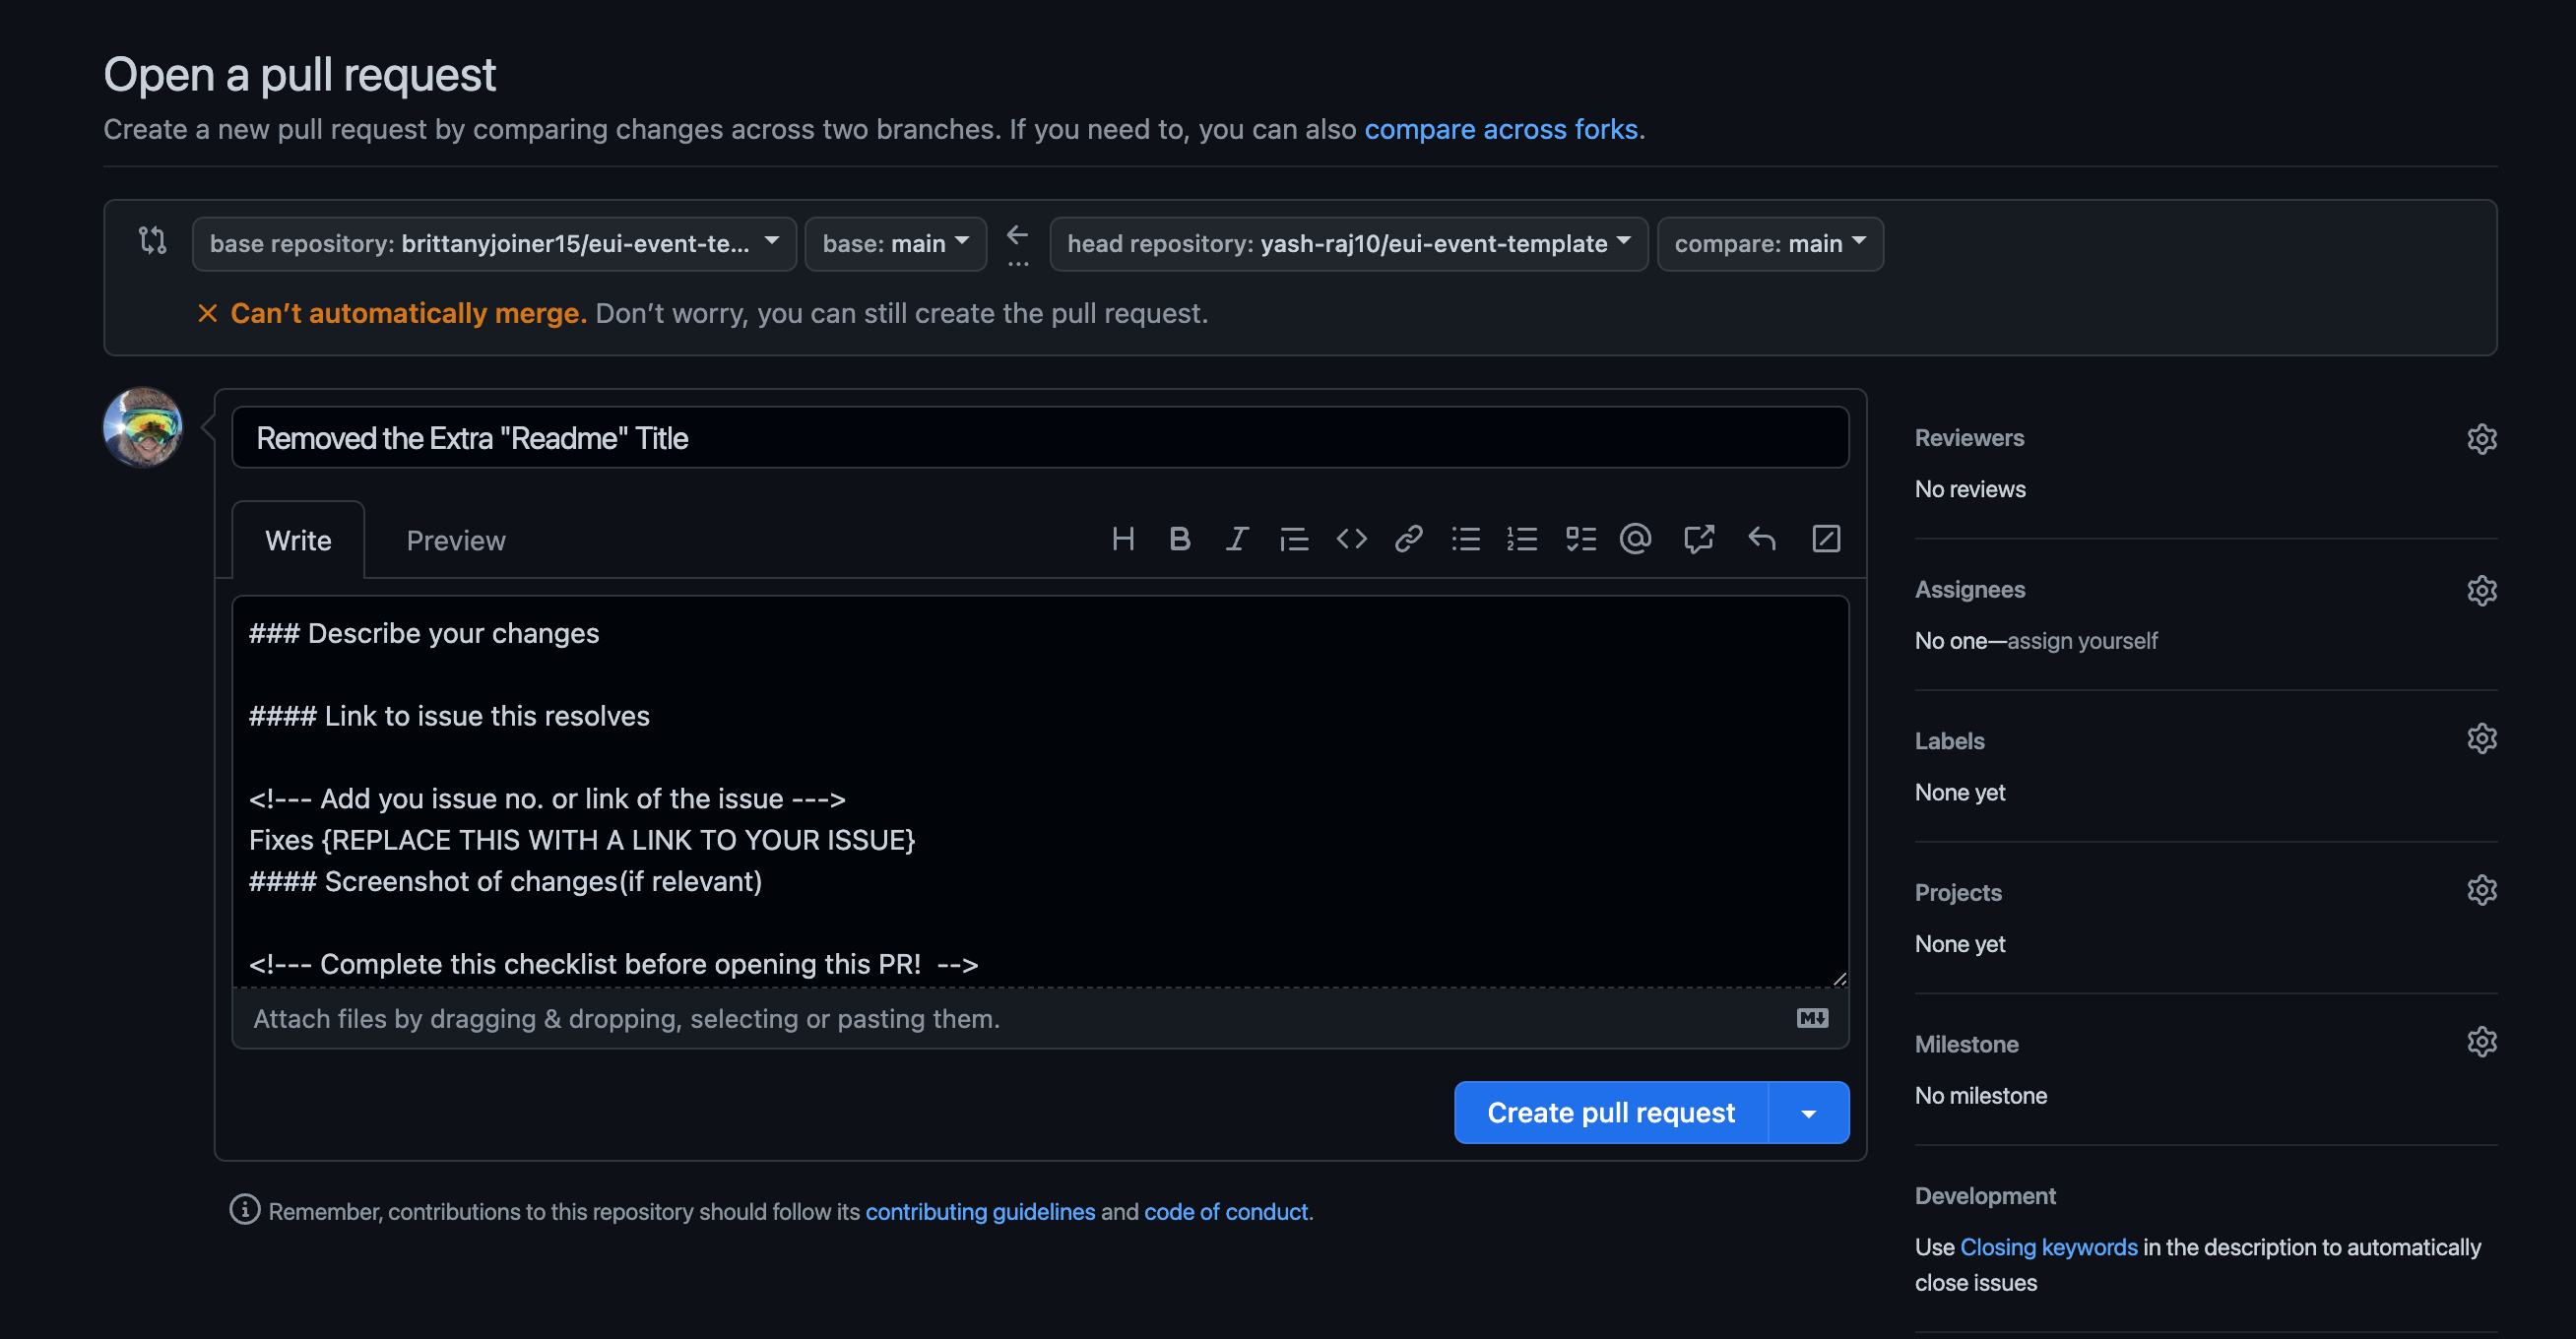
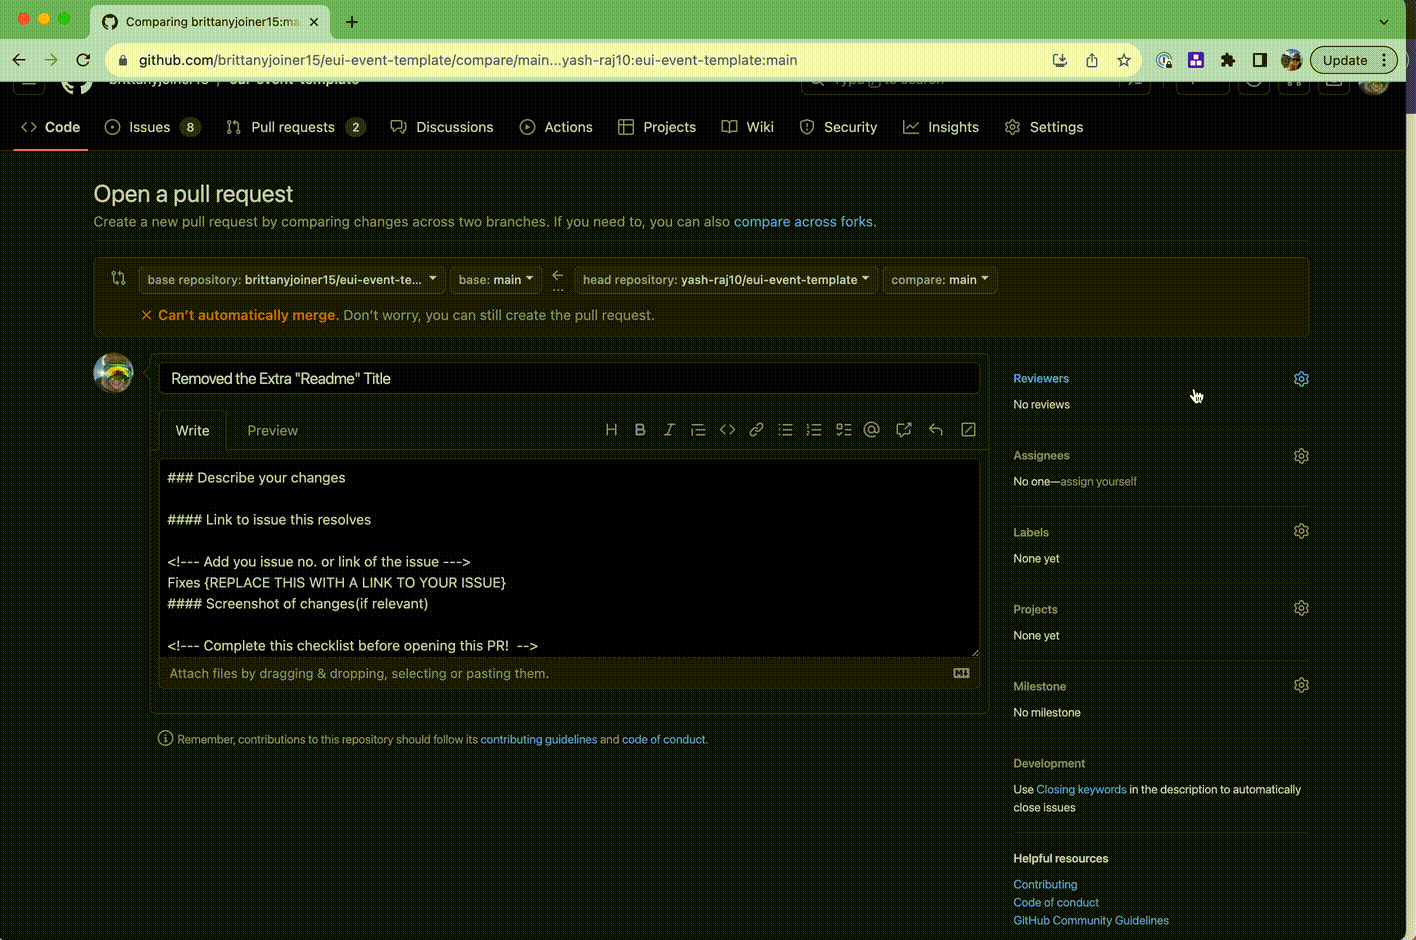
Once you've created an account, open a new tab and go to GitHub. Go through the process to begin opening a pull request until your page looks like this.
Now open the PixieBrix Page Editor by right-clicking anywhere on the page and choosing Inspect. Look for the PixieBrix tab in the Chrome Dev Tools.

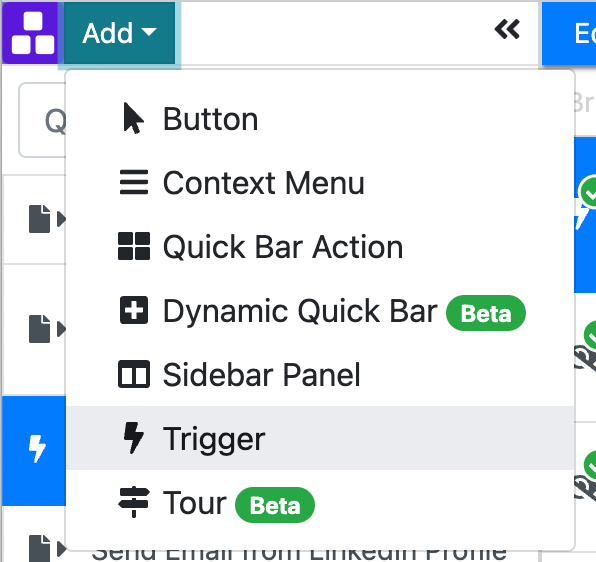
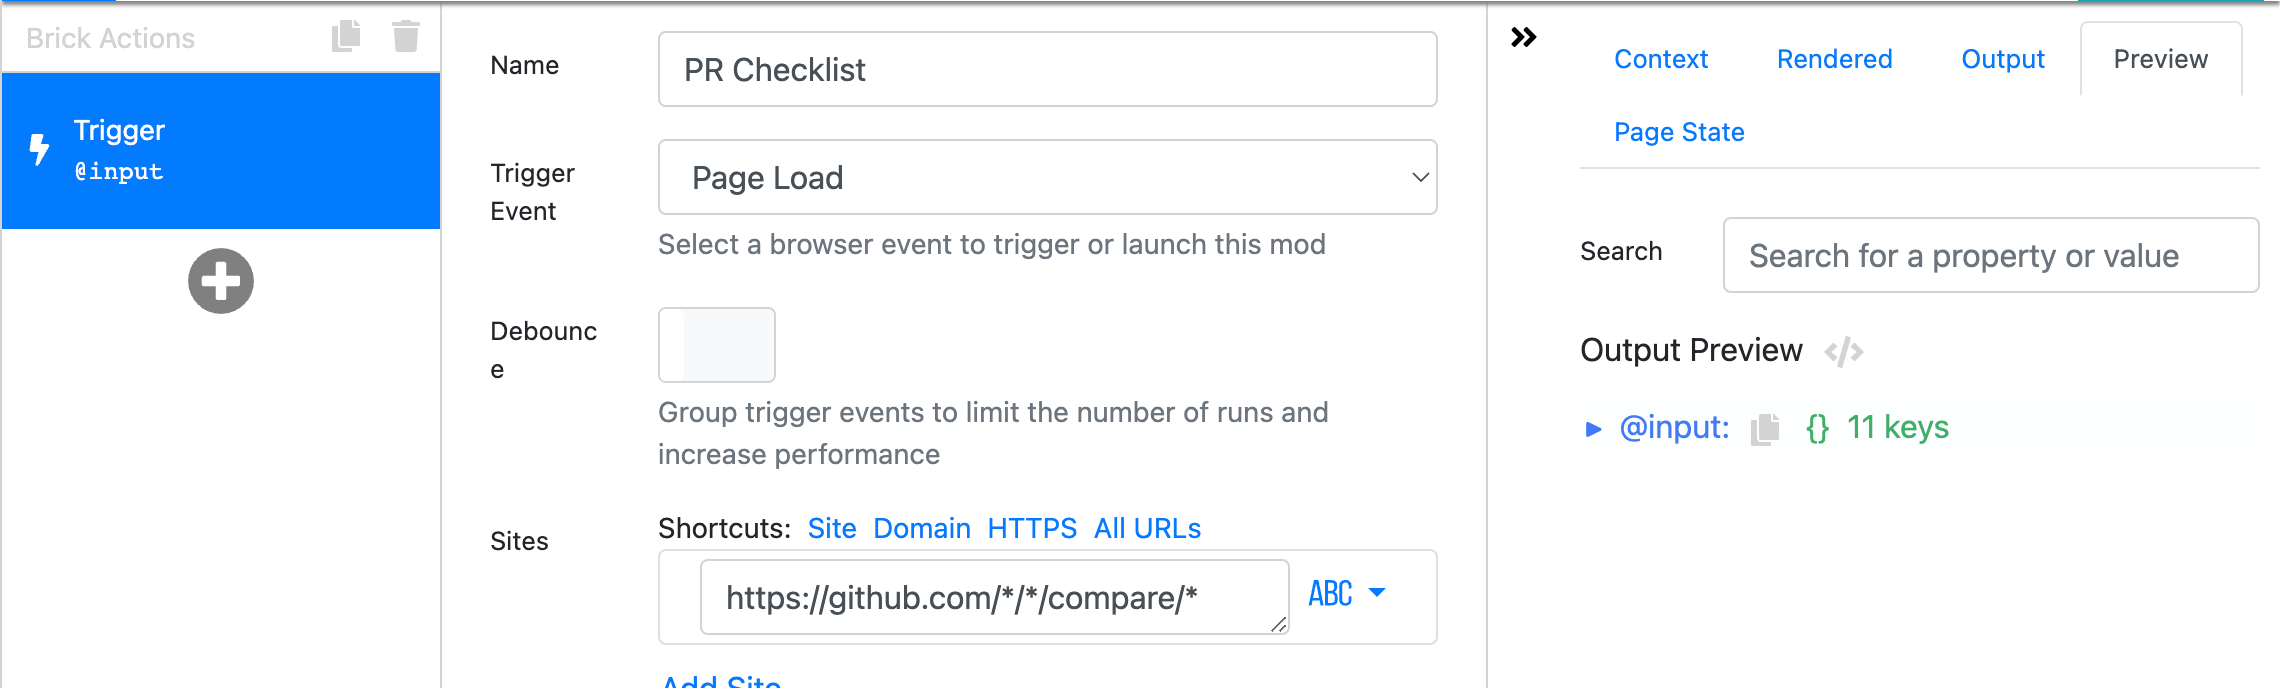
Add a Trigger starter brick
Every mod (workflow built with PixieBrix) begins with a starter brick that defines when the mod is run.
Click the teal Add button next to the PixieBrix logo on the left side of the Page Editor and select the Trigger option.
Configuration options appear in the middle panel, and you'll name the mod and define where you want to access this mod. If you want to access it on any pull request in any repo, you'll want to set the Sites value to https://github.com/*/*/compare/*
Here's what the Trigger brick should look like:
Hide the Create Pull Request Button
This next part is going to let us hide the button for creating a pull request because we don't want to be able to click that until we've completed our checklist!
Click the + button below the Trigger brick, and a modal appears for searching bricks. Search for the Hide brick, hover over it, and click Add.
Once you click Add, you'll see it appear in your Brick Actions pipeline, and new configuration options appear in the middle of your Page Editor. This is where you specify which element you want to hide.
I happen to know the selector for the element we want to hide, so you can type .hx_create-pr-button in the selector field.
Because I also wanted to hide the little square dropdown that's next to the button, I added another Hide brick, and this time, set the selector to .float-none
Create your checklist
We're going to use two bricks to create our checklist.
First, we'll add the Assign Mod Variable brick. This will let us create a static list that we can reference when we define our checklist and also gives us a way to crosscheck and make sure we've checked everything off the list before showing the button.
Add the brick below the Hide bricks in your pipeline, and name the variable in the Variable Name field. You can call it anything, but I called it requirements. Next, in the Value field, click the ABC at the end of the row and select the Array items option. Click Add Item and type out each item in your checklist.
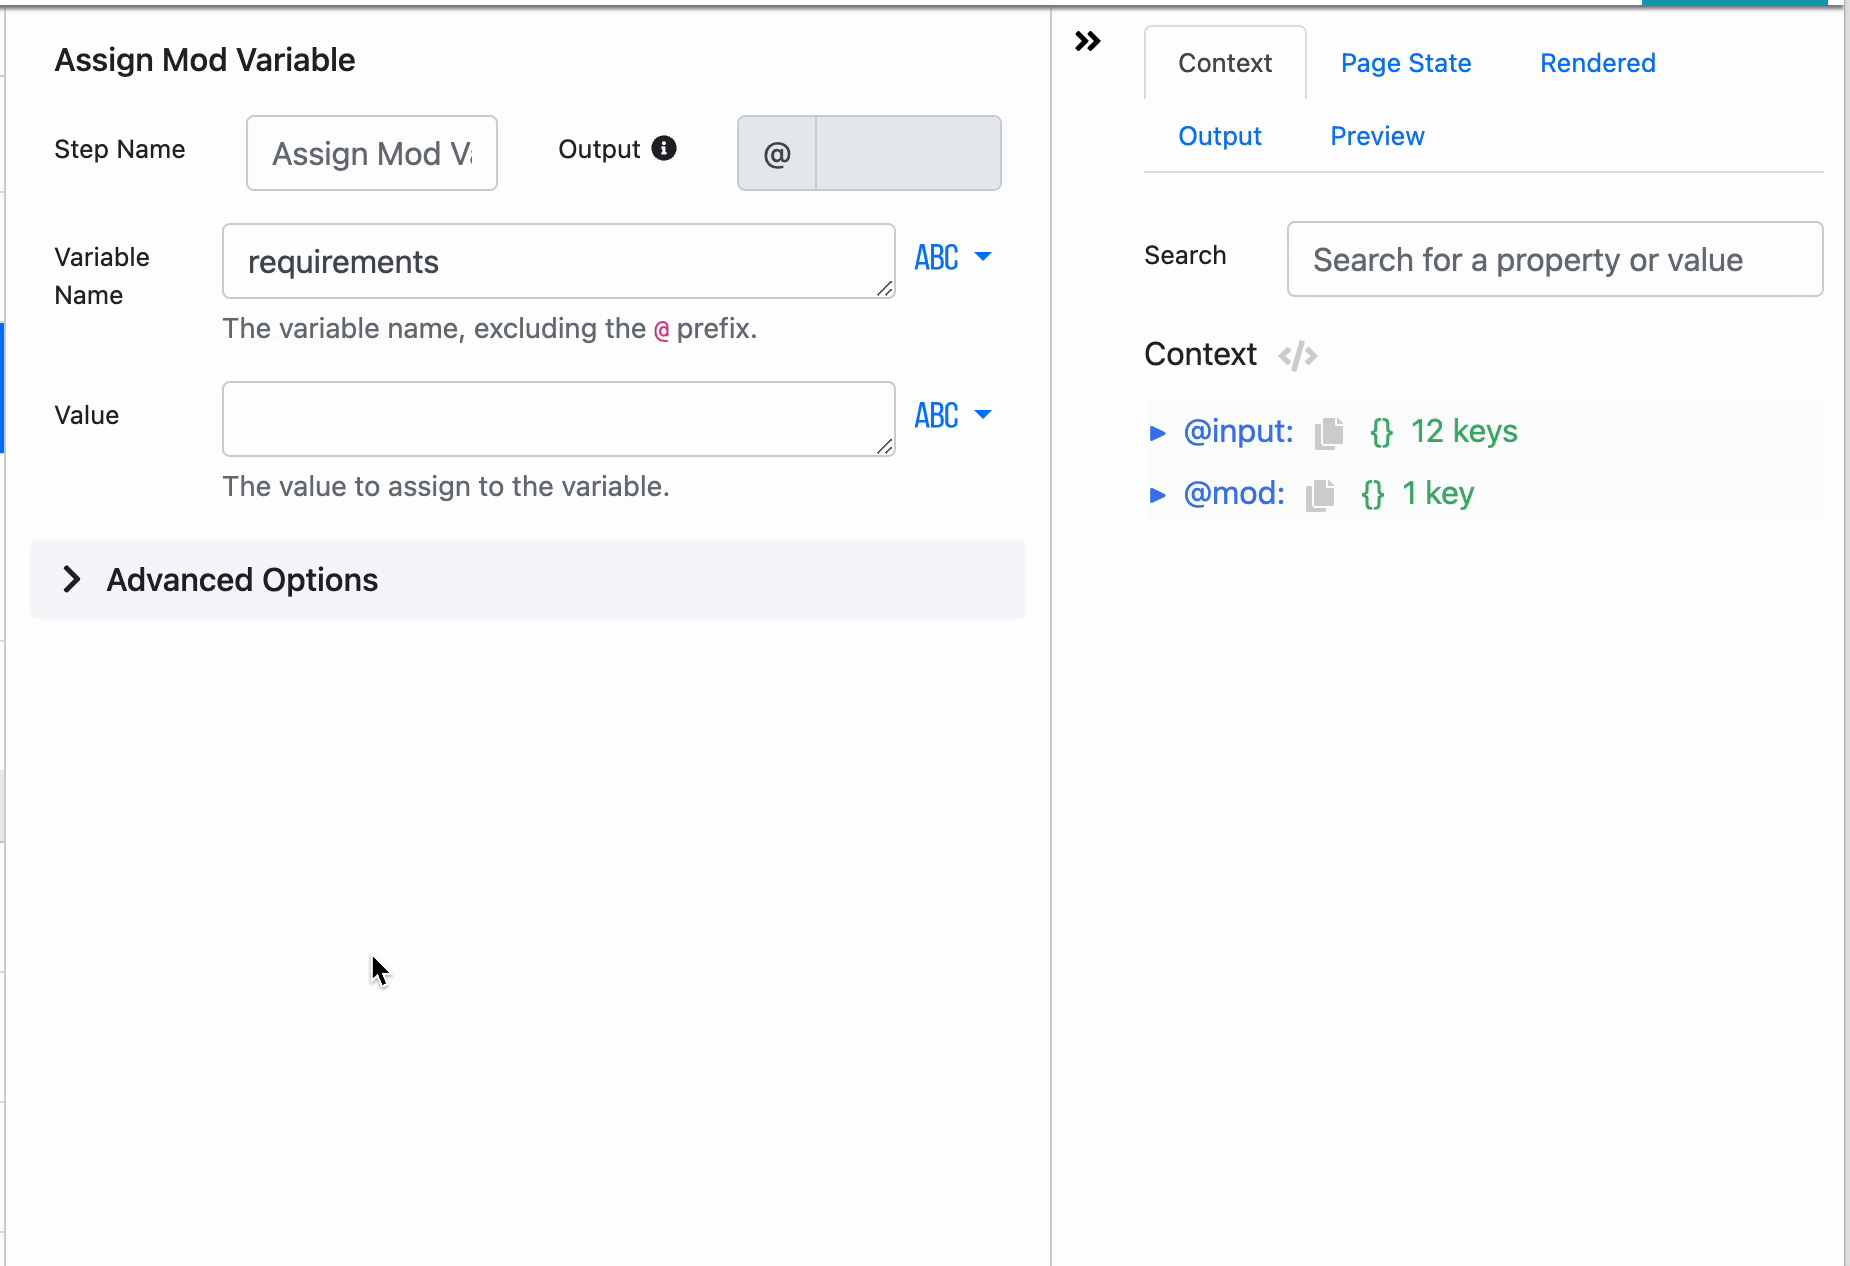
When you save a mod variable, you can access it anywhere in the mod by using @mod.{variable-name} . This makes it easy to define something that you can reference multiple times throughout your mod.
- Everything is sorted alphabetically
- Unit tests created
- All text is tokenized for i18n
- Check for typos
- Add comments
Once you've created your items, it's time to display the checklist. Add the Show a modal or sidebar form brick.
This lets you build a form and choose where to display it. Don't worry—we've got a pretty simple form; it's just one field! Give it a title, like PR Checklist, then edit the existing field.
By default, it will be titled example, but we want to rename it. Call the Name checklist, and set the Label value to something that describes the items, such as Do these things before opening a PR.
For the input type, select the Checkboxes (multi-select) option, and click a,b,c at the end of the Options row to change it to @ Variable.
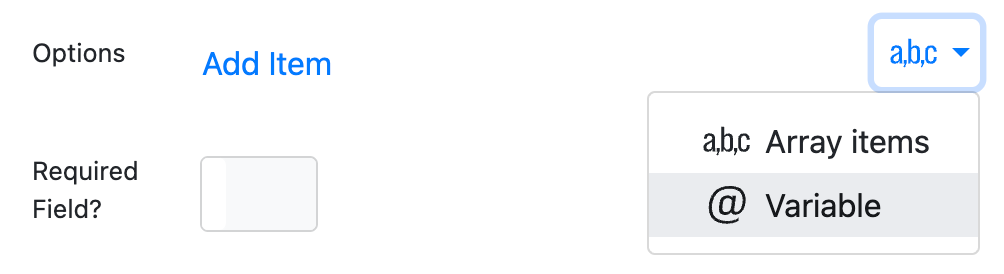
In the field, type @mod.requirements . This tells PixieBrix to grab the items from the mod variables we defined and create a checkbox for each one, like this!
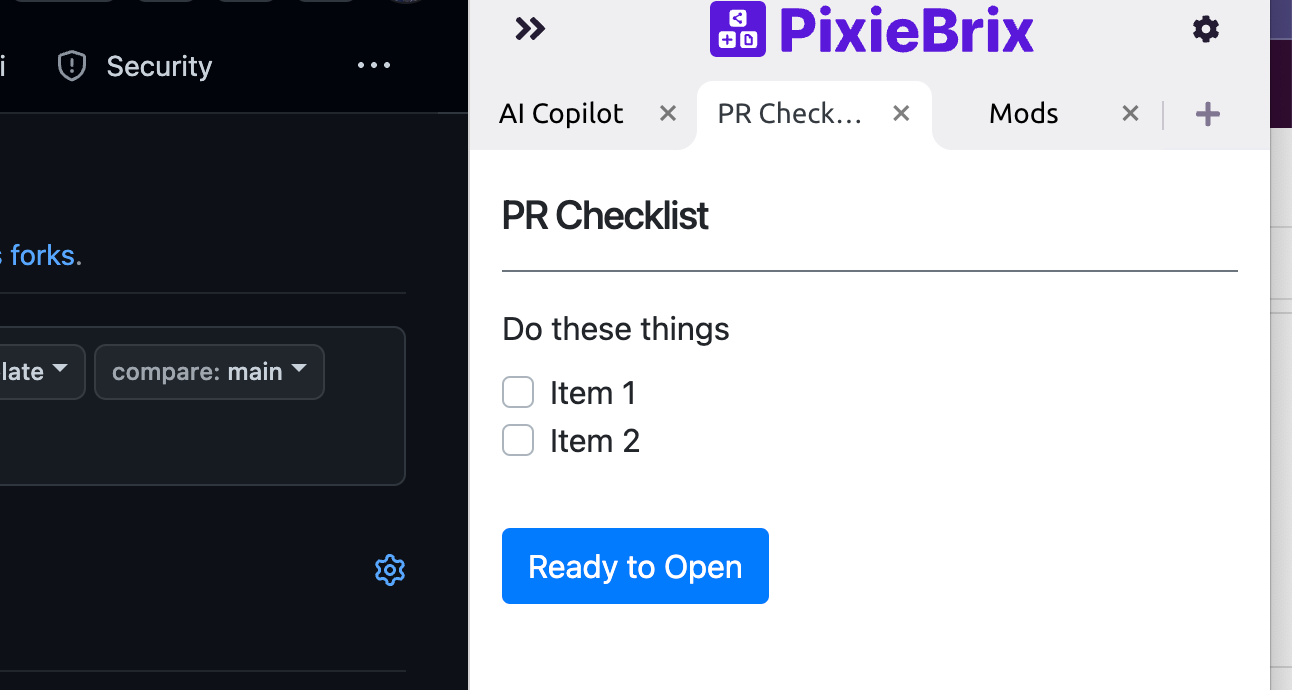
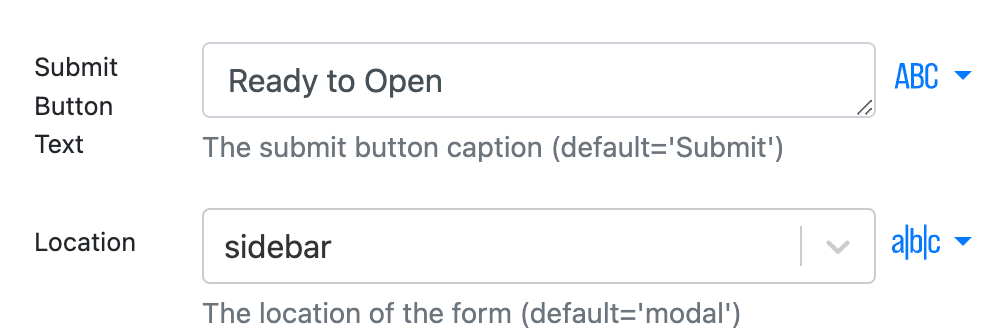
Scroll below your form field to change the Submit Button Text to something clearer like Ready to Open and choose sidebar the location. (By default, it will be set to modal , but this isn't very helpful for viewing on the side while you're trying to look at your pull request!)
Set logic for re-enabling the buttons
Our checklist now appears, but we need to make our buttons come back when we've filled out our checklist! And, just as importantly, we need to ensure they don't return if we haven't checked everything off.
To do that, we'll use the If-Else brick and ask it to check if everything was completed and then take two different paths, depending on the status.
Add the If-Else brick, and you'll see that pipeline section appear.
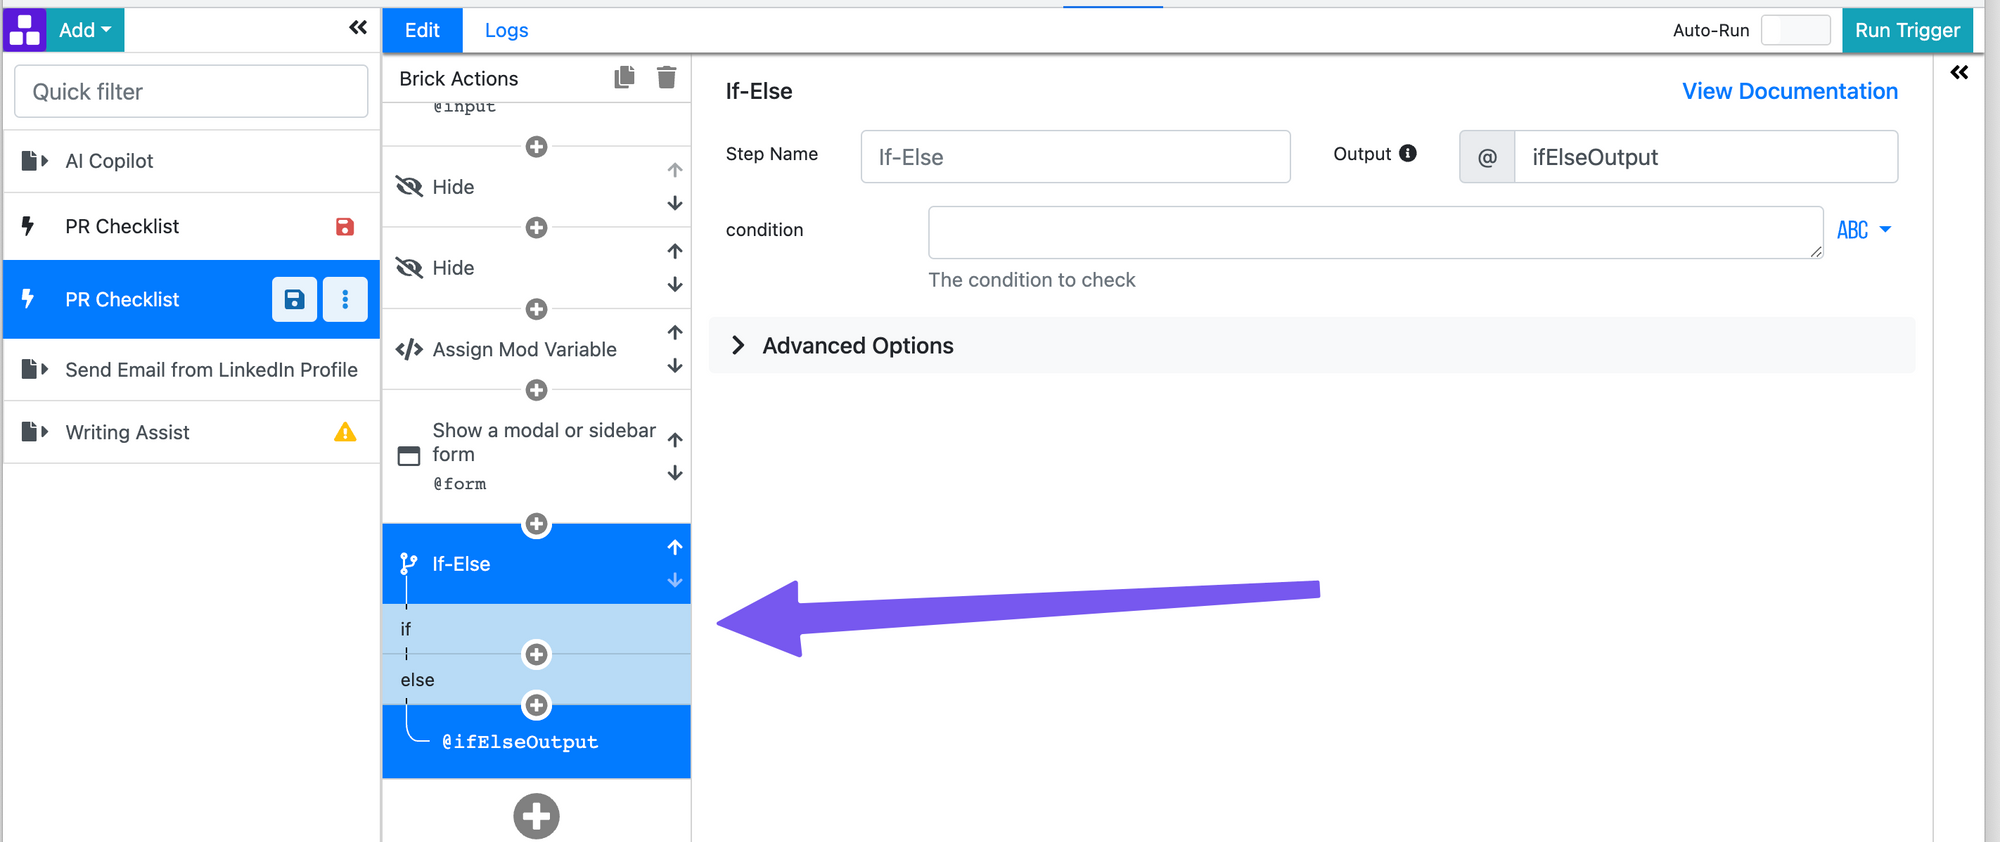
First, we'll set the condition field in the If-Else brick to
{{ @form.checklist | length === @mod.requirements | length }}
This will check if the number of items checked off in the form field is the same as the ones we provided in the mod variable...aka, did we check off everything?
Inside the If-Else brick are If and Else sections.
Setting the If true actions:
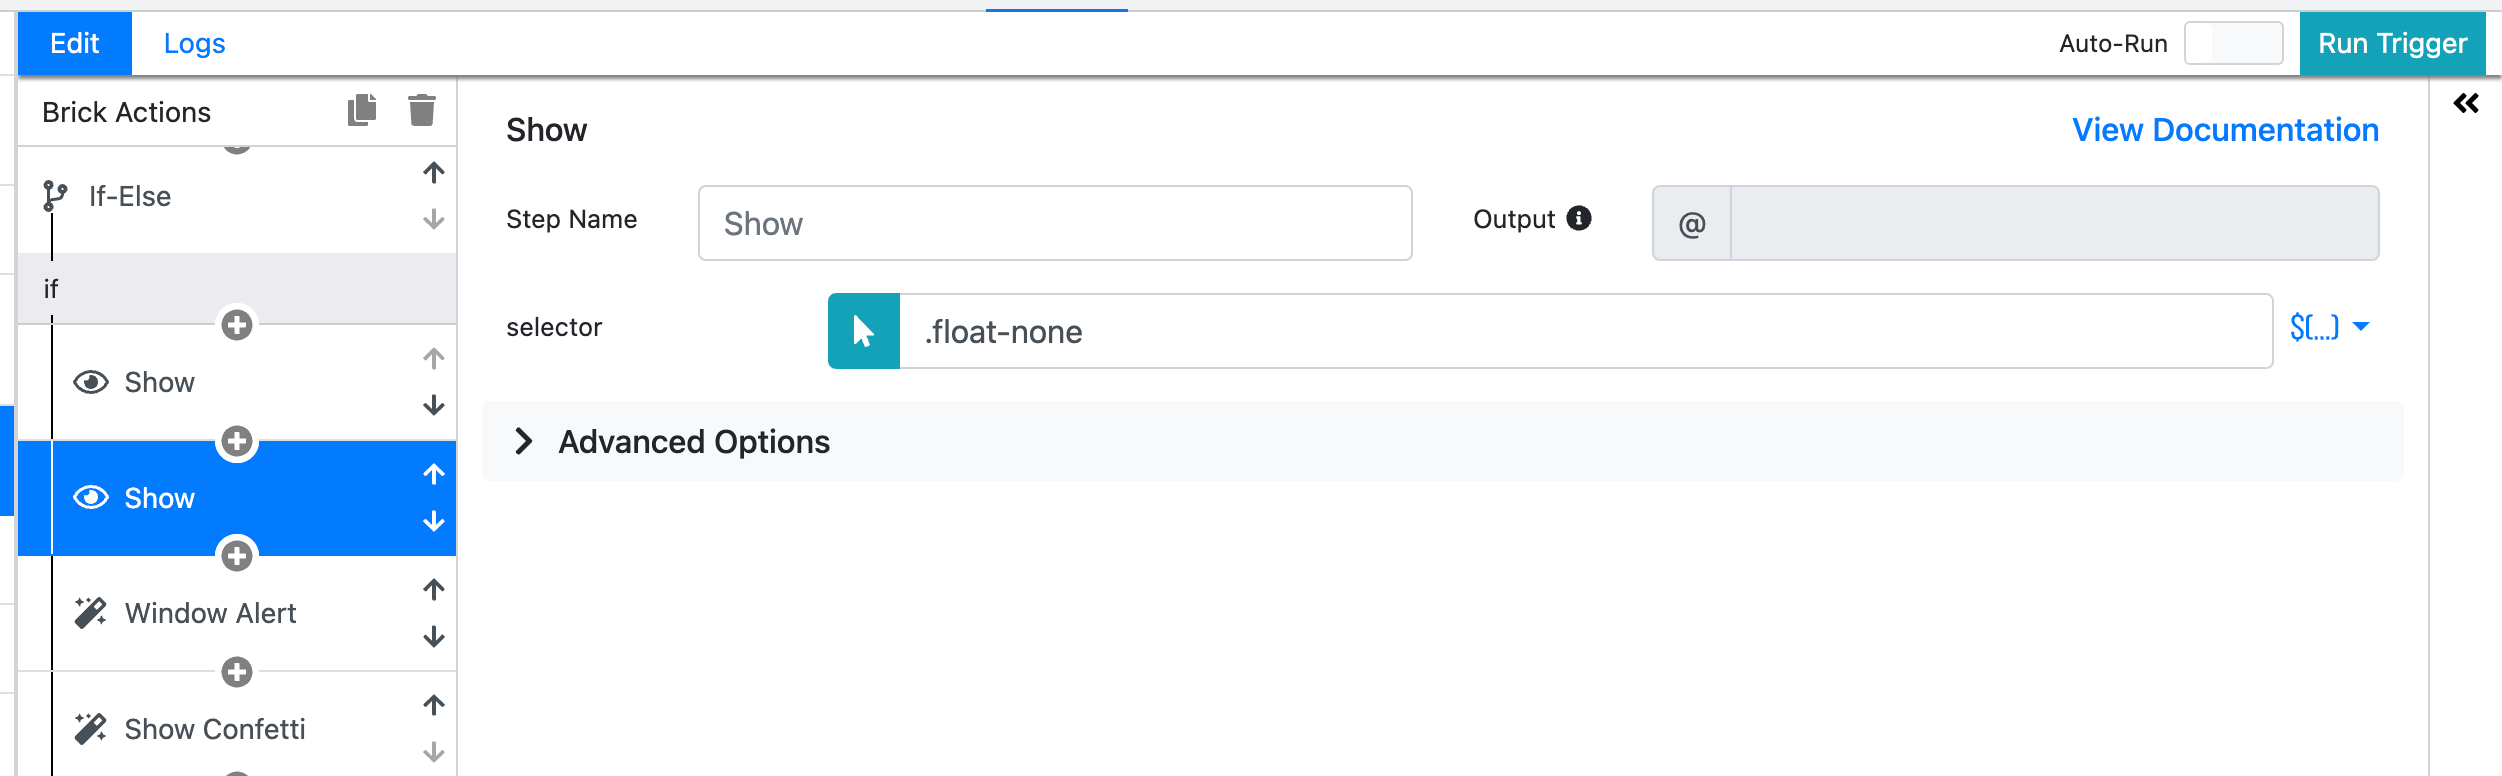
Click the + button under the If to add specific bricks to happen if that condition is true. If it's true, we want to show the "create pull request" buttons we hid before, so we'll add the Show brick.
You can copy the selector value from the Hide brick earlier. (Or you can copy and paste this: .hx_create-pr-button).
Add another Show brick to display the square button if you hid that, too. (Selector value for that is: .float-none).
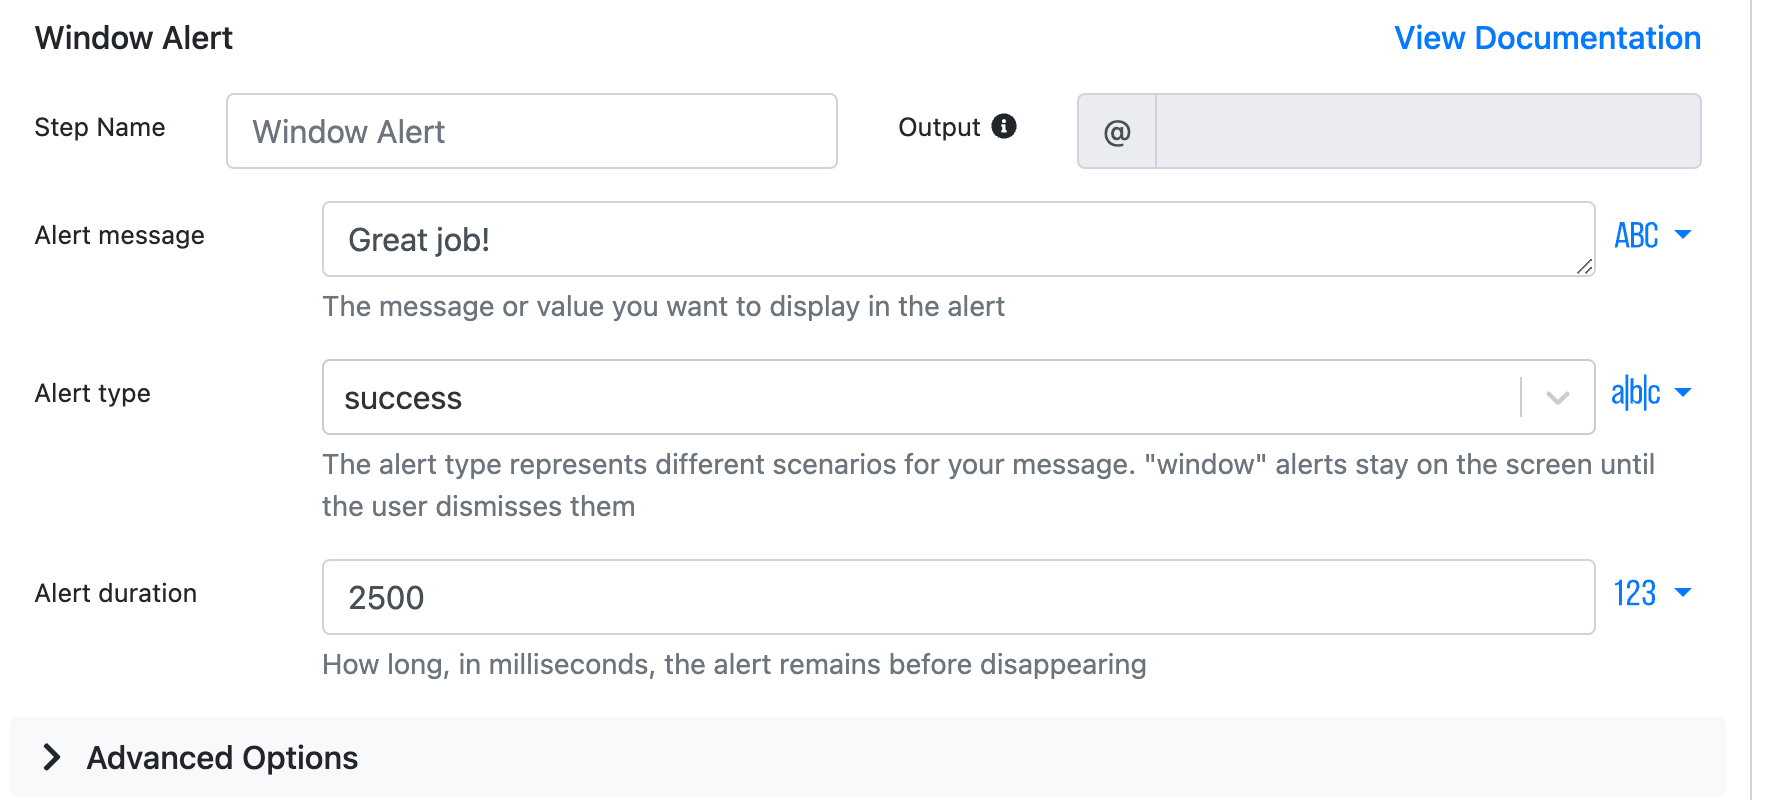
That's all that's really required, but I like to add a little more fun to it, so I also added a Show confetti brick that sprays confetti across the screen.
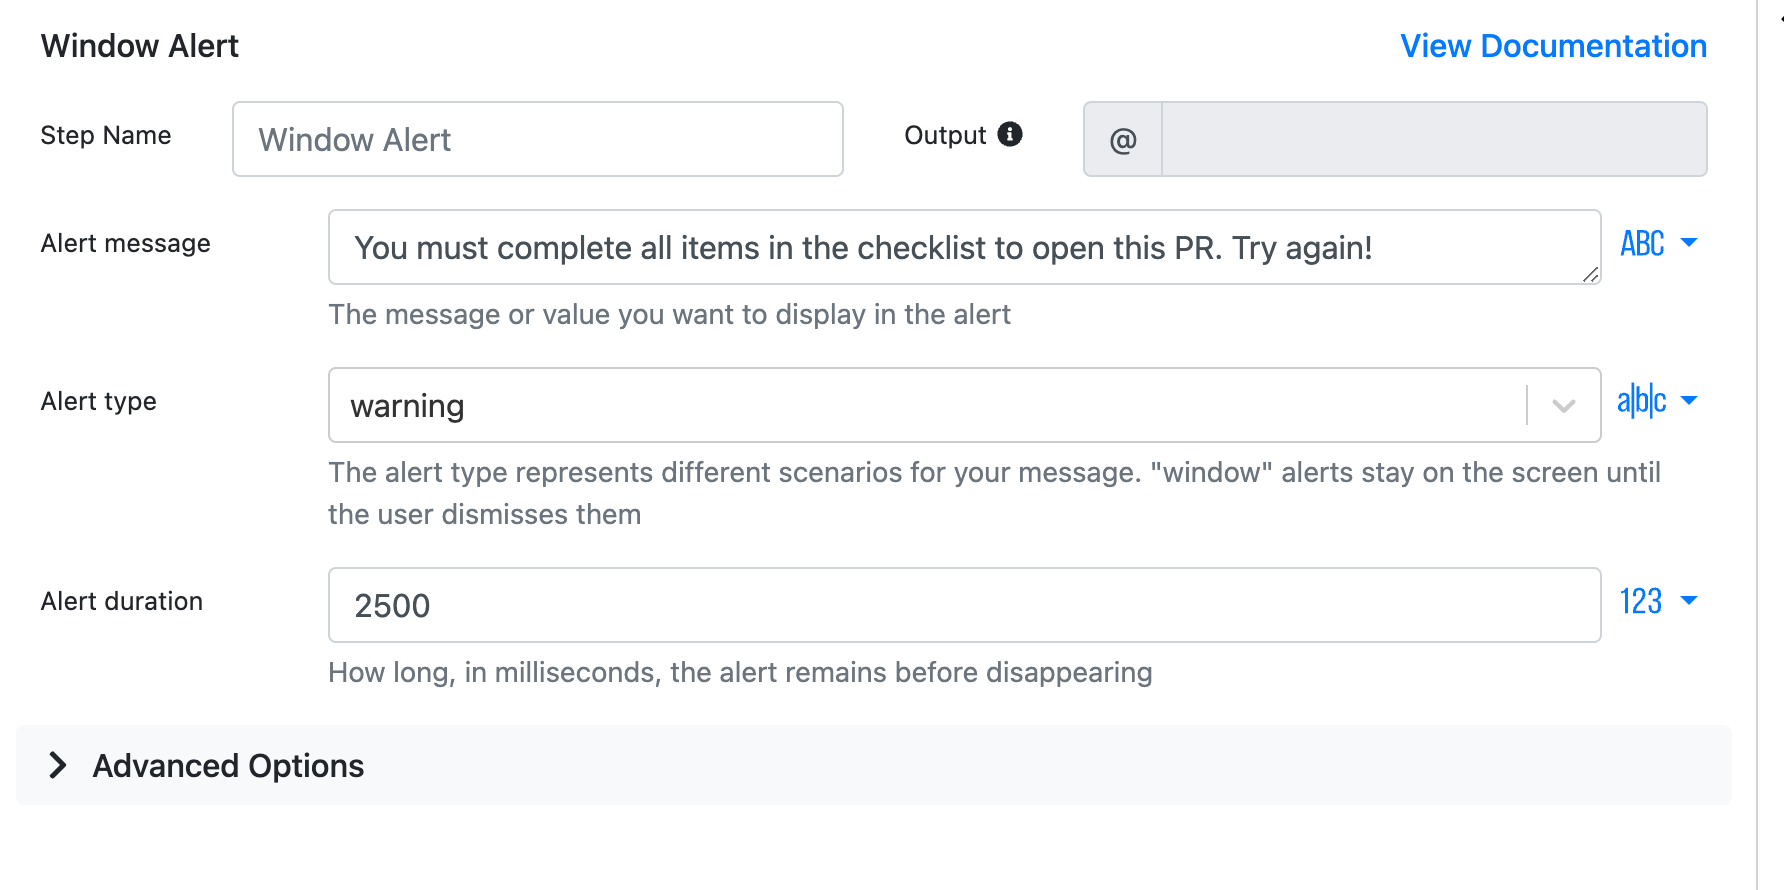
I also added a Window alert brick and set the message to say Great job! and changed it to a success alert type so the box is green.
Setting the Else actions:
If the condition is not true, any bricks you add to the Else section of the pipeline will trigger. In this case, we don't need to do anything except maybe display a message telling us why the buttons aren't re-enabled.
Add a Window Alert brick and create a message reminding the user to complete all the items in the checklist.
And test it out!
Now close the Page Editor and refresh the page to create a pull request. You should see the buttons disappear, and your sidebar with a checklist show up. Once you check off all the items, your button will be re-enabled!
This is really just the beginning, though. You could add more advanced functionality to this to make it more useful if you'd like.
For instance, you could save the checklist to the page state so that even if you refresh the page or navigate away and come back, it will save the items you have checked. You could also force it to re-load the checklist if you submit it without checking all the items.
What are you going to build now?
We can't wait to see what you build. If you have an idea for a checklist or need some help, head over to the PixieBrix Slack Community! You'll get inspiration, help building, and expert tips to take your PixieBrix skills to the next level. See you over there! 👋
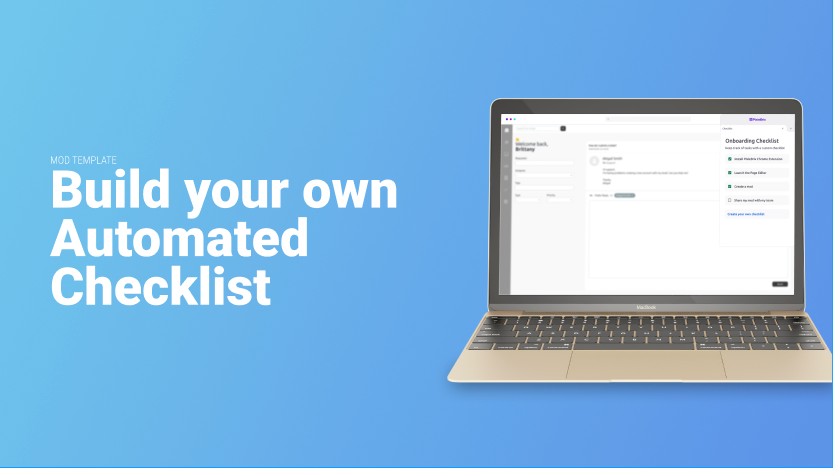
Learn about the Automated Checklist Template.


