
Create a decision tree from an Excel spreadsheet
You may have seen my post where I wrote about creating a decision tree from a Google Sheet, but since not everyone uses Google Workspace, we made a way to populate a decision tree from an Excel spreadsheet.
We added a new feature that allows you to upload a CSV to populate data in a PixieBrix database, which you can then reference in our Decision Tree mod.
Here's how to do it.
Build a tree in your spreadsheet
Start by using one of our templates below and customizing it as you see fit.
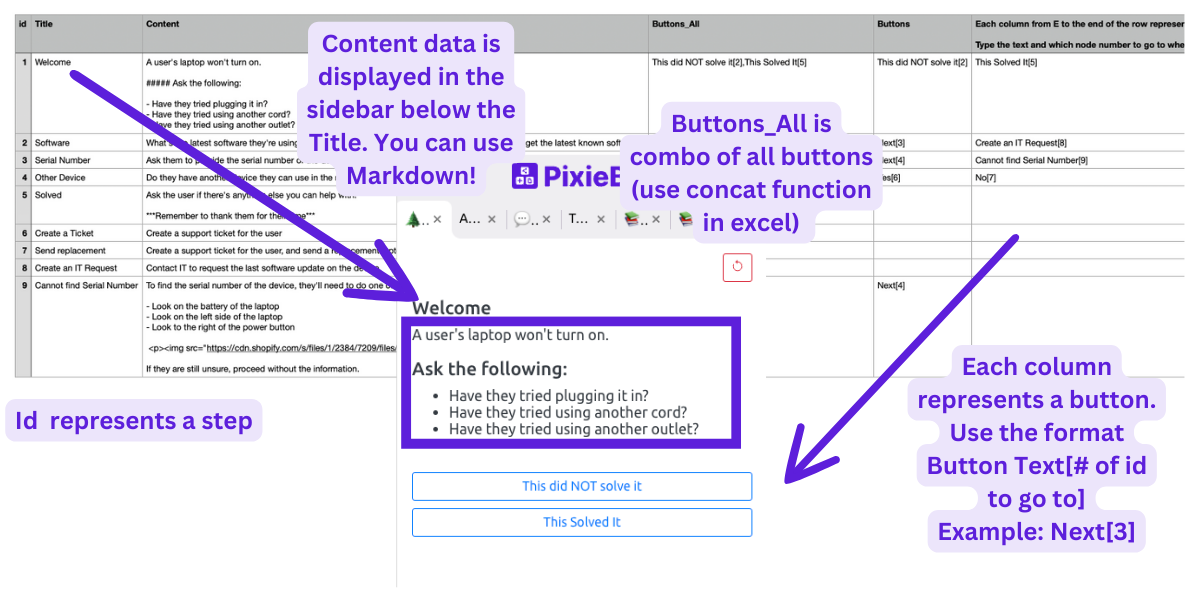
This screenshot shows a quick breakdown of how to edit your CSV/Spreadsheet to incorporate your decision tree. If you need more help, use the live chat button in the bottom left corner of this page, and we'll help you out!
Once you've got your spreadsheet decision tree formatted the way you want (or you can just use our example without any edits to try it out), make sure to save the file in a CSV format.
Create a database in PixieBrix with the CSV
PixieBrix has a database feature to fetch and add data in your mods. We need to create a database and upload our CSV file there.
Head to app.pixiebrix.com and choose the Team Databases section on the left side panel. (You'll need to create a team if you haven't already - check the dropdown at the top of the page!)
Click the Create Database button and give your database a name, like My Decision Tree. Then click Create Database.
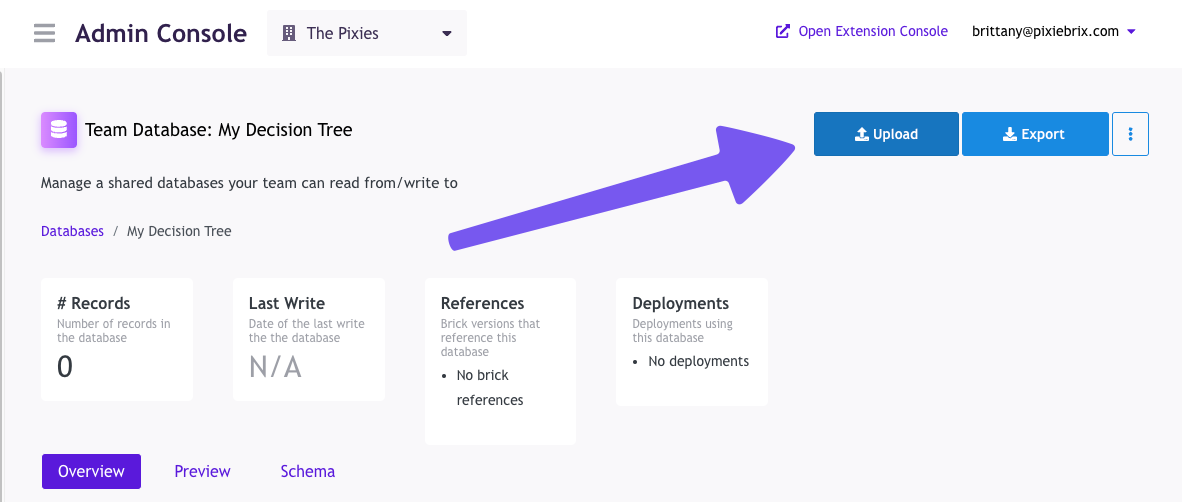
Click the Upload button in the top right corner.
Next, drag and drop or click to upload the CSV file you just created. Once added, you'll see how many valid rows are provided. Confirm this matches what you're expecting based on your spreadsheet.
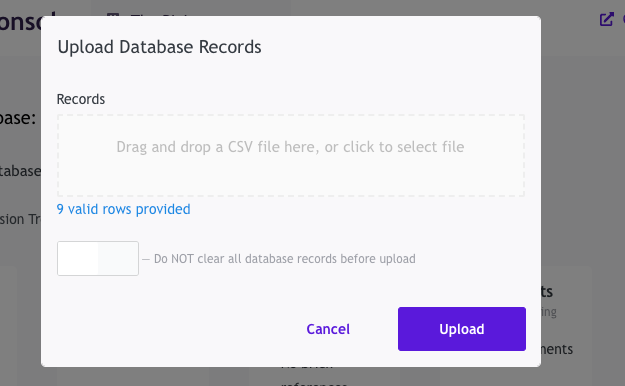
Click Upload when you're ready, and you'll see your data is in the database (you'll see a number in the # of Records field).
Now you're ready to hook it up to our decision tree mod!
Activate the PixieBrix Decision Tree mod
Follow this link to activate the PixieBrix decision tree mod
You'll be asked to choose a Tree Database:
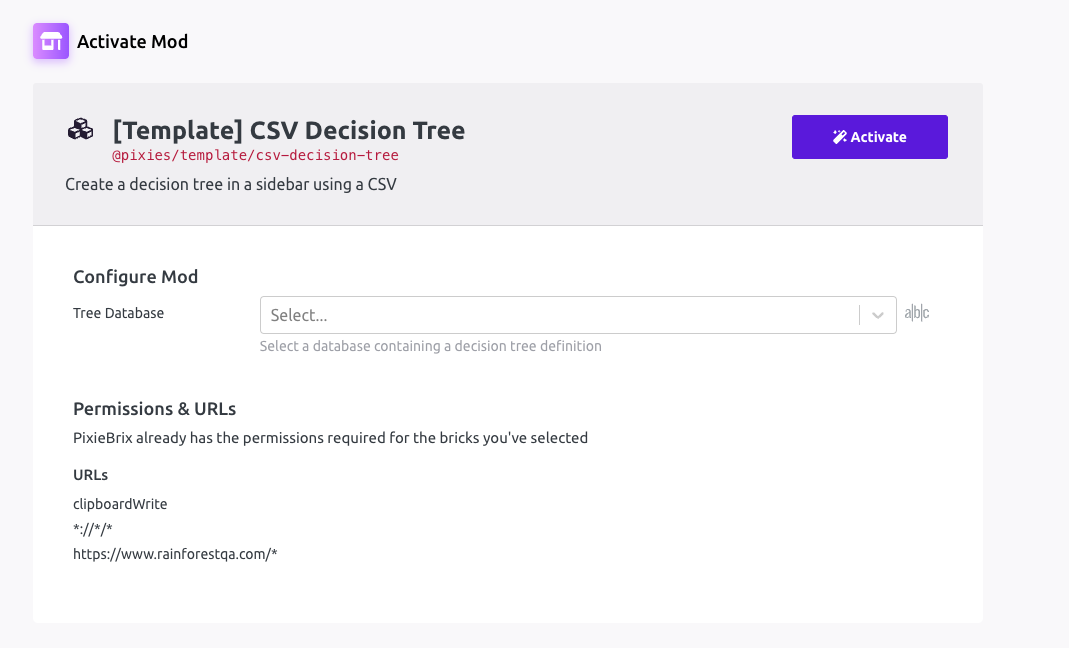
Use the dropdown to select the database you created in the previous step.
Click the purple Activate button, and you're ready to try it out! Go to a tab where you can access the PixieBrix Chrome extension (not available in the Extension Console or a new tab page, but it should work on any other page).
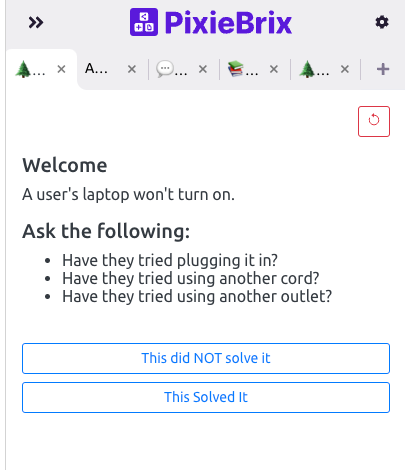
Clicking the PixieBrix icon opens your sidebar, with your newly added decision tree. Click the buttons to navigate through your decision tree, and restart the tree any time by clicking the restart button in the top right corner.
If you want to change the content of your decision tree at any time, just go back to your database in the PixieBrix admin console and upload a new CSV with the data.
As always, if you need any help, reach out to our team, and we'll be happy to get you set up.