
How YouTube Creators Can Automate Their Workflows With PixieBrix

If you’re a YouTube creator, you spend hours on your videos. Some of it’s just so time-consuming—like coming up with titles, designing images, uploading movies, adding subtitles and timestamps…
When you’re a big influencer you can afford to pay someone else to deal with all of that. But when you’re not quite there yet, you have to do all of these little things and they add up, eating away at your available time to be creative and make videos.
While PixieBrix can’t make the videos for you, it can make some of these steps just a little easier. Here are a few ways that YouTube creators can automate their workflows with PixieBrix and YouTube automation. While you're here, be sure to check the Best YouTube Chrome Extensions for Content Creators.
Disclaimer: This is a lot of info and much easier to follow along with in Video Format, so if you’re skimming through this and feeling a little like this…

… Just watch the video 😊
Create a Go Live Posting Button
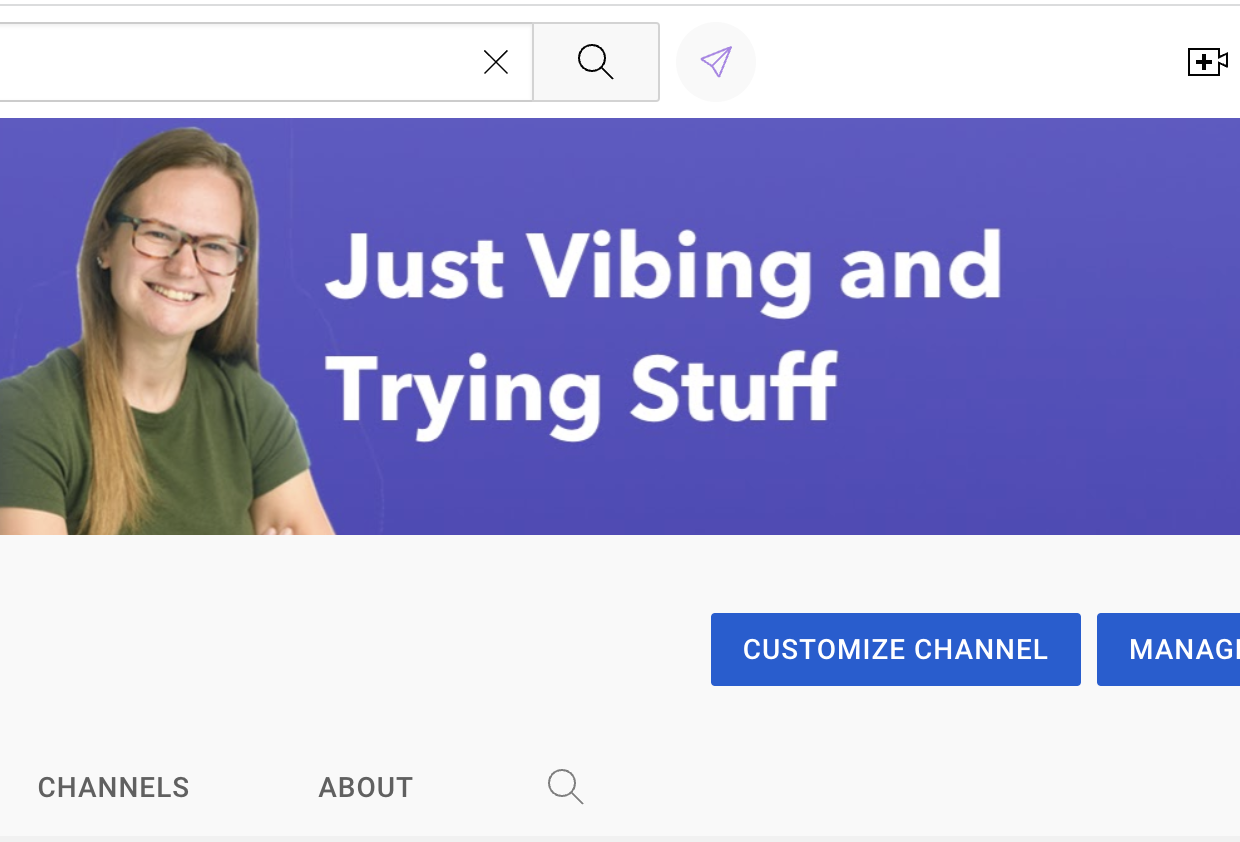
I created a button next to the search bar so that when I click the send arrow, PixieBrix will post a message on Twitter and LinkedIn to let my followers know that I’m live on YouTube!
Previously, I had to grab the link to my livestream, go to Twitter and LinkedIn in separate browser tabs and create a post saying I’m live on YouTube, and click publish then close out those tabs. Not terribly time-consuming one time, but enough that it’s worth finding a solution for because I’d rather just jump into streaming!
Now PixieBrix does all of that with a few clicks.
I prefer to post on LinkedIn and Twitter, but you can try this out for any channels you like. For this post, I’m going to walk through how to do it with Twitter, and you’ll just repeat a similar process for any social channel you want to use (the selectors and URLs will just be different, and in some cases, the process might look a little different. Post in the PixieBrix community if you get stuck ).
1. Button Brick
Start by adding the Button Brick. You can place the button anywhere you like, but I selected the microphone near the search bar as I never use the voice search, so I didn’t really need to keep that on my screen.
(Once I grabbed that ID, I created another mod with a Trigger brick that executed on page load of youtube.com, then added the “Hide” elements brick and selected the microphone, so now all I see is my button!)

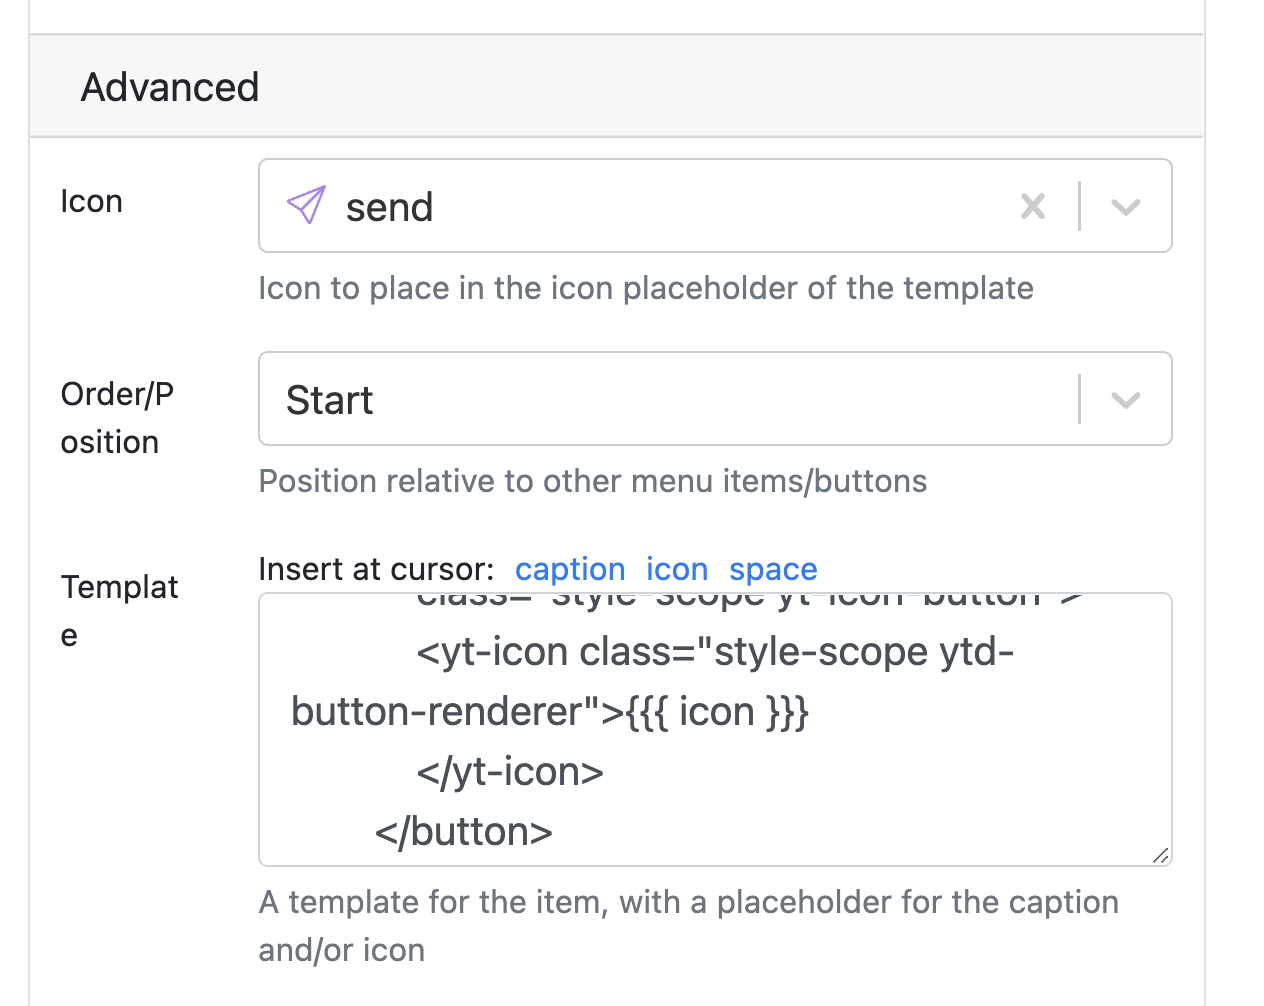
I set this mod to only run on my channel page. I left the caption blank and selected the “send” icon, and set the order position to “Start”.
2. Modal Brick
For the next piece of the mod, I wanted a way to customize the social post message in case there was anything specific I wanted to say. I also wanted the option to pick which channels I wanted to post on.
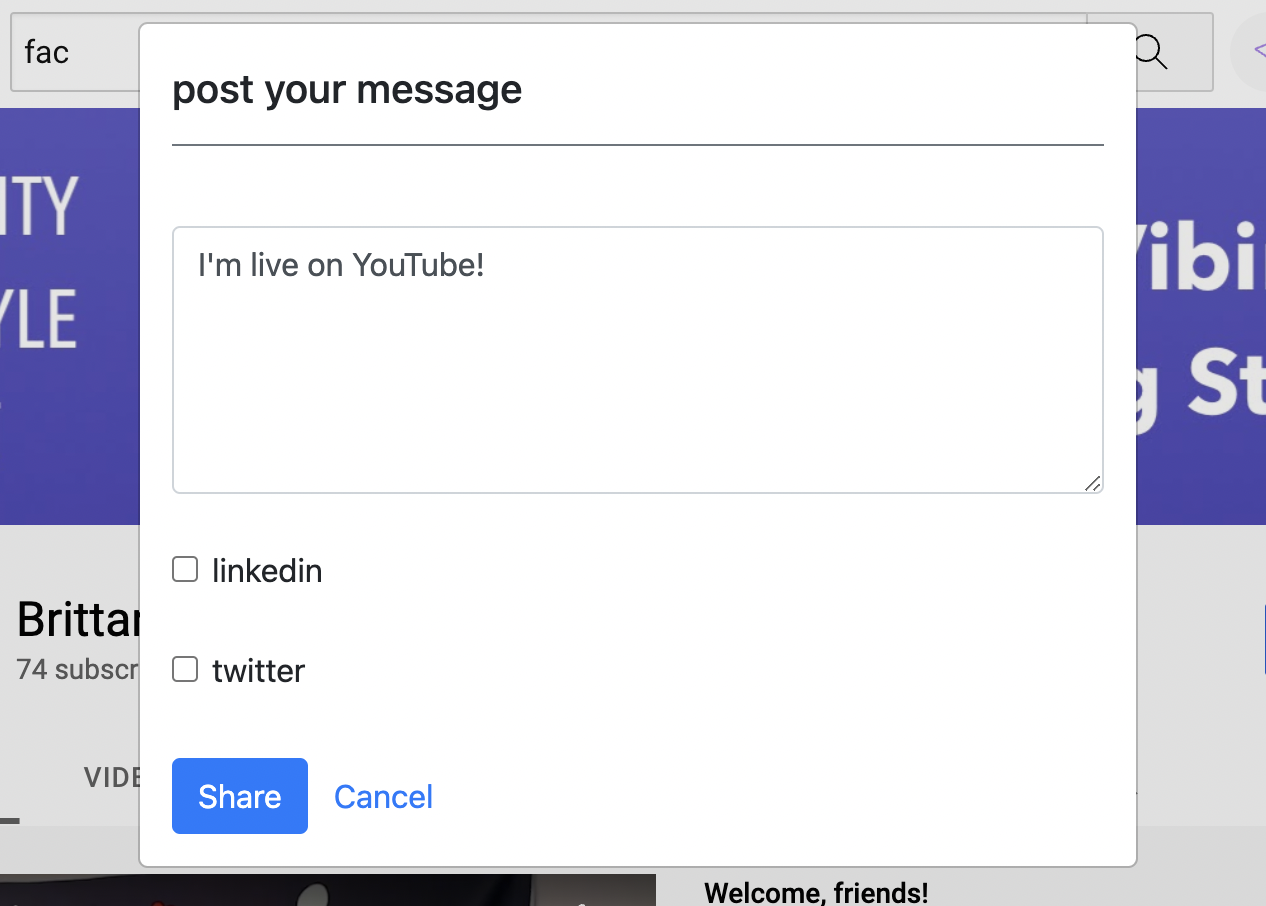
I added the modal brick and gave it a title, and selected the type as paragraph text.
I also set some default text to be “I’m live on YouTube” that way if I didn’t want to type a message, there would always be one there.

I scrolled a little lower and customized the submit message to say “share” (to make it feel more like a social publisher.)
Lastly, I added two more checkbox fields: one called LinkedIn and one called Twitter. I defaulted their values to true so that once again if I didn’t want to customize anything I was ready to go with just a click.
Here’s what the modal looks like when I use it.
Send the Tweet
I added a couple of bricks to make this happen. First of all, the Open a Tab brick, which opens a new tab and then I told it to go to https://twitter.com/compose/tweet in the URL.
This takes me directly to a page with an open box to input my tweet text.
One thing to note about this - and the other bricks in this section - is that in the Advanced Options group, I edited the “Condition” field to say @form.twitter.

This is because I only want this mod to run if Twitter is true in the modal (aka, if it’s selected). This prevents this brick from running if I did NOT select Twitter in the form.
Next, I add the “Wait for DOM element” brick.
In the selector section, I type [aria-label="Tweet text"]. (Handy pro tip— if you’re looking for a consistent class, try to find the aria label as it’s more likely to be static.
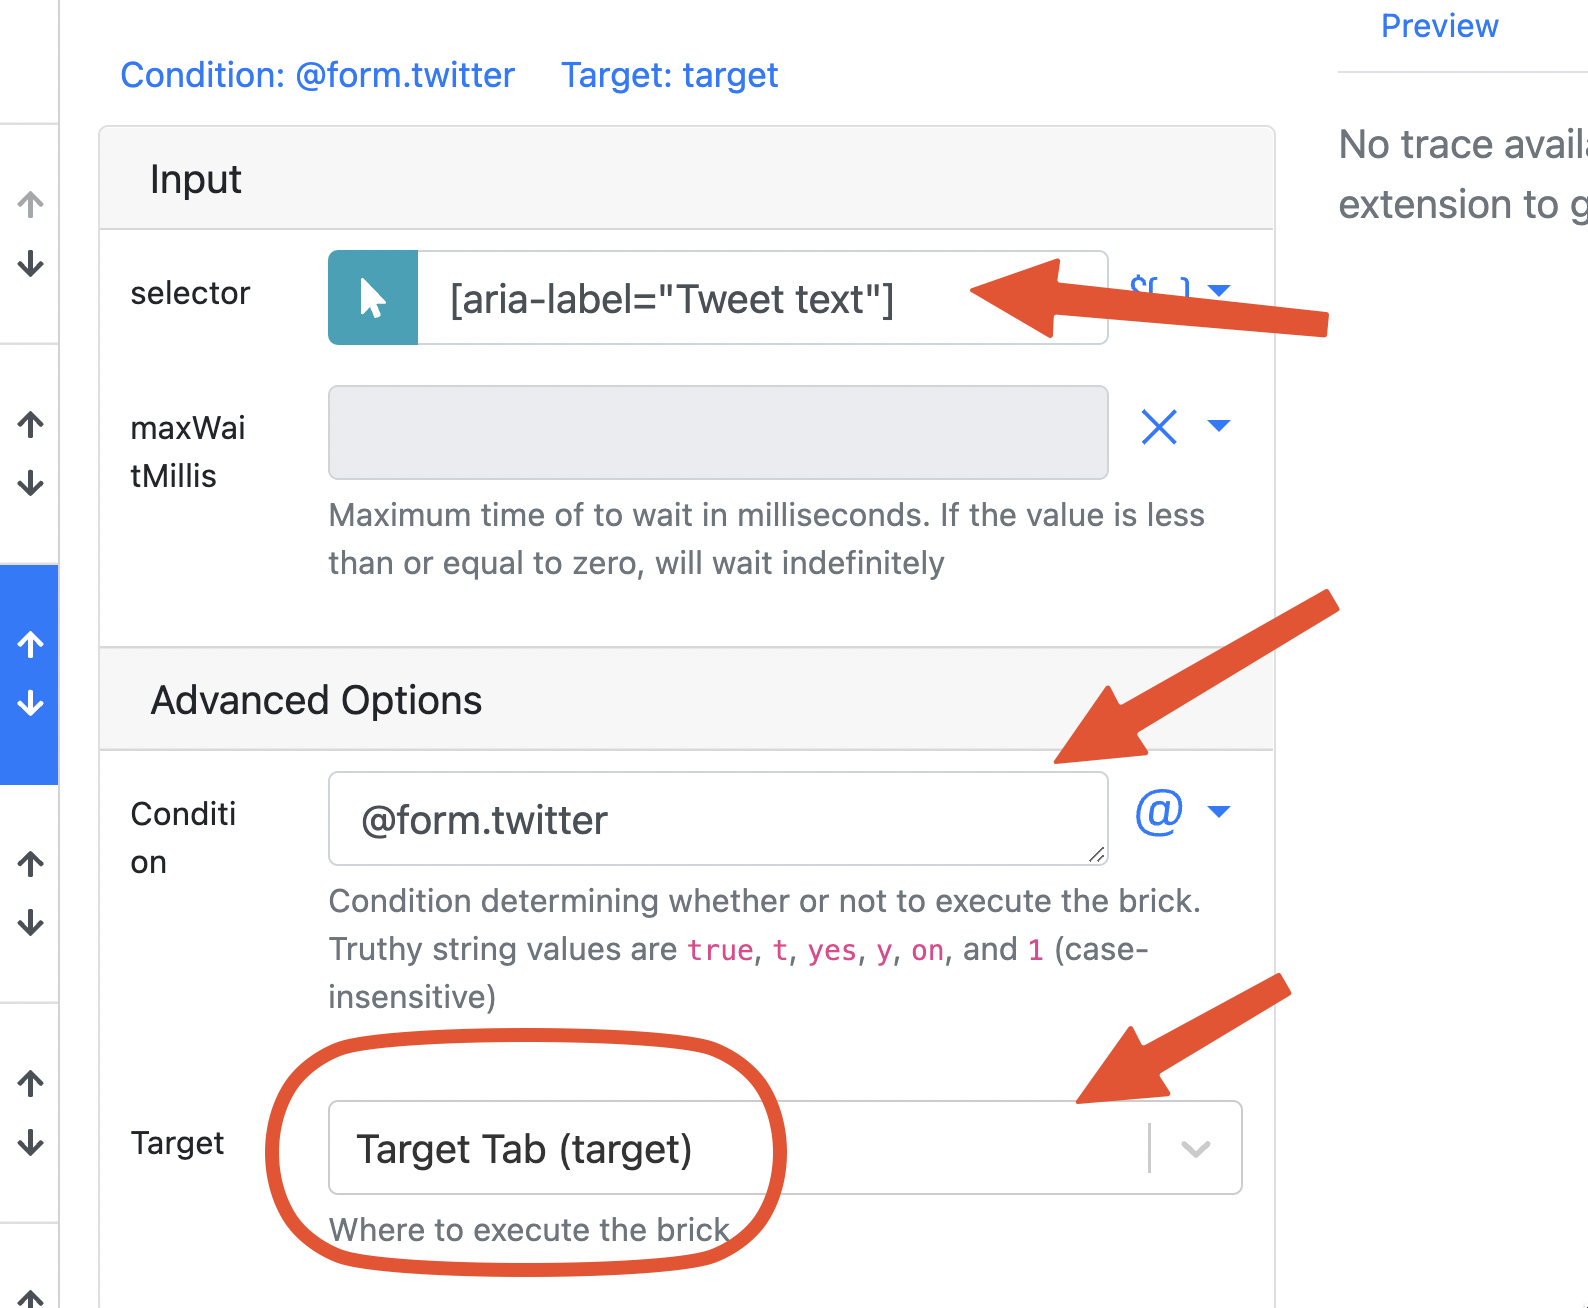
Once again, make sure to type @form.twitter in the condition so that this mod only runs if we have selected Twitter. And one more thing to adjust, under the target, select “target tab” because that’s how we tell PixieBrix “hey we started this mod from youtube, but then I told you to open another tab, yeah the twitter tab, so that’s where I want you to do this action.” (Excuse all my technical speak there. 😂)
Next, add the Set Input Value Brick.
For the selector, you’ll want to select [aria-label="Tweet text"] (look at that Aria label coming in handy again!)
Then you’ll want to add this block to the “value” field.
{{@form.message}} https://www.youtube.com/channel/UCiUh7JSw-5Dr4Q_WJ-QZBHA/live
(Replace that link with the link to your youtube channel - just make sure to add “live” to the end of the URL.)
Remember to once again update the Advanced Options to have a condition value of @form.twitter and target tab.
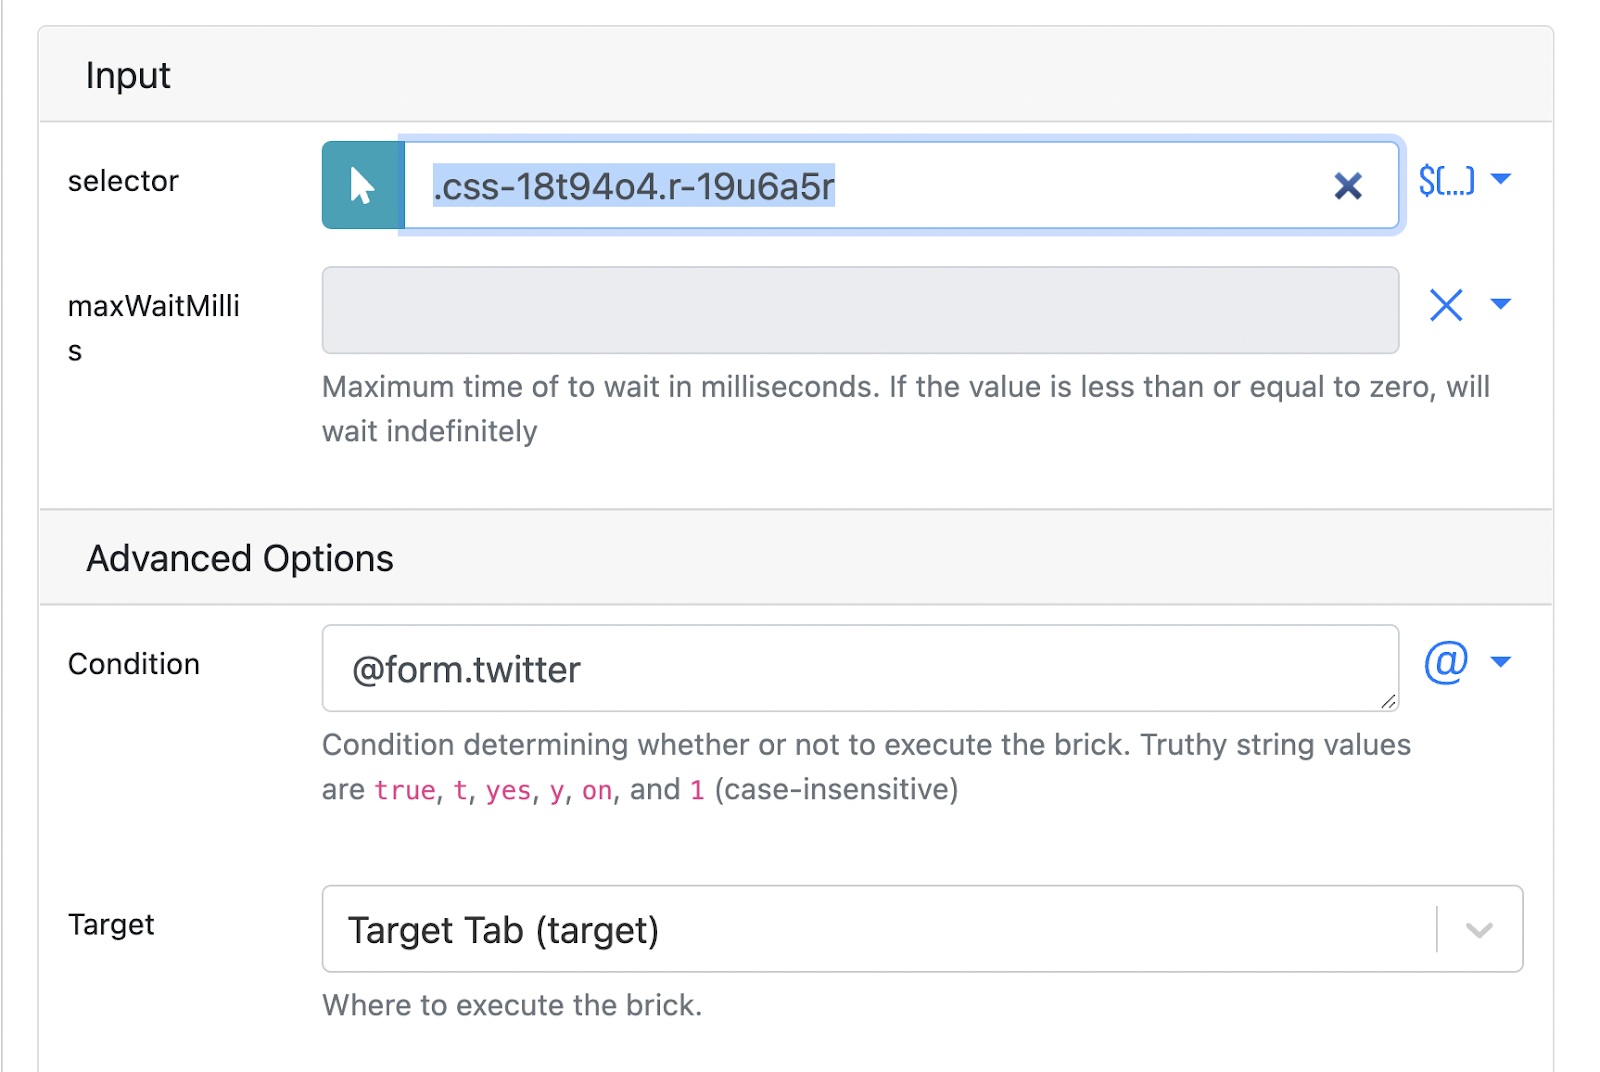
Next, add the Wait for DOM Element Brick.
Once more we need to wait for an element! This time, we’re waiting for the Tweet button to be activated and ready to click.
Here’s the class I was able to use in the selector, although you might need to use a different one. .css-18t94o4.r-19u6a5r
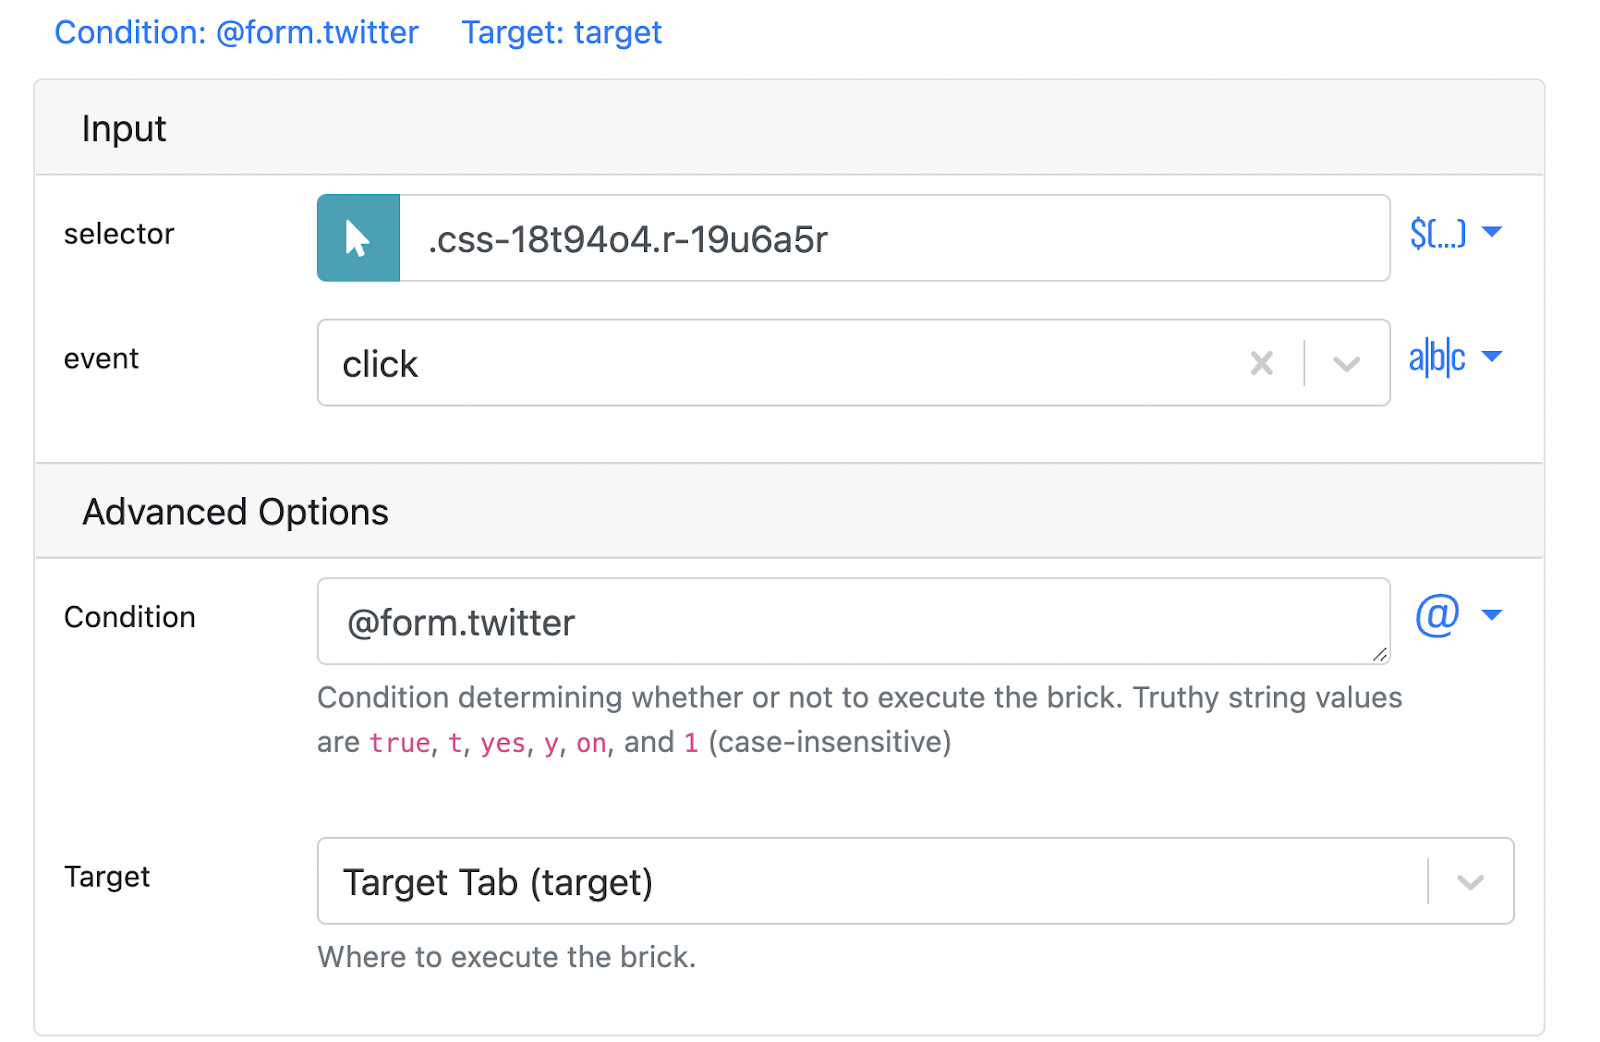
Next, add the Simulate DOM Event Brick.
Use the same class you just used and select the “click” event.
Note: This means it will go ahead click that tweet button and share whatever is in there when you test this mod! So either set up a dummy Twitter account for testing or be prepared to go delete a testing tweet from your profile.
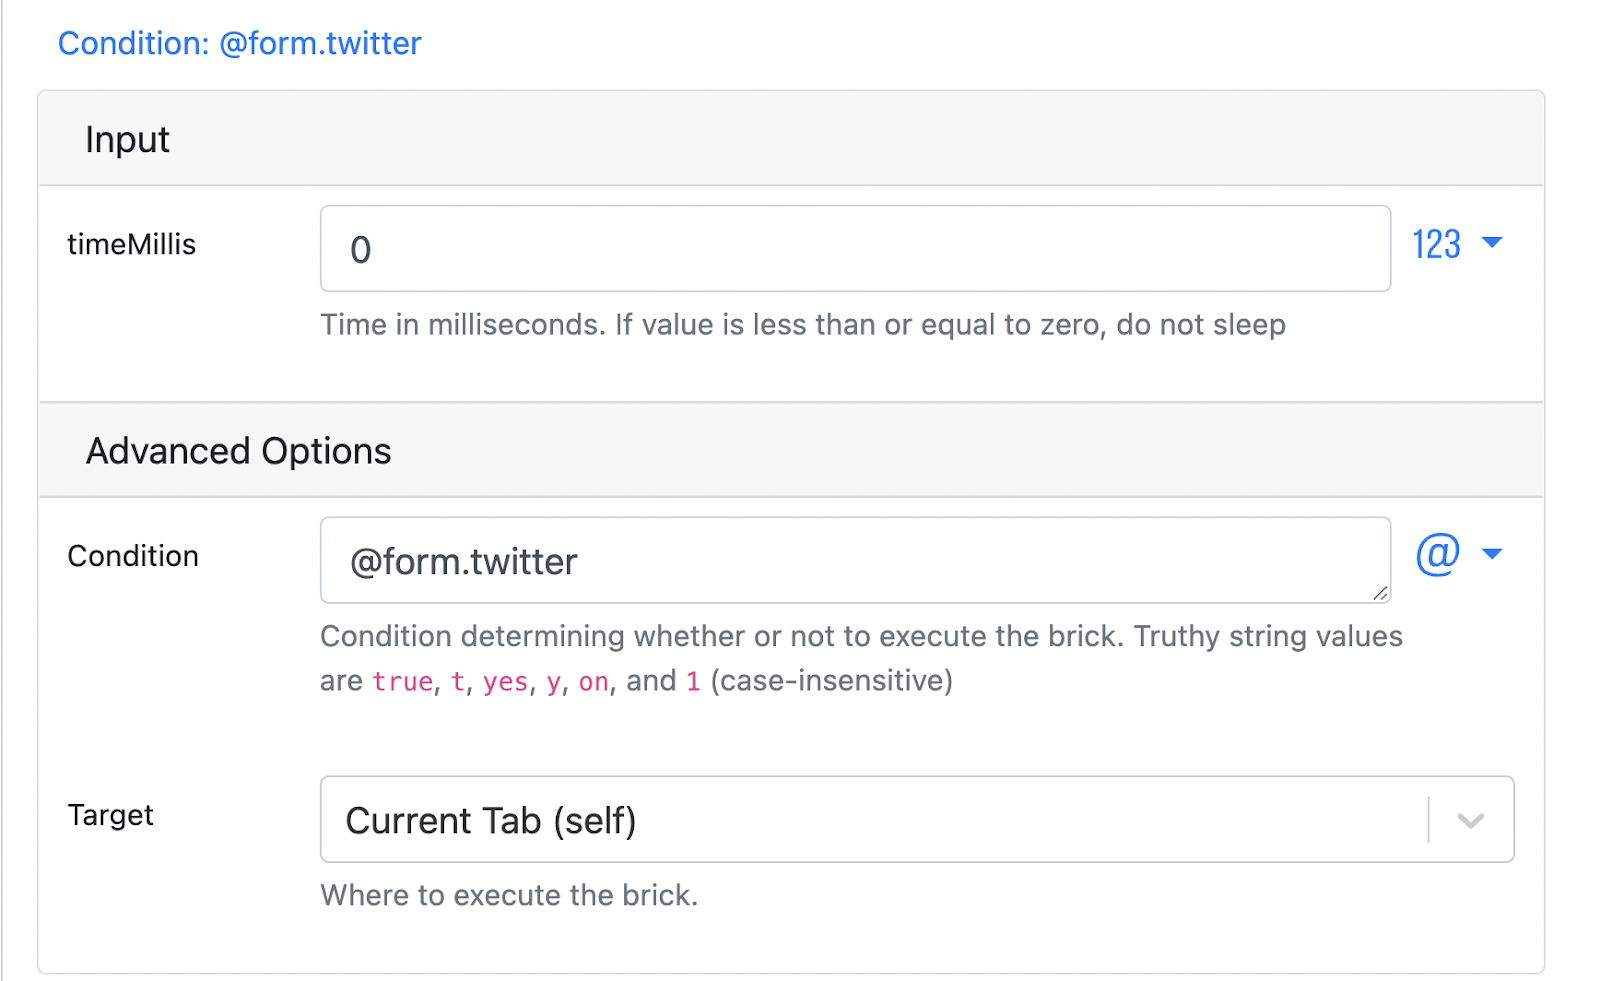
Next, add the Wait/Sleep Brick.
Just add this brick and set the time for 0. We mostly just want to give it time to post the tweet before we close out the page.
Last Twitter Brick! Add the “Close Browser Tab” Brick.
Nothing you need to add to the top, just update the advanced options as we’ve been doing for all the other bricks!
Viola! Now repeat these steps for LinkedIn, or any other channel you added.
Create Timestamps For Video Descriptions
Did you know if you add lines like this to your video description, they’ll become hyperlinked and your viewers can jump right to the timestamp by clicking it?

Here’s how you can quickly type up those timestamps and add them to your description with PixieBrix.
I created three mods to accomplish this, and I’ll walk you through each one. Let’s start with the hardest one and get it out of the way 😊
Grab the timestamp and name a chapter
Alright, buckle up for this one. (And once again, don’t forget to reference the video if you get stuck!)
Start by adding the Quick Bar Brick.
This will let us start an action by typing a keyboard shortcut (I set mine to be Cmd/Ctrl + Q) to take an action, which in our case will be adding a chapter to a list of chapters.
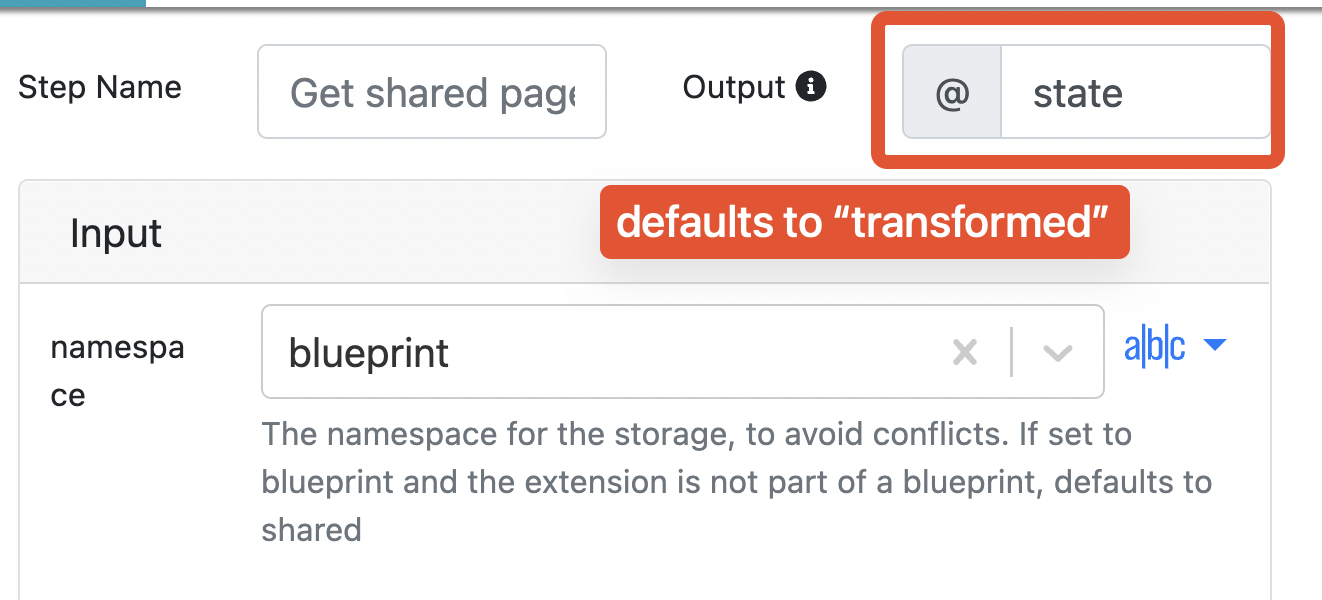
Next, add the Get Shared Page State Brick.
This is going to be where we’ll “store” all the timestamps and chapter names.
You don’t have to configure anything in this brick, but I changed the output to be state instead of transformed, just so it was easier to reference later. Like this!
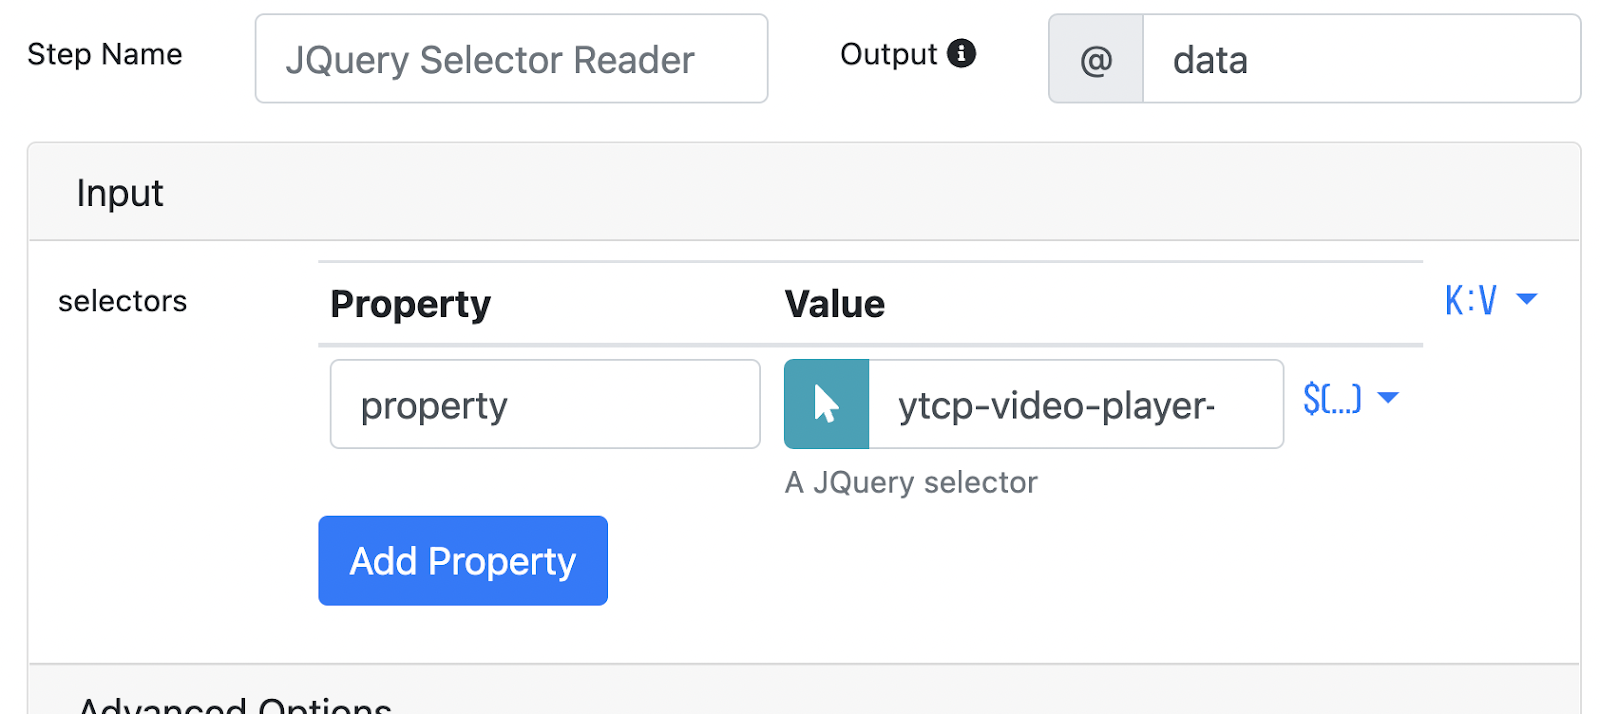
Next, add the Jquery Selector Reader Brick.
Inside this brick, we’ll define the property that checks for what the timestamp is currently set to. I’ll make this easy for ya - here’s what you want to put in the value for the property field: ytcp-video-player-timestamp.
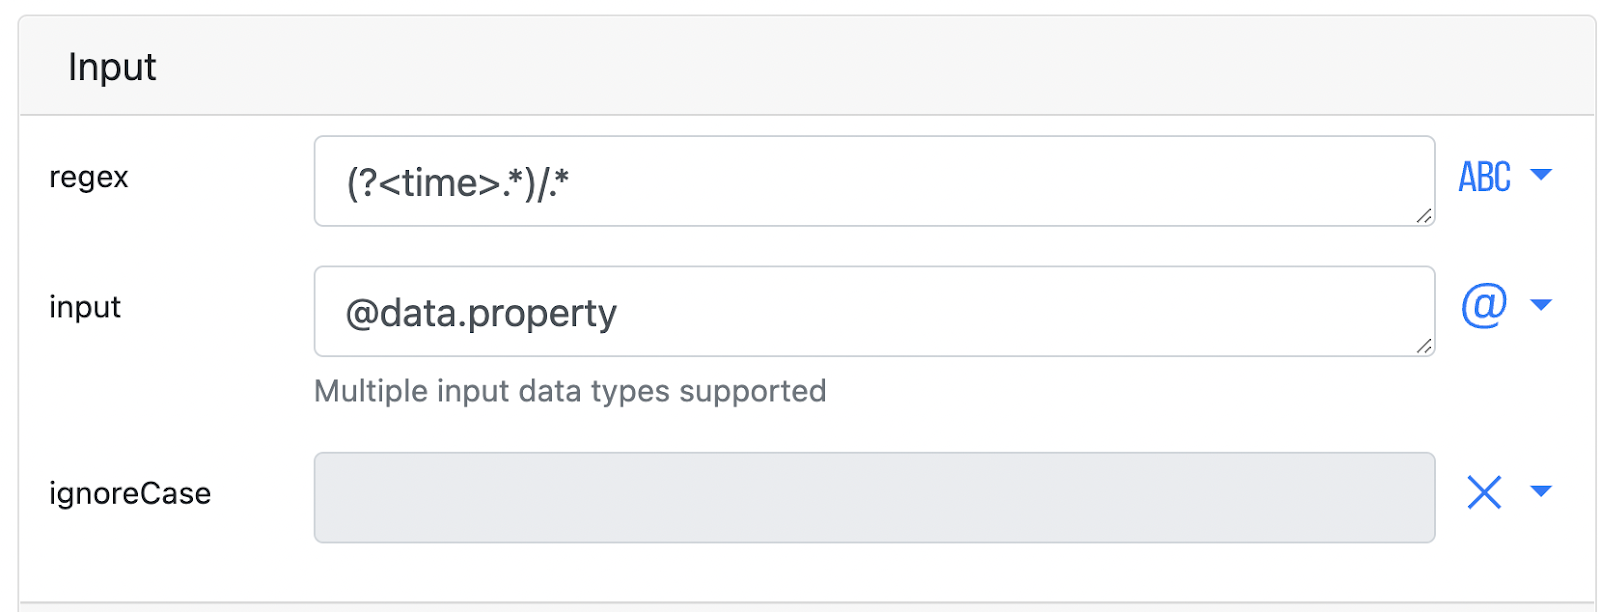
Next, add the Regex Extractor Brick.
Here’s where we’ll go look at that selector we just grabbed and parse the timestamp from it.
In regex, just type (?<time>.*)/.*, and for input, set it to @data.property. Should look like this.
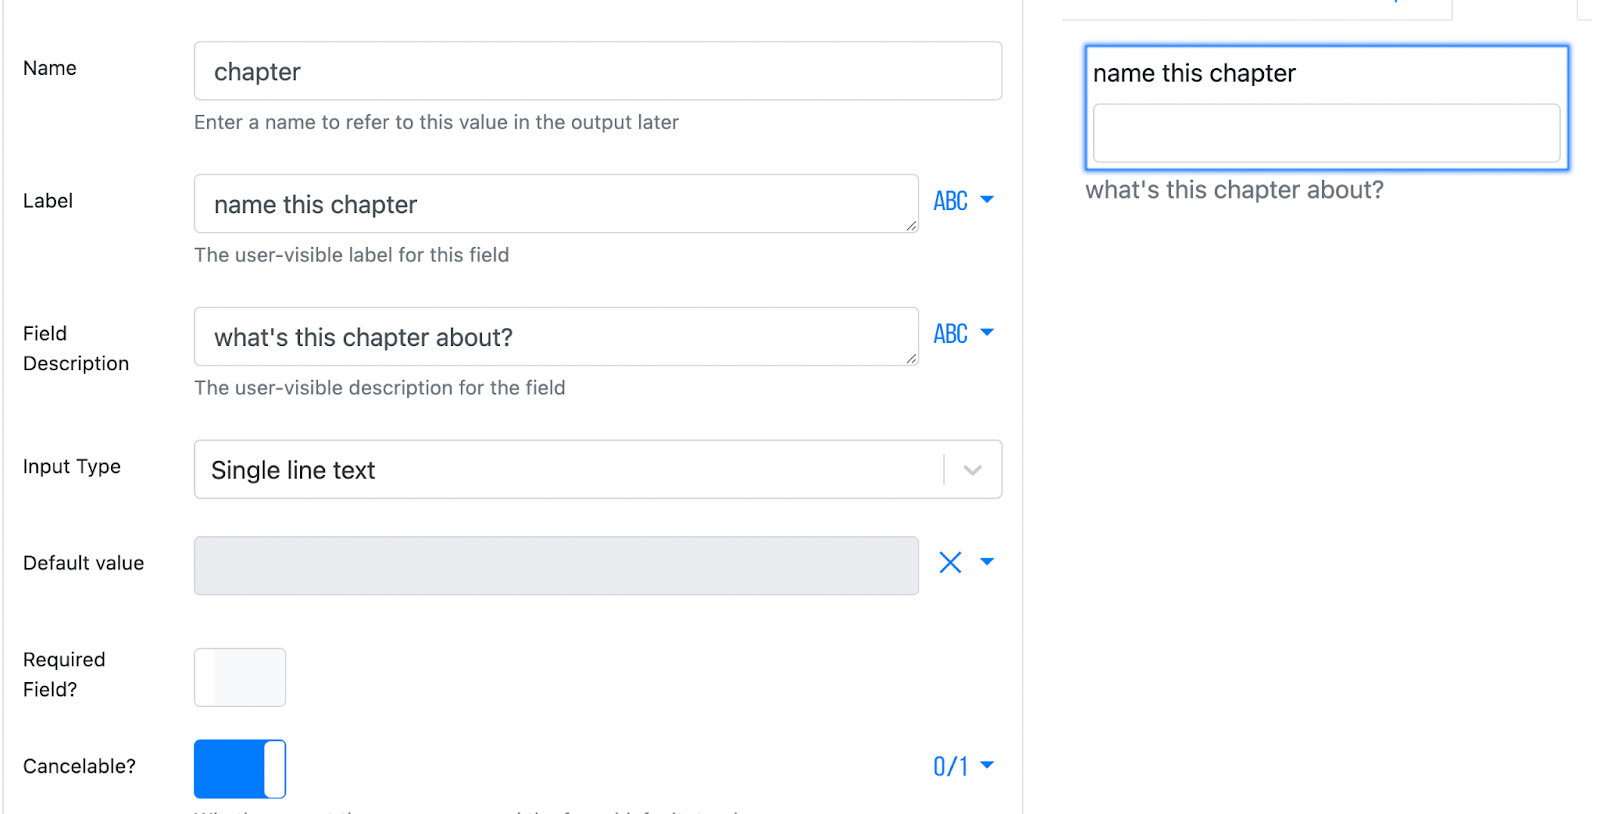
Next, add the Show a Modal or Sidebar Form Brick.
This is the brick we’ll use to show an input field for naming the chapters. We just need one field with a single line of text. Your brick should look like this.
Next, add the jq-JSON Processor Brick.
We’ll use this to organize the data we want to send to the state.
Just type this in the filter
(.times // []) + [{ time: "{{@t.time}}", message: "{{@form.chapter}}" } ]
And you’ll want to reference the @state variable for the data.

Lastly, I renamed the output to stateGenerator, which we’ll reference in our (almost) final step in this mod.
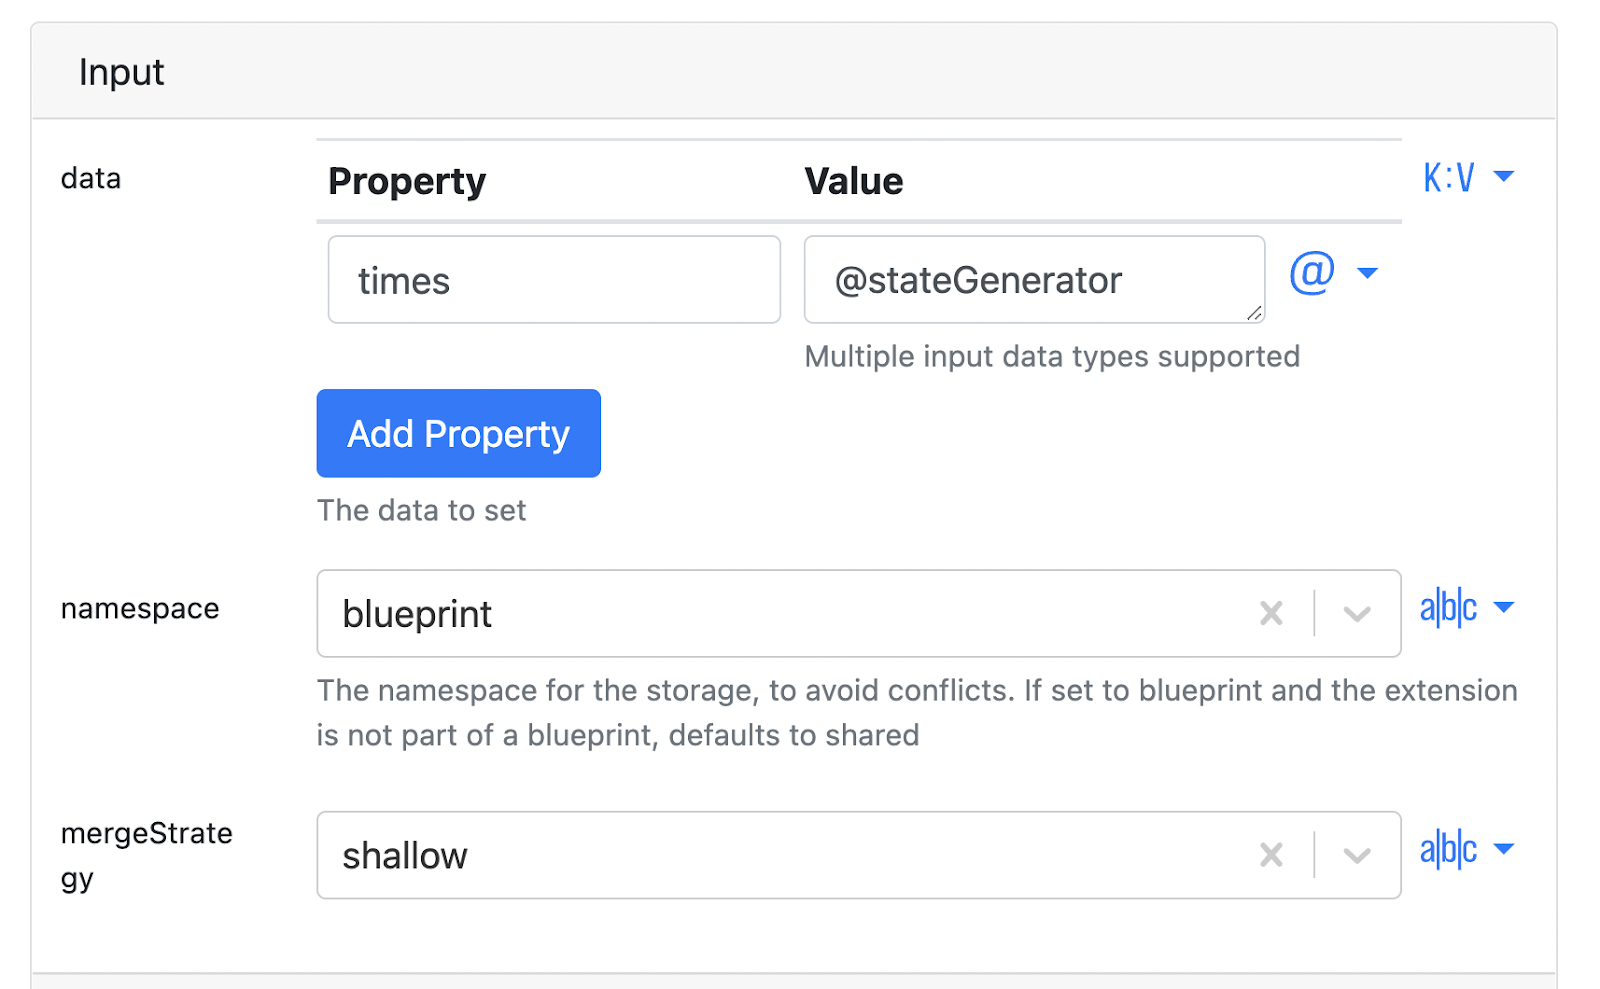
Next, add the Set Shared Page State Brick.
Now we’ll just update the state with what we just created. Just add a property called “times”, and set it to the @stateGenerator value.
Lastly, add the Show Sidebar Brick.
No need to configure anything here - this brick just pops up with the sidebar menu that will show a list of each of your chapters with their timestamps (but we need to go build that part now!)
Show all your timestamps in your sidebar
Now we need an mod to show a list of all the timestamps we created in the sidebar.
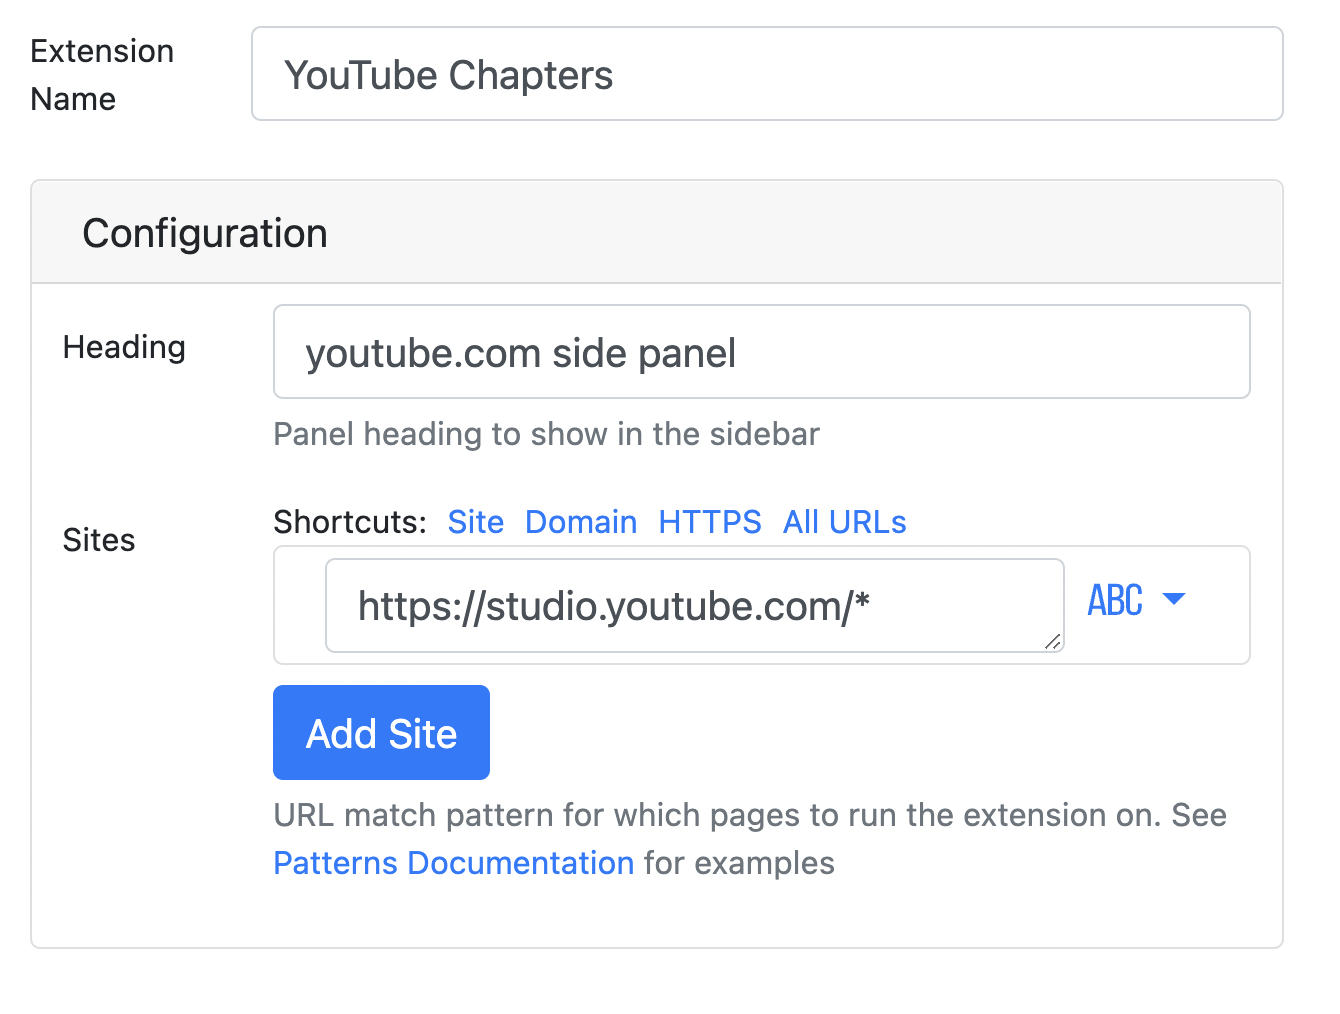
Click “Add” in the top left, then select “Sidebar Panel.
You don’t really have to configure anything on this page, but I made sure it defaulted to only show up on YouTube Studio pages and that the header made sense to me.
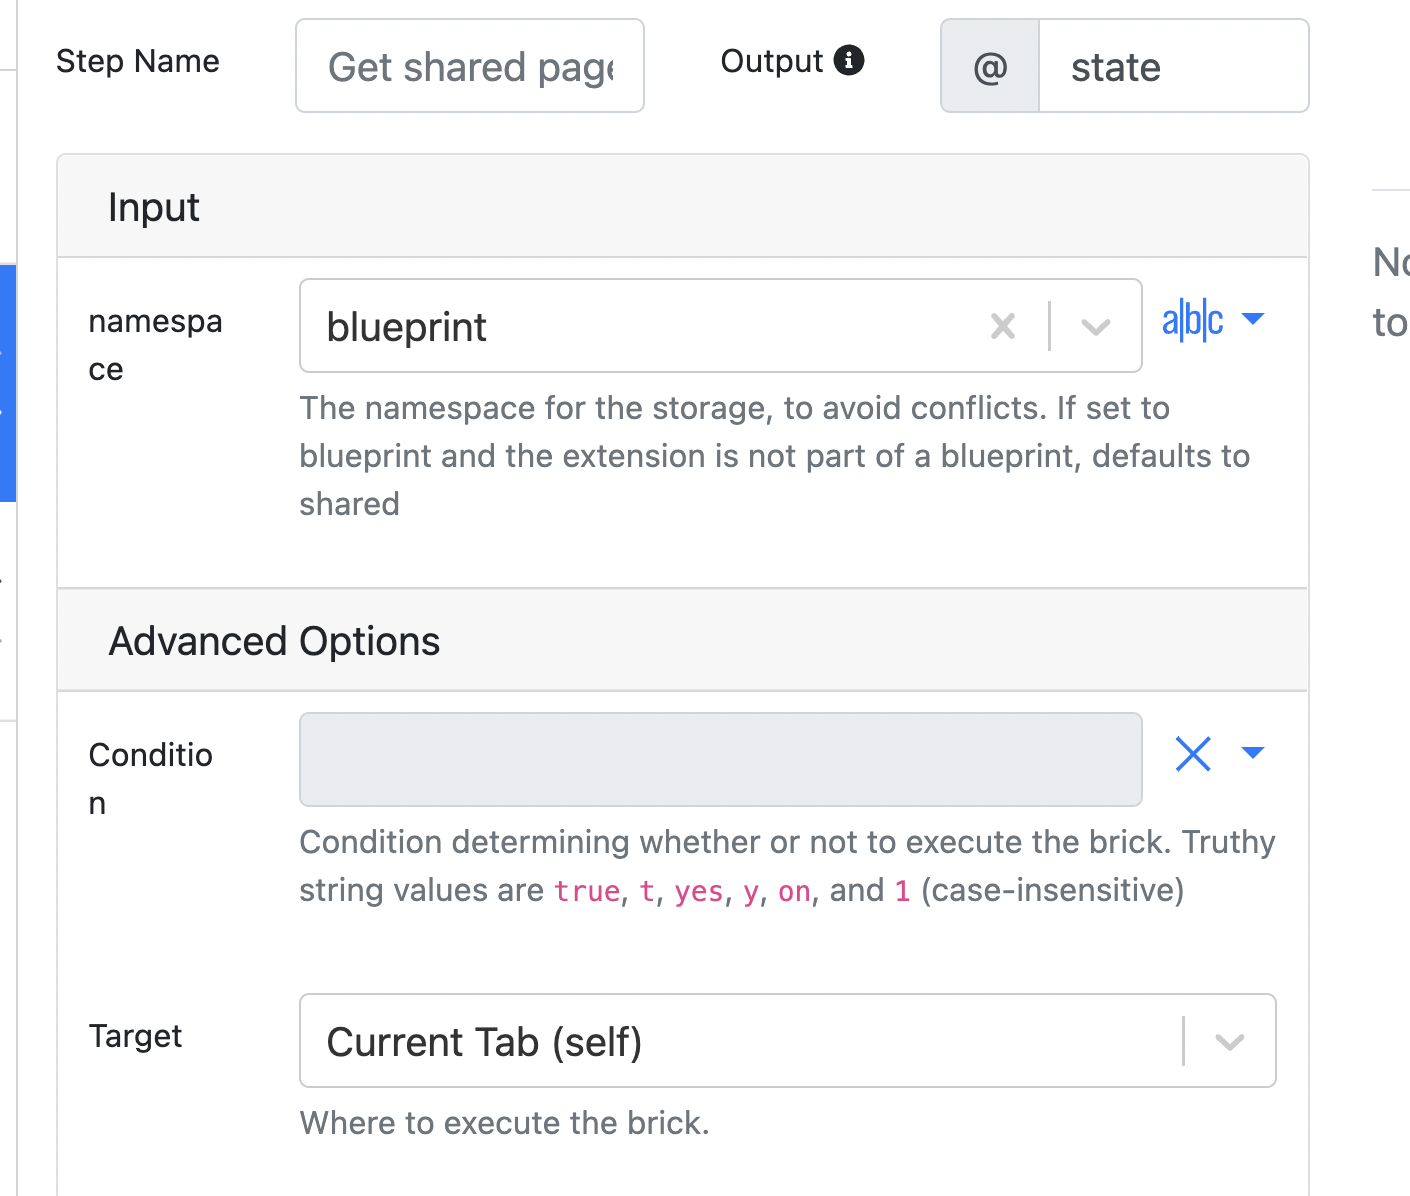
Next, add the Get Shared Page State Brick.
I renamed the export variable to be state instead of transformed as I did when we used this brick in our other mod, but other than that, there’s no need to configure anything in here.
Lastly, add the Render Markdown Brick.
In the markdown box, type this:
```
{% for x in @state.times %}{{x.time}} {{x.message}}
{%endfor%}
```
You’re basically saying for each timestamp that’s saved in the state, push it to a line on this markdown.
And that’s it!
Clear out the markdown when you reload the page.
I added one more mod to clear out the markdown when I was done with it so that it didn’t keep track of timestamps from every video I’ve ever worked on 😂. Don’t worry - this is the easiest of them all.
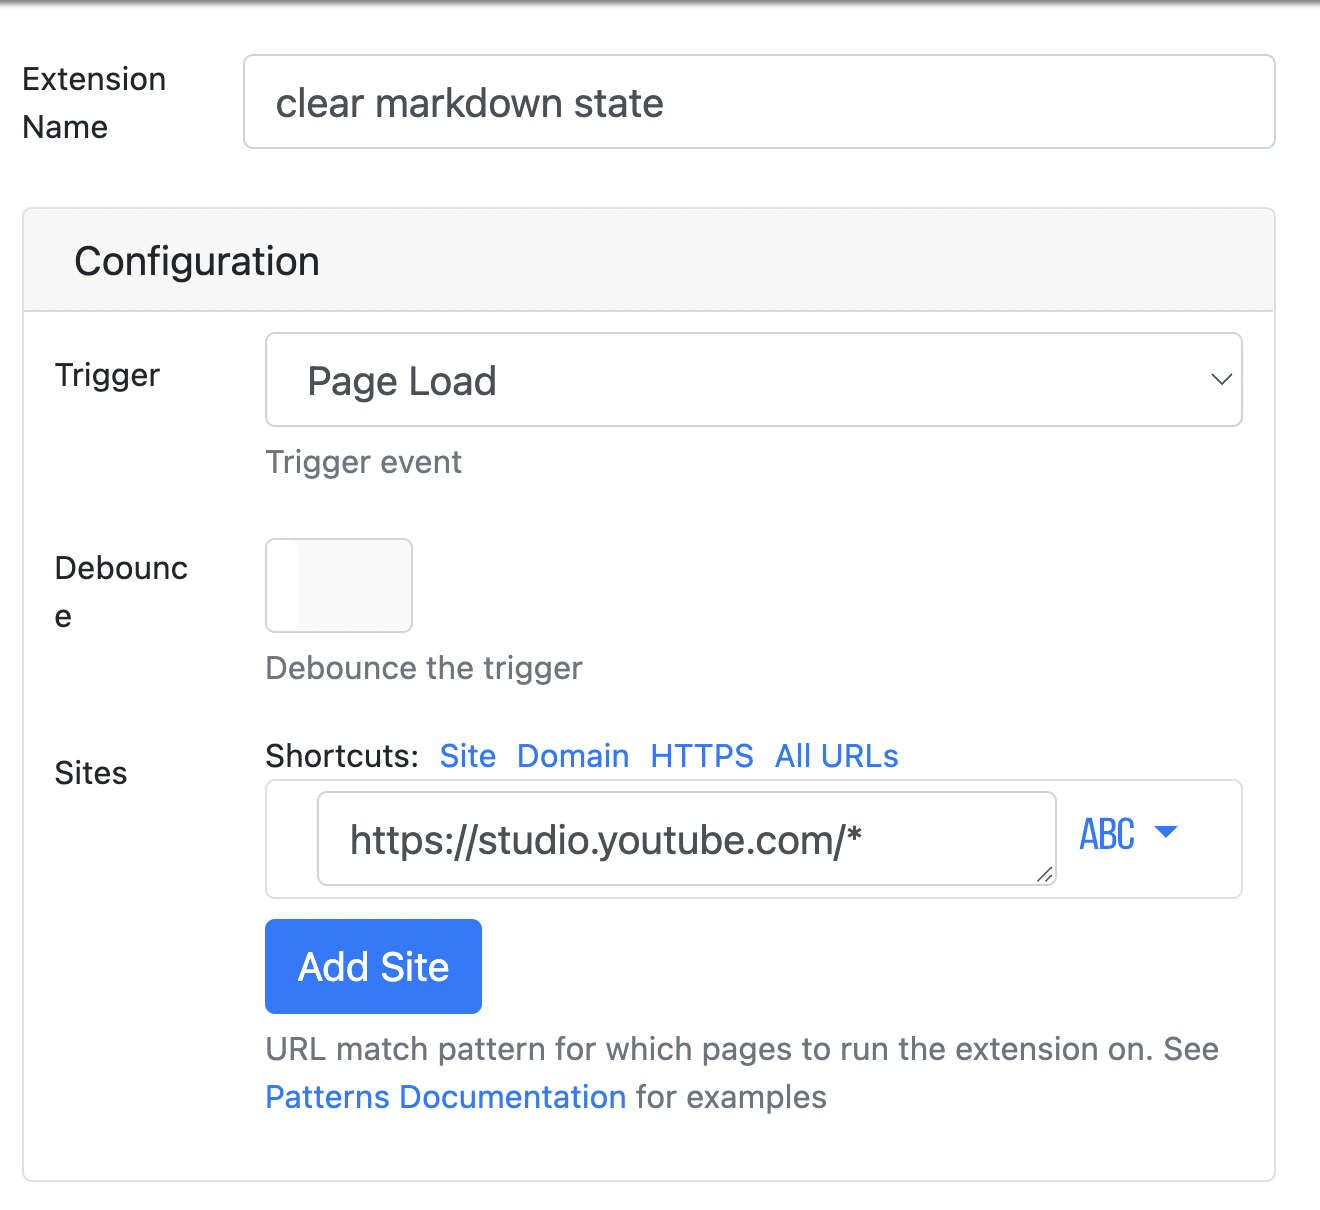
Create a new Trigger Brick by clicking "Add" and then "Trigger". Leave it to Page Load trigger (which it should default to).
Next, add the Set Shared Page State Brick.
No need to configure anything in here. By leaving it blank we’re telling it to clear the state and remove the markdown.
That’s it!
YouTube creators, what else do you wish you could automate?
Comment below with something that you find tedious, and maybe it’ll be our next blog post 😊


