
PixieBrix + Zapier : The Dream Team for Scheduling Comments

If you're an automation geek, you're familiar with Zapier and its powerful ability to connect apps and automate tasks in your day to day workflows. But did you know that you can use PixieBrix with Zapier automation to make it even more powerful?
At first you might be like, why do I want to use both? Isn't Zapier strong enough to do everything on its own?
I used to think so, but recently I was trying to figure out how to schedule comments in Trello. Gmail and Slack have options for scheduling messages, and I like that because I work late at night sometimes because that's when my brain is awake, but I don't want to ping people when they're in their off hours. But unfortunately there are no solutions right out of the box for scheduling comments in Trello.
Even Zapier failed me because I wasn't looking for posting a comment based on something happening in Trello (or another app for that matter), but rather I wanted to be able to specify a specific time for the comment to post.
Zapier got me halfway there because after a trigger happens, I can delay the action for a certain amount of time and then perform the action. So all I needed was a way to collect a timestamp showing when I wanted the action delayed until...
And then whatever comment text I wanted posted in Trello!
So I had the delay and action piece figured out. But there was no trigger for initiating the zap and specifying in the moment how long the zap should delay for.
I needed something to start this workflow, collect a timestamp and comment text that I could share with Zapier so it could do the rest.
This is where PixieBrix came in.
PixieBrix is perfect for manual triggers that you can push immediately via a UI element, and then it handles all the automation behind the scenes for you. This made me wonder if there was a way to marry a trigger in PixieBrix with an action in Zapier.
And as it turns out... there is!!
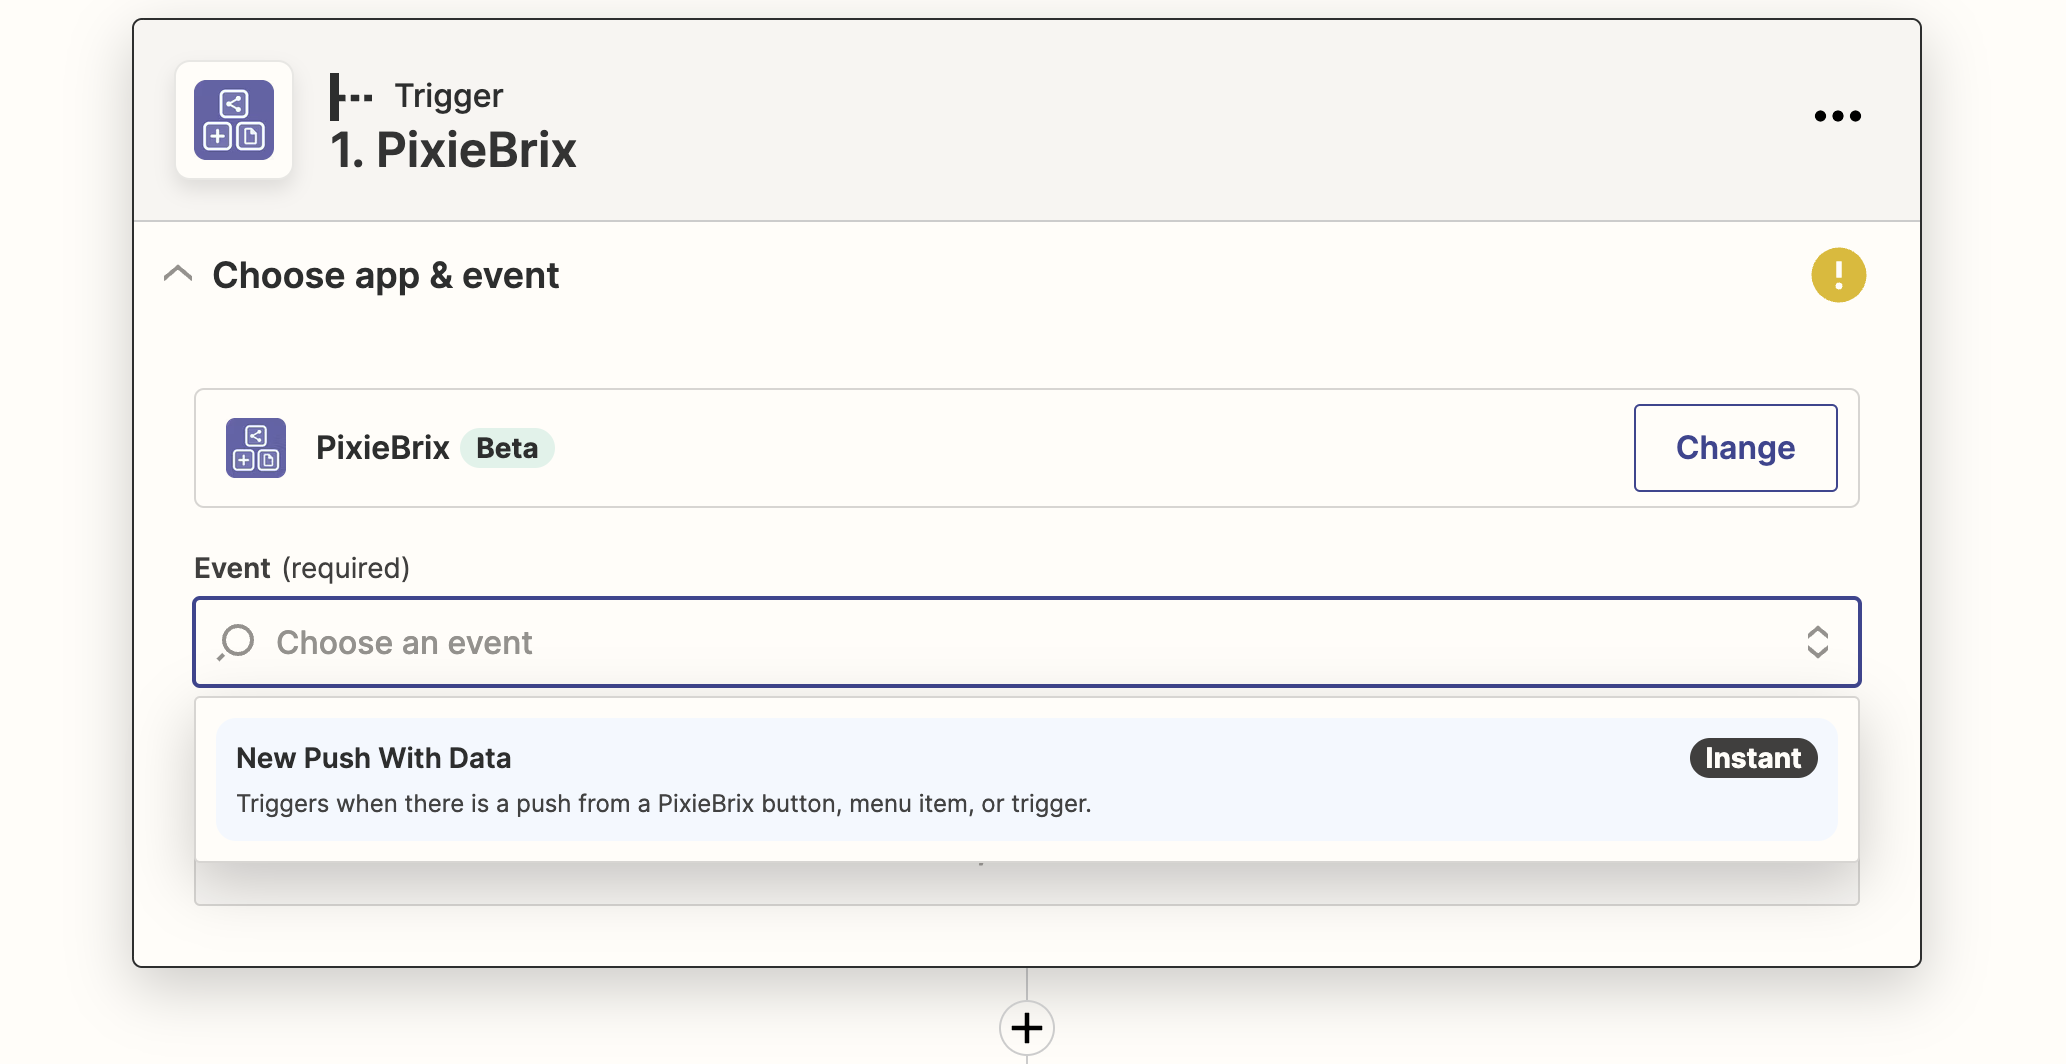
Enter the "Push Data to Zapier" brick in PixieBrix
and the New Data from PixieBrix push trigger in Zapier!
I could now see my path to creating scheduled comments in Trello.
- Create a UI component in a Trello card that iniaties this action.
- When I click the button, have a form to let me specify a message and select a time that I wanted to post the comment.
- Do some behind-the-scenes magic with PixieBrix to grab the ID of the card that I was performing this on.
- Send the information from that PixeBrix form TO Zapier via the PixieBrix trigger.
- Add a delay action to Zapier, and set the delay time to be until whatever the value was the timestamp field of the data we received from PixieBrix
- Add a "Post Comment on Card" action to Zapier, and using the Card ID and card message that I got from PixieBrix, post the comment.
Sure enough, this works! And it was shockingly more straightforward than I thought. Here's how it works if you want to set it up for yourself.
Don't want to read but want to watch? Scroll to the end for a video demo of how to set this up.
STEP 1: CREATE THE UI COMPONENT
Head over to Trello, click on a card, and open up the PixieBrix page editor (just right click on the page, click the "Inspect" item, and then look for the PixieBrix tab).
Click "Add" in the top left, and select Button.
Next, just select a button that you want to copy to set your schedule trigger. I clicked on "Write a comment" box, and then used the PixieBrix selector to grab the "save" button, which then created a button right next to it. Which looks like this:
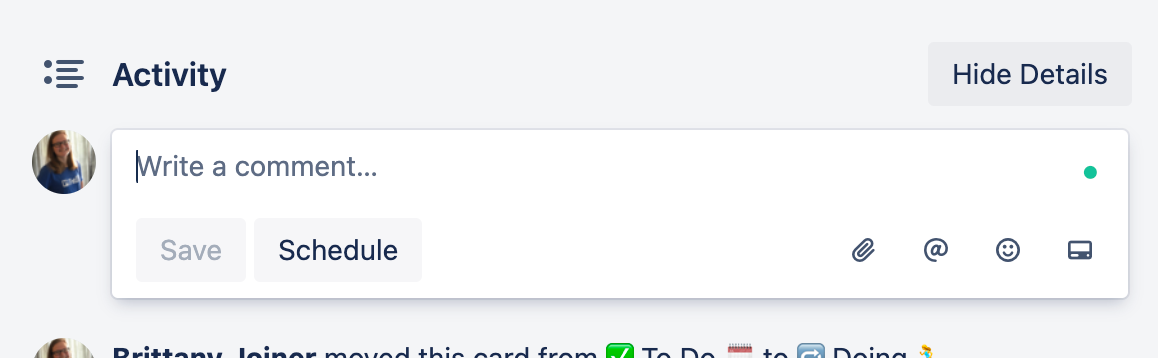
Your PixieBrix button brick should look like this:
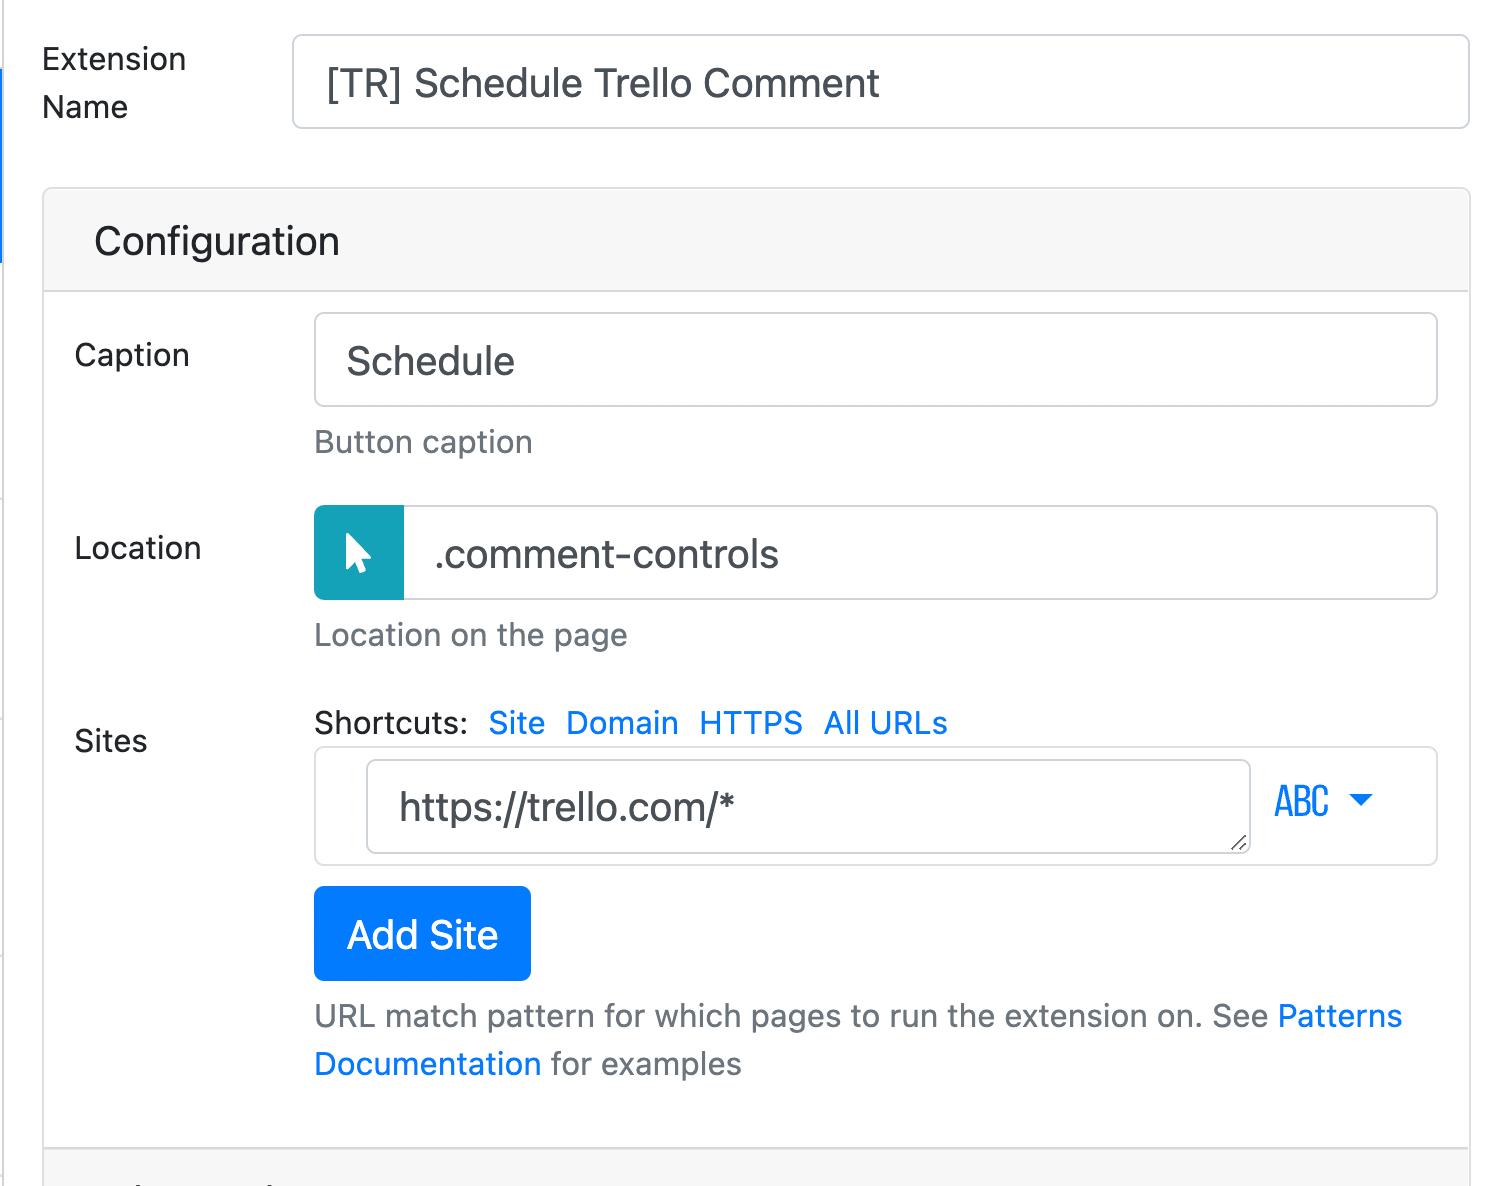
(If you want to just copy and paste, here's the location value : .comment-controls.)
STEP 2: CREATE THE FORM
Next, add the "Show a modal or sidebar form" brick.
No need to name the form or anything, but you do need two fields here: comment and timestamp. So let's make those.
For the comment field, you can name it whatever you want... but I found it easier to keep the name and label both as comment. The input type is paragraph text, so you can write as much as you want.
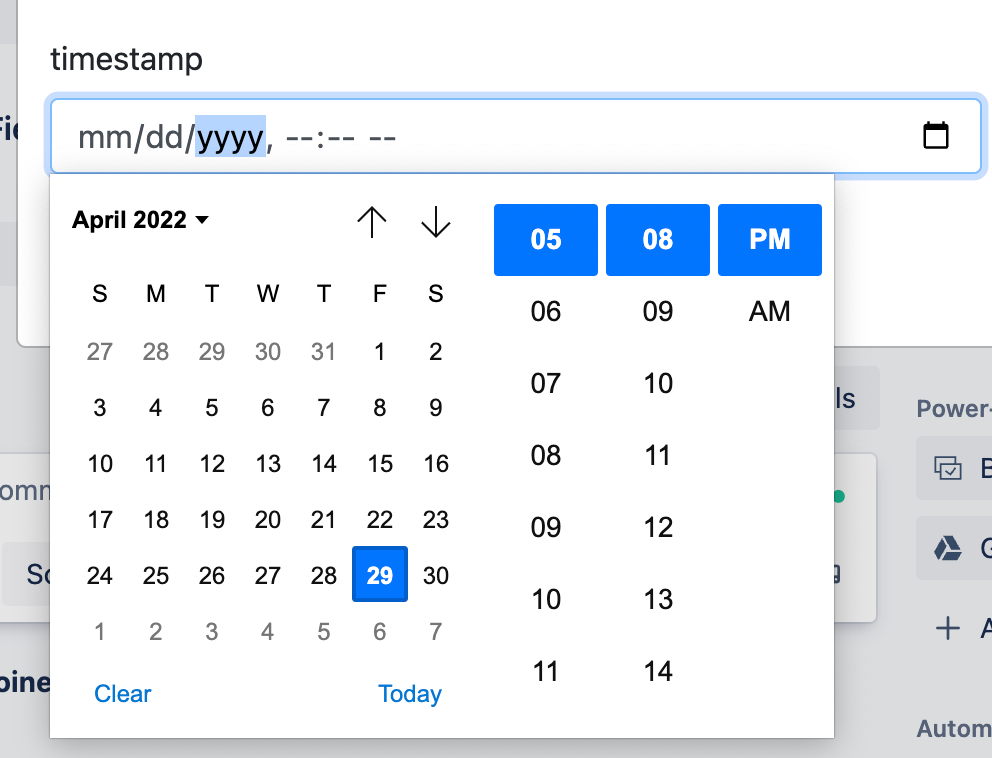
To add another field, click the blue "Add new field" button at the top of the brick, and repeat! For this one, I just set both the name and label to timestamp, and the input type is Date and Time. Check it out it! It opens a little calendar where you can select a date and time!
Change the submit button to something like "Schedule Comment" (or whatever you want... this is purely cosmetic!)
STEP 3: GET THE CARD ID
Although it's four bricks, it's actually a pretty simple process. What we need to do is open a new tab with the JSON element that contains all the details of the card. Then we need to grab a specific id from that element, which holds the cardId, that we'll send to Zapier.
Add the Open a New Tab brick.
Easy start here. In the URL field, just set the value to {{@input.url}}.json
This is going to open a new tab that will open the card URL in json format.
Add the HTML Element Reader brick.
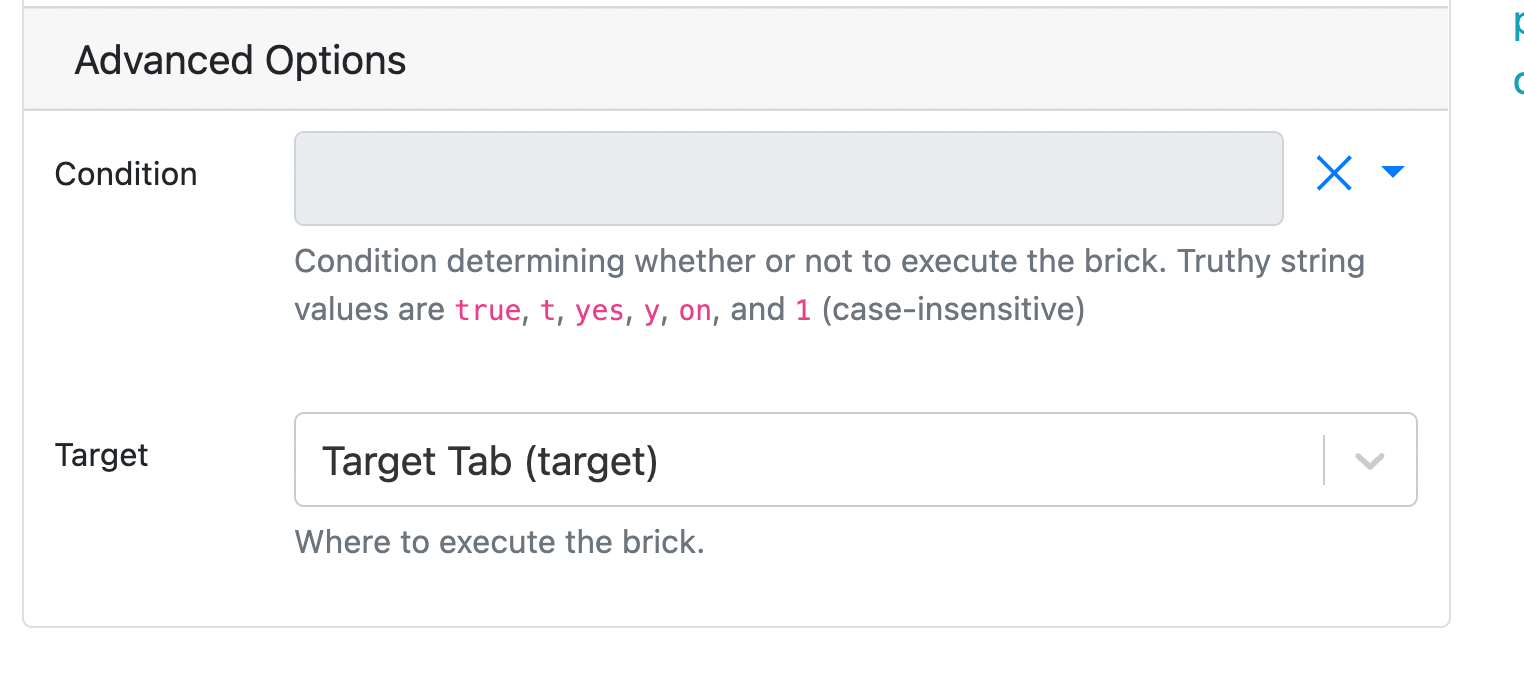
Another easy one! Only thing you need to do here is go to the Advanced Options in the brick and select "Target Tab" like this.
Now you may pass go and collect $200!
Add the Parse JSON brick.
All you need to do is set the content value to @element.text.
This is saying to parse the text of what you find on that page... which is that whole JSON object.
Add the Close Browser Tab brick
And once again, head to the advanced options and set this to happen in the Target Tab (so it closes the weird JSON-y tab and not the Trello card tab).
You're done! You'll now be able to access the id of the card in our next step.
STEP 4: SEND CARD ID, TIMESTAMP, AND COMMENT TO ZAPIER
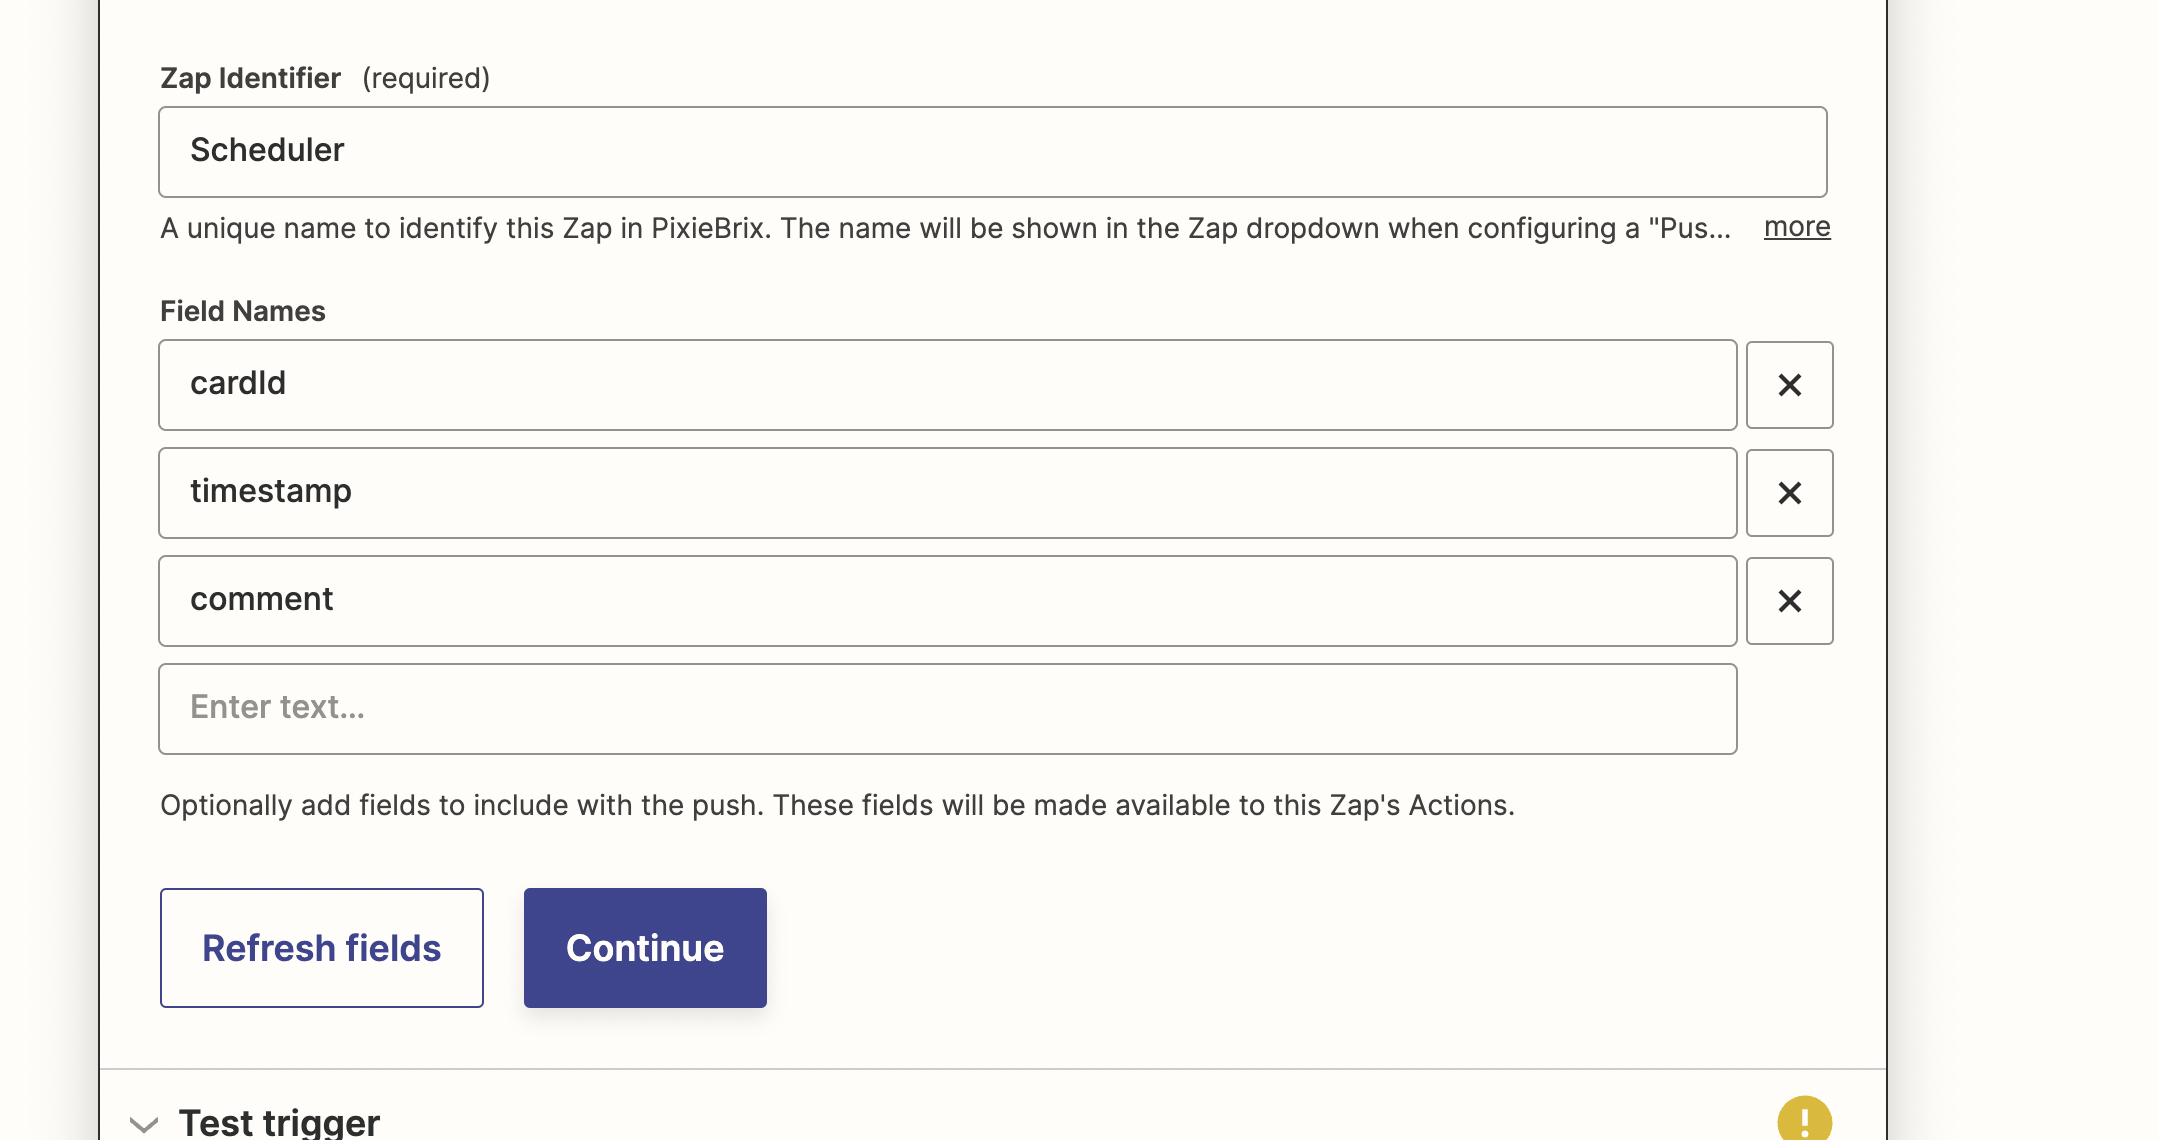
Now add the "Push Data to Zapier" brick, and just plug in what you want to send.
This part is a bit chicken and egg because in order for you to select the Zap you want to run this with, you need to actually make the Zap happen. So let's pause on PixieBrix and head back over to Zapier. Create a new zap, and add the PixieBrix trigger, name it whatever you like (I chose "Comment"), and then define the fields you want. In our case, we want cardId, timestamp, and comment.
Now set up an action like "send an email" and just send yourself an email. Now turn the zap one. Once you do that, it should show up in the PixieBrix options under "Zap". Select it, and then you'll see fields that you just defined. Now all you need to do is set the data from the previous bricks!
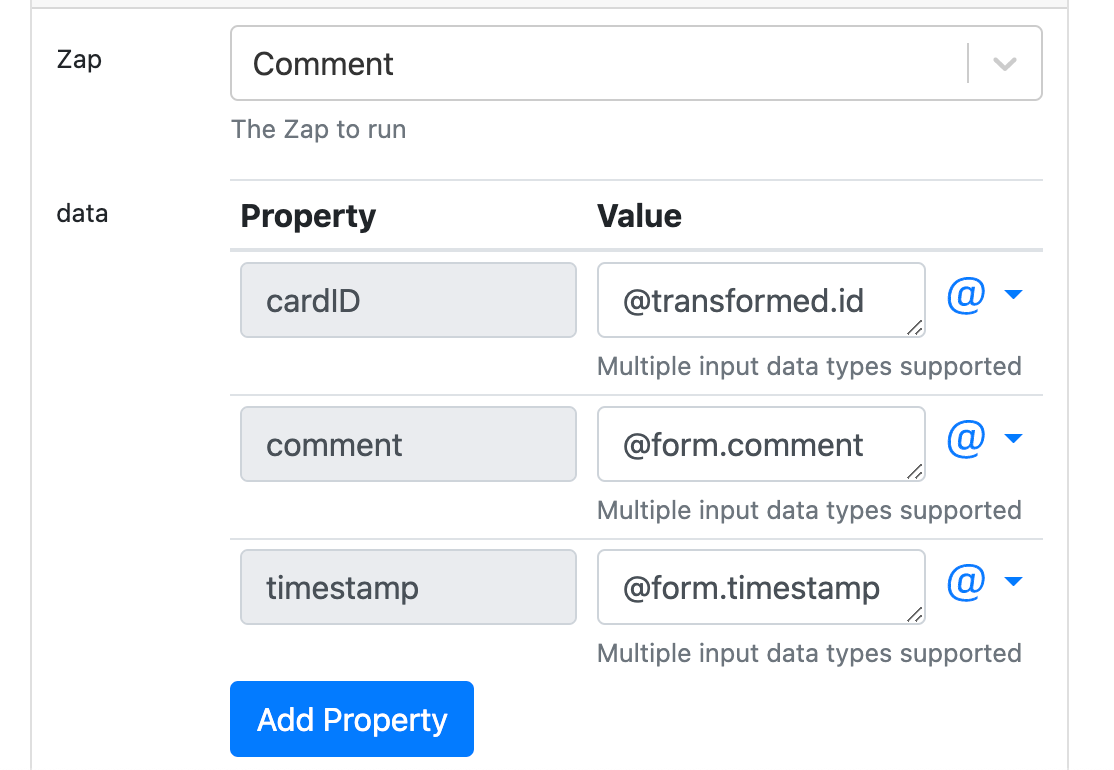
For cardID, you'll just reference @transformed.id (that's going to return the parsed JSON object and the value to the id key... aka the card id!).
For comment and timestamp, you just need to reference @form and the relevant pieces (whatever you named the fields).
STEP 5: ADD THE DELAY ACTION TO ZAPIER
We're nearly done! Now let's head back to Zapier and plug in our other actions.
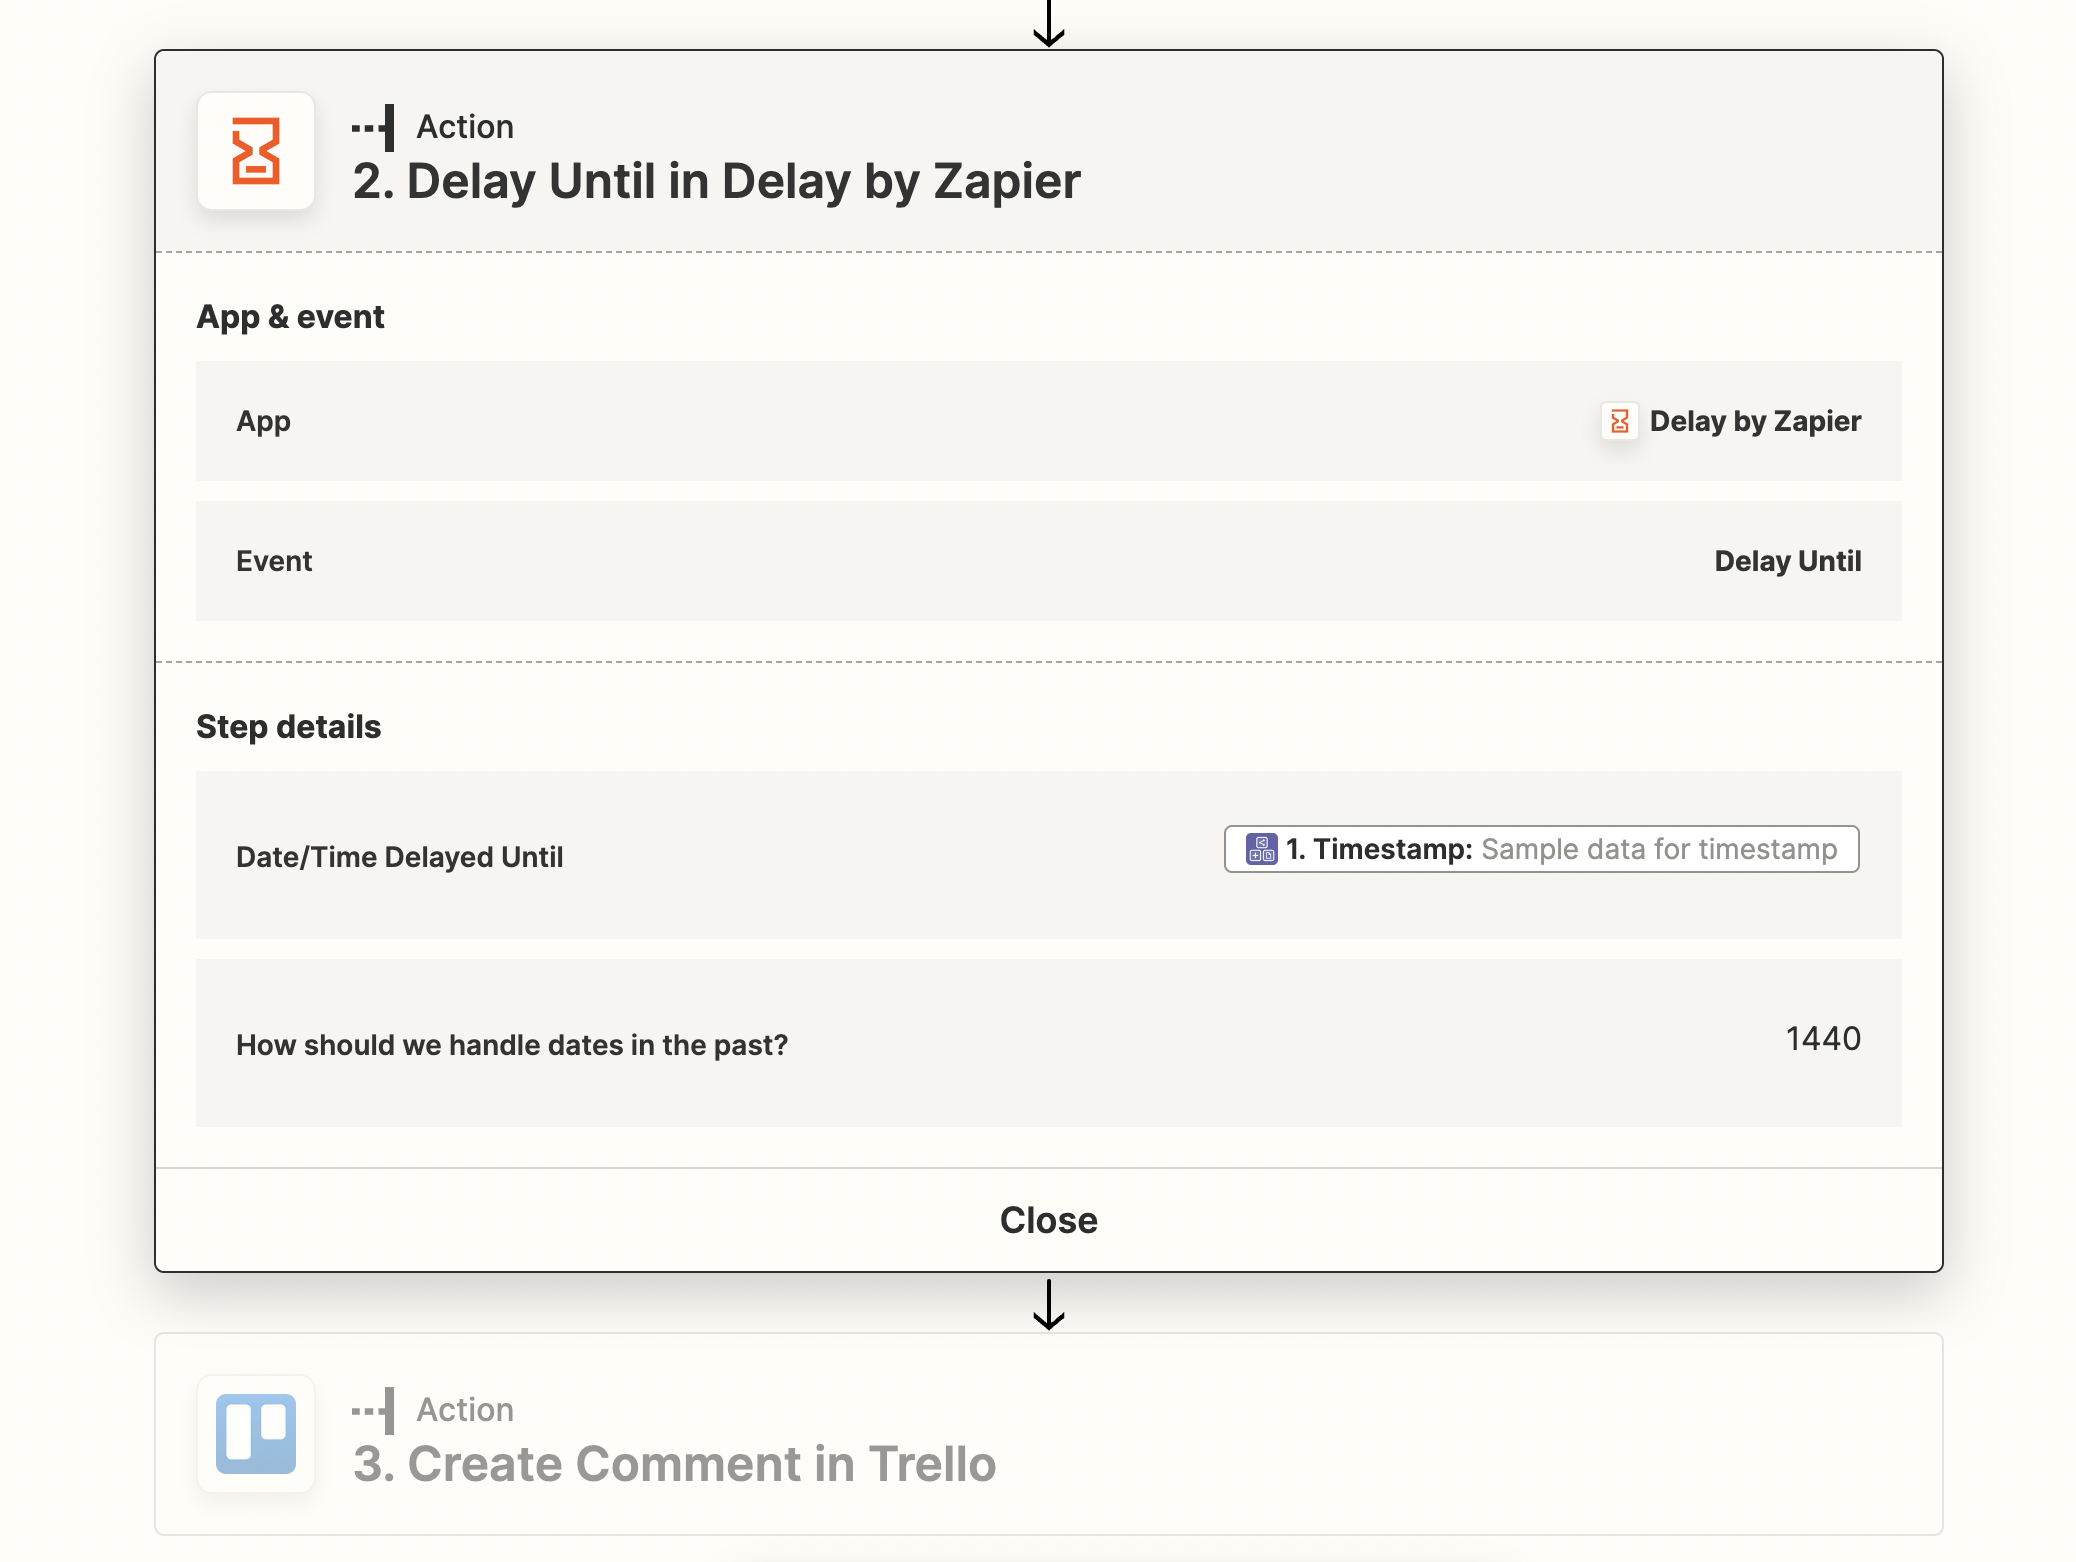
You can remove the gmail action now, and add the "Delay" action. Select "delay until".
Then set up the action and in the date/time field, click the text area to select from the PixieBrix data dropdown. Select the "timestamp".
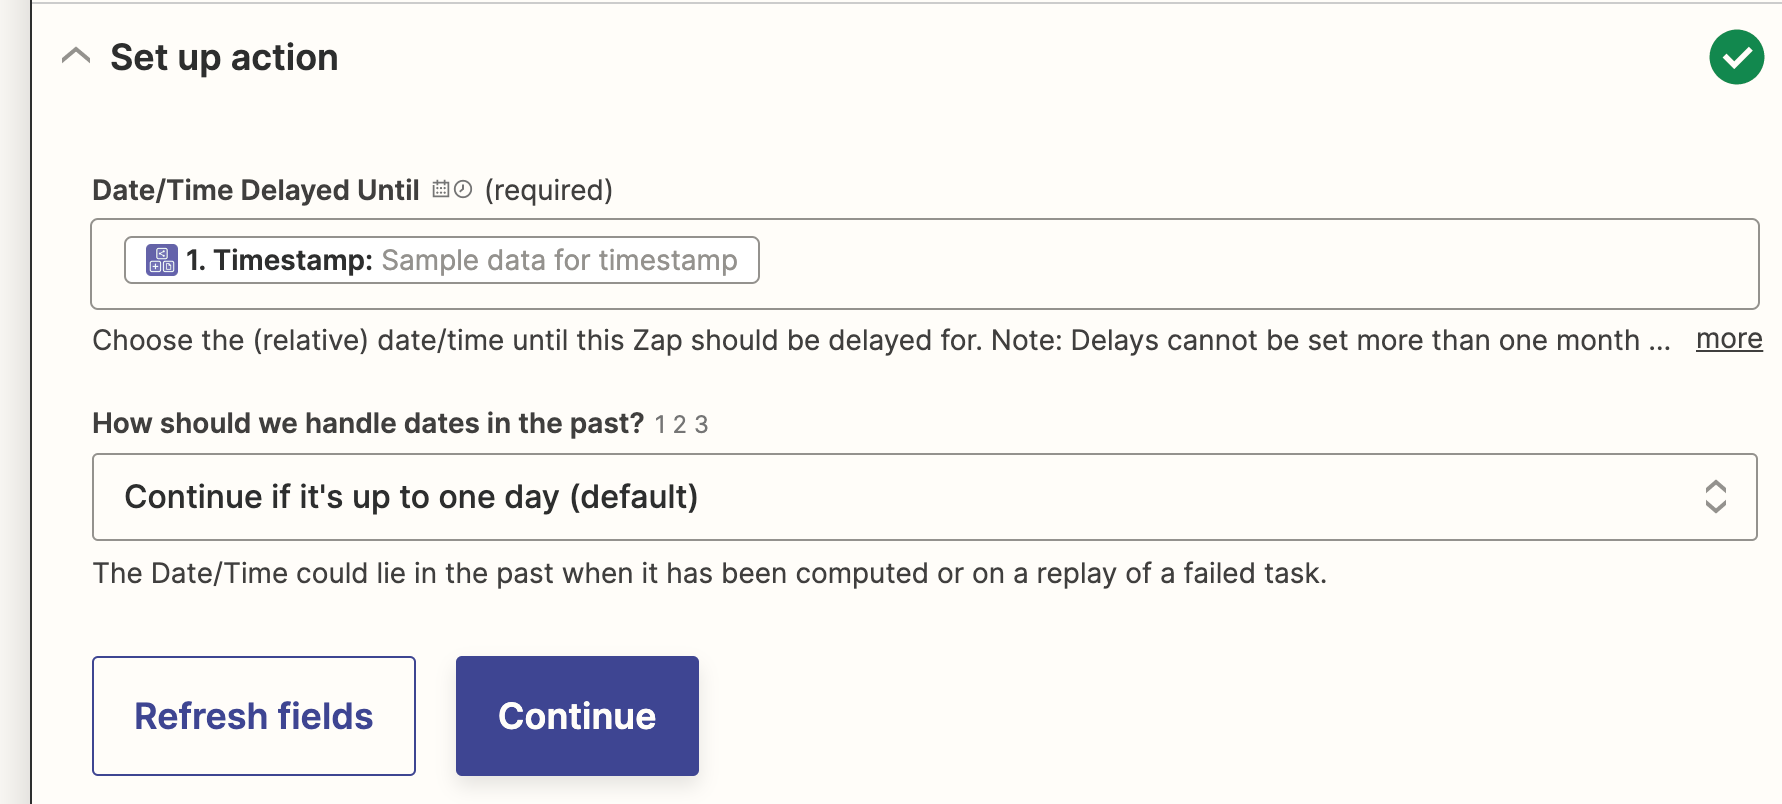
You can just leave other field as its default value.
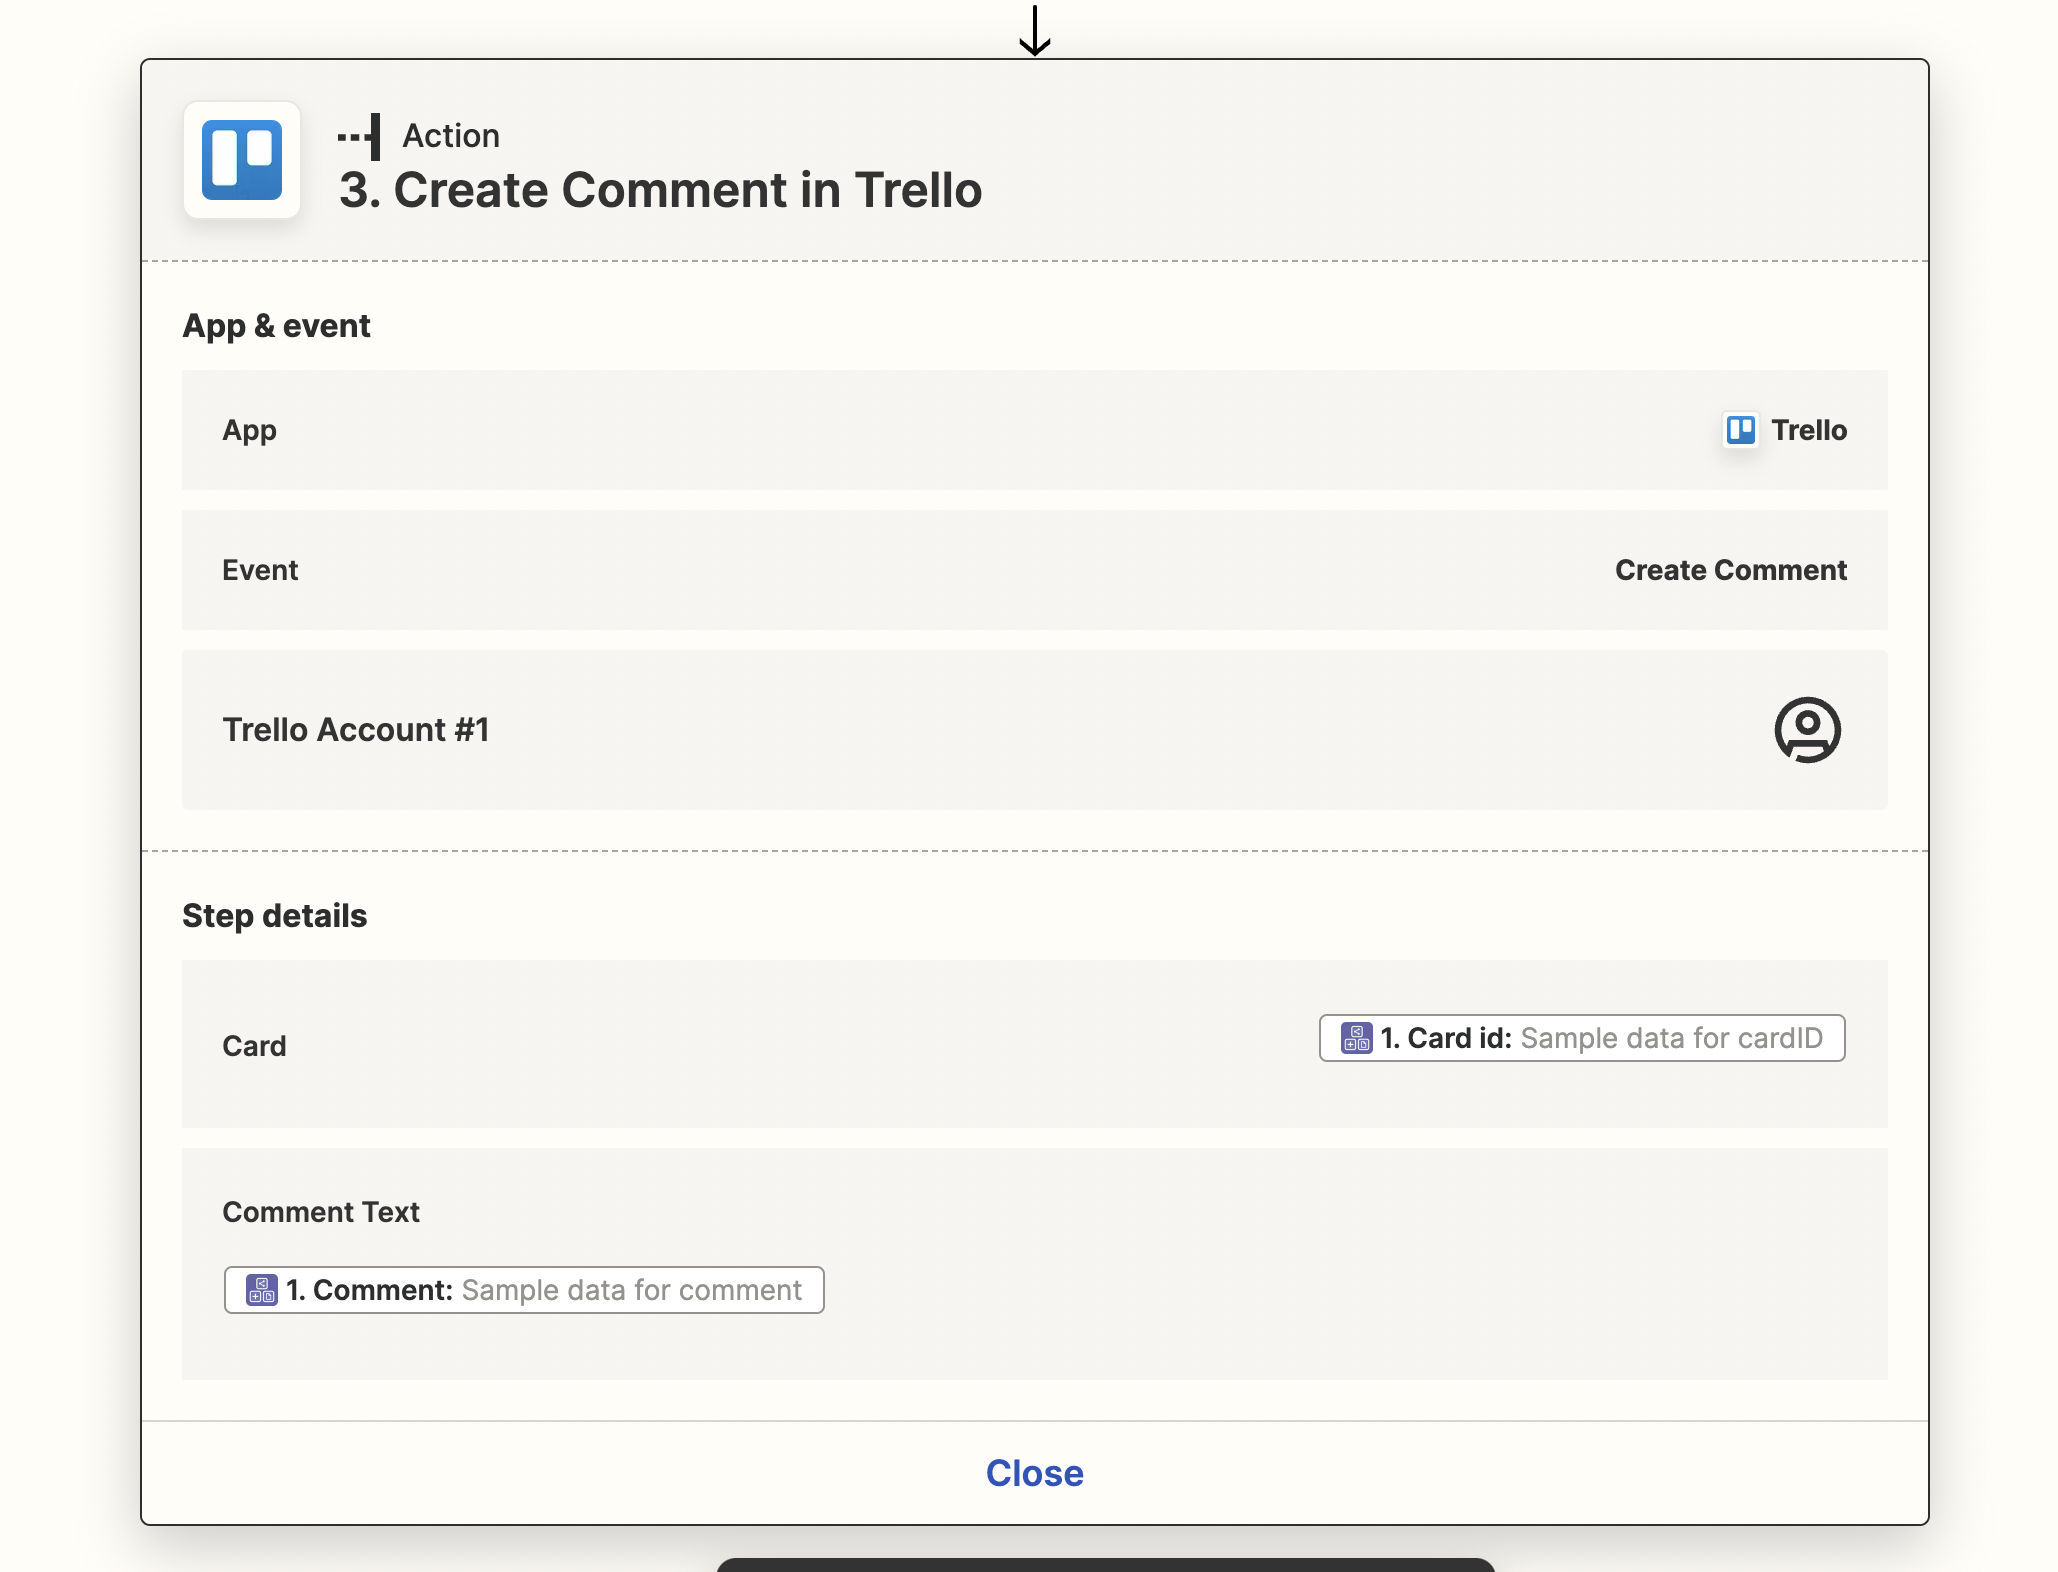
STEP 6: ADD THE TRELLO ACTION TO POST THE COMMENT
Now add one more action in Zapier. Select the Trello app and then pick the "Create comment" action. Now connect your Trello account, and set up the action to specify which card you want to post on (that's where we'll use the cardId), and what comment text to post (that's where we'll use the comment!) It should look like this.
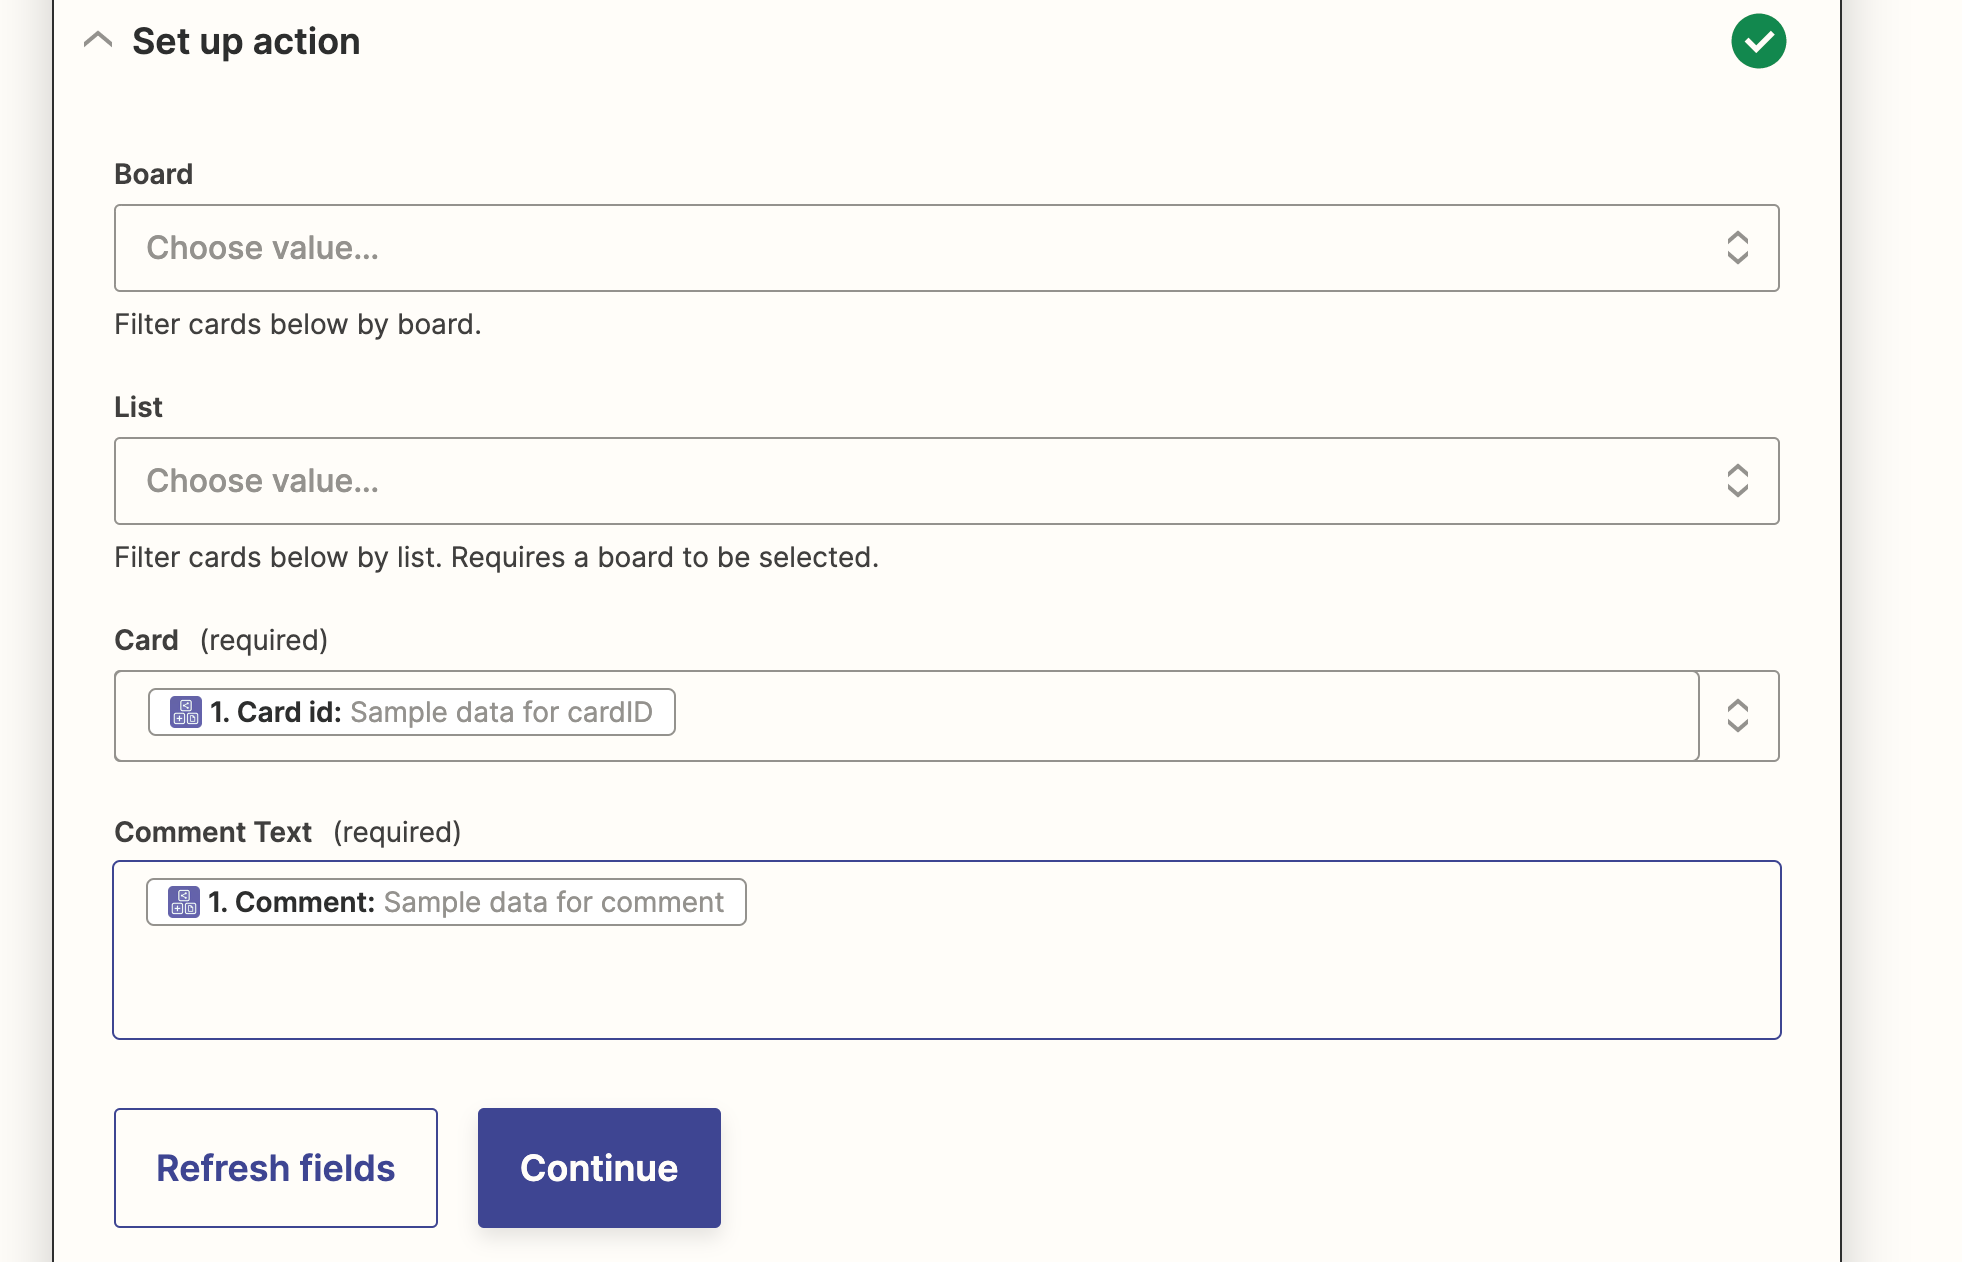
You can ignore the board and list values since we are giving it the card value (which is unique to each card, so it provides all the info we need!)
Now, you'll need to skip the test action part, and go ahead and turn on the zap.
Want to test it out? Head to your Trello board, open a card, and go to the comment section then click your schedule button. And viola!
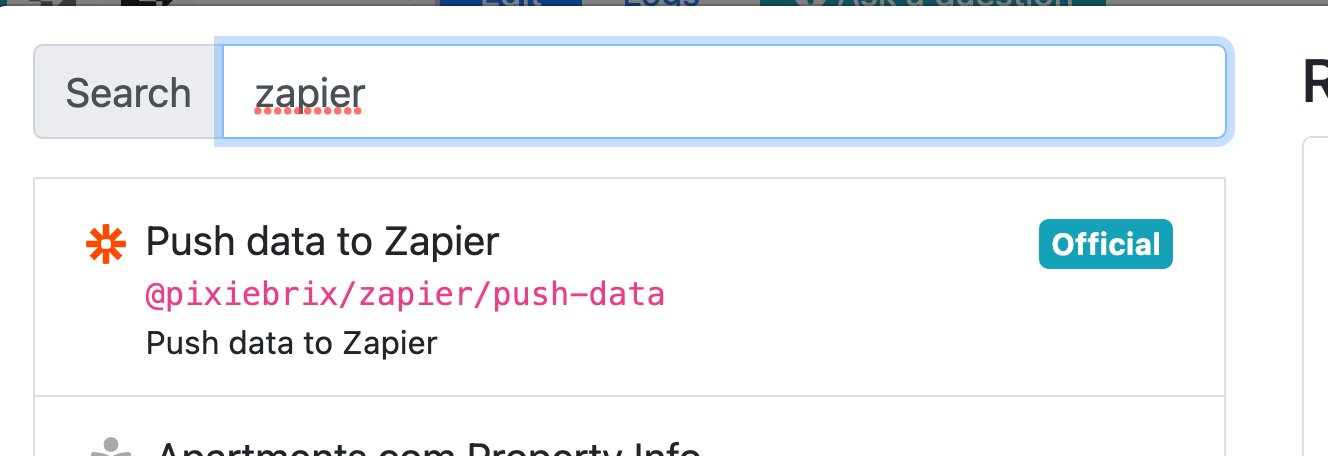
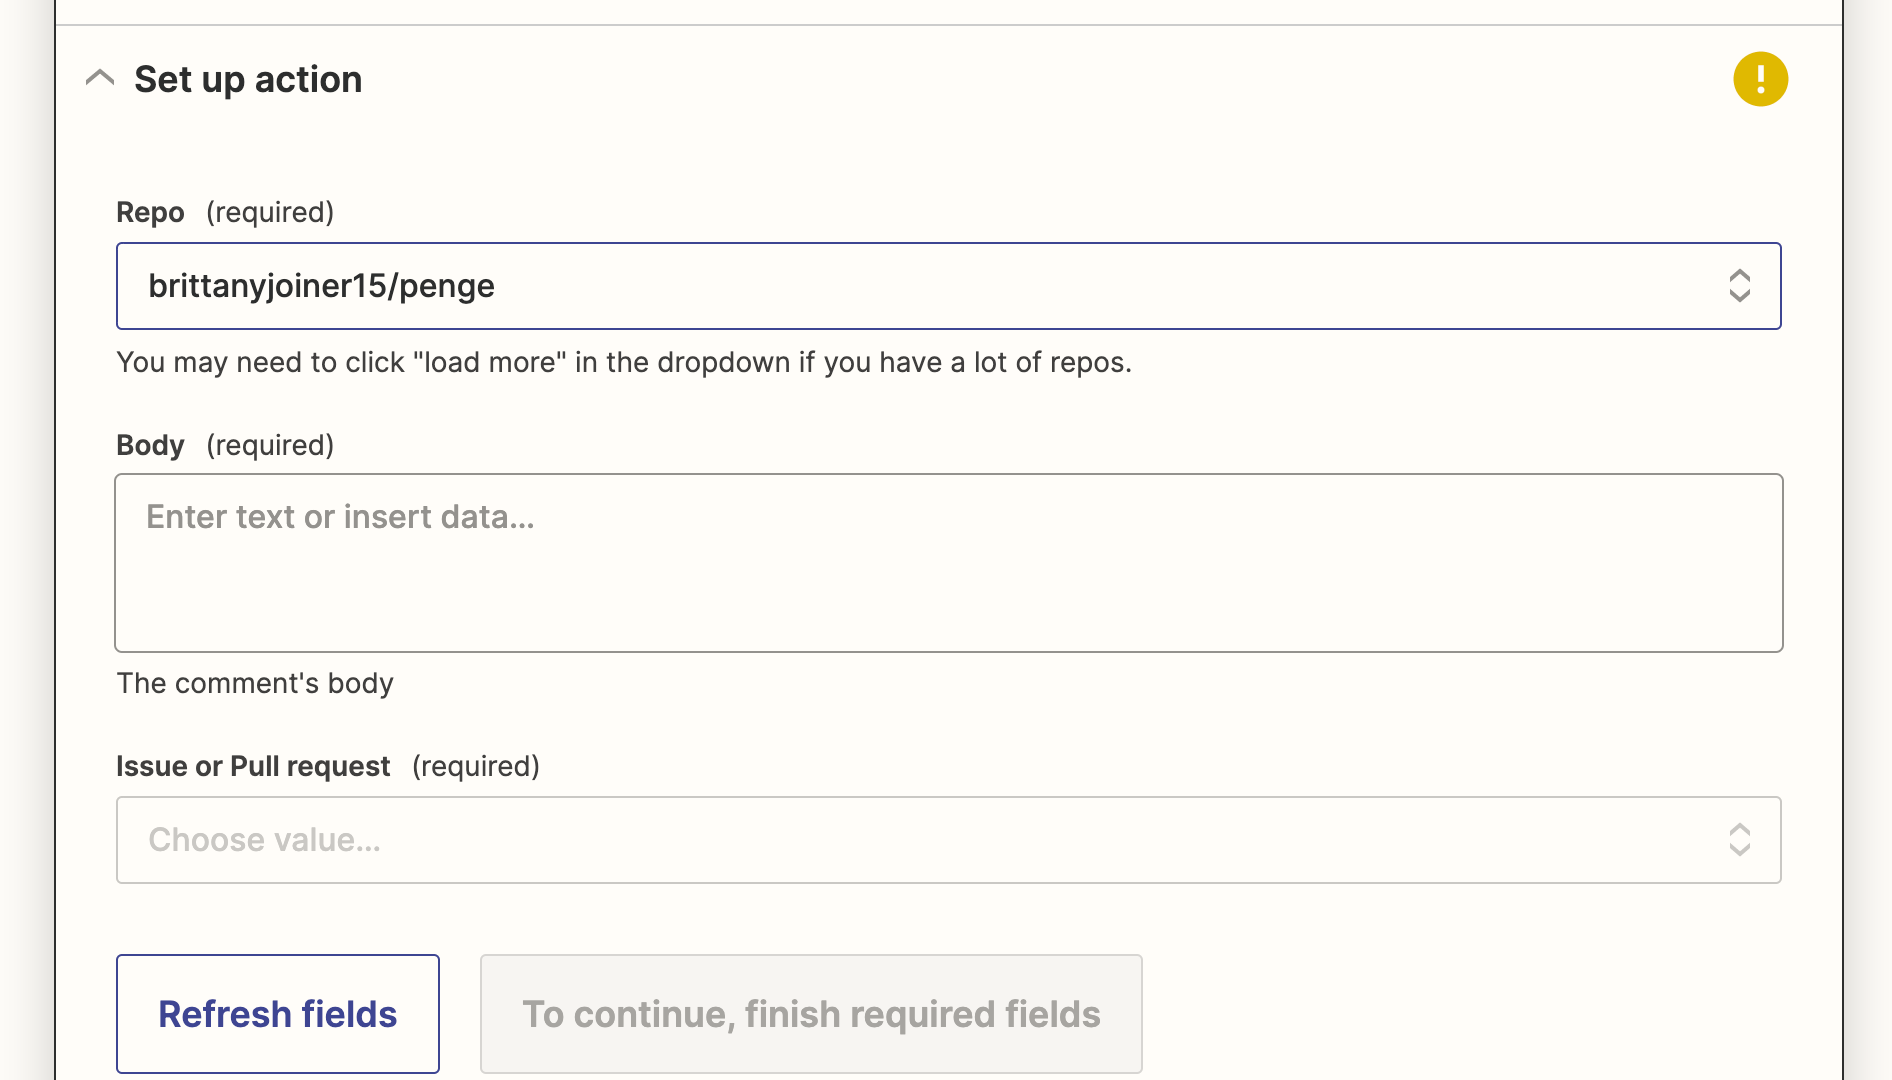
Don't use Trello but wish you could schedule comments in other tools? Just check that it has a Zapier action, and you can follow a similar process for those tools! For instance, here's what the action looks like for Github:
Other sites that Zapier has actions for posting comments includes:
- Monday.com
- Asana
- Discord (send a message)
So take it for a spin and see what you think!
Prefer to watch? Here's me walking through the process.


