
Adding checklists in Zendesk
If you're working to automate processes in Zendesk, you might notice that macros can only get you so far. I've been building decision trees and checklists that appear when I need them, creating safeguards, and ensuring I follow the right process each time.
In this article, I'll guide you on how to create auto-populated checklists in Zendesk.
Why use checklists
Even if you believe you're certain about a process' steps, it's crucial to have checklists. In fact, the more you're used to doing something, the more important it is to have a checklist!
Activate the checklist mod template
By activating the PixieBrix Checklist mod template, you'll start off with a prebuilt sidebar that displays checklist items from a Google Sheet.
To activate, copy this spreadsheet and replace the items with the info you want in your checklist:
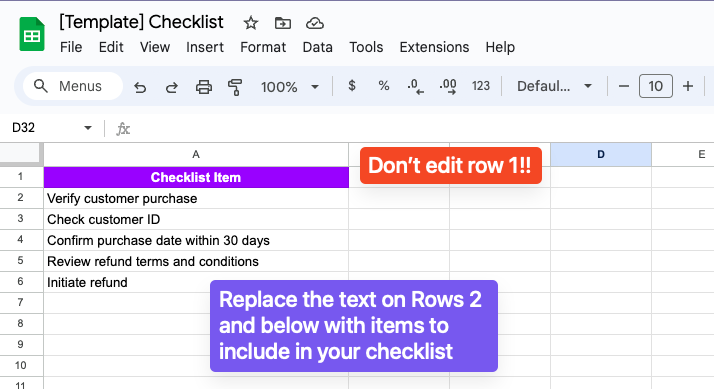
Once you've done that, activate the [Template] Checklist mod. Right-click to open that link in a new tab.
You will be prompted to link your Google Drive account. Remember to choose the one where your copied Google Sheet is stored, then select that specific sheet.
Click the purple Activate button when you're done.
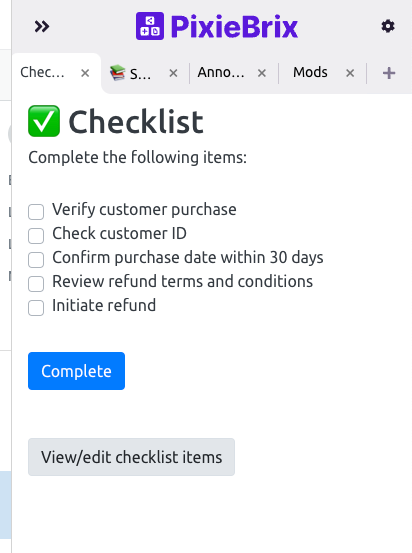
You can try the checklist by clicking the PixieBrix icon in your URL bar. (Don't see it? Click the puzzle piece and pin the PixieBrix extension.)
Now that you have a checklist let's enhance its automation.
Create a trigger to load on Zendesk
Let's say you want to trigger the checklist to appear every time you open a ticket in Zendesk, without requiring you to click the PixieBrix icon.
Head to a Zendesk page and open the PixieBrix Page Editor. (Right-click anywhere on the page and choose Inspect, then look for the PixieBrix tab.)
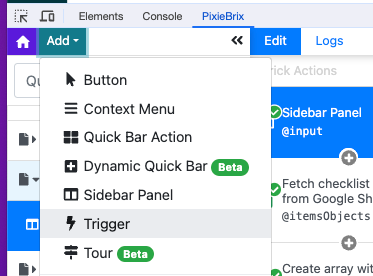
Click the Add button next to the purple home icon in the top left, and choose Trigger.
The brick configuration panel appears, and you'll update the Sites field to contain https://yourDomain.zendesk.com/agent/tickets/* This tells PixieBrix to watch for when a page is loaded with that pattern.
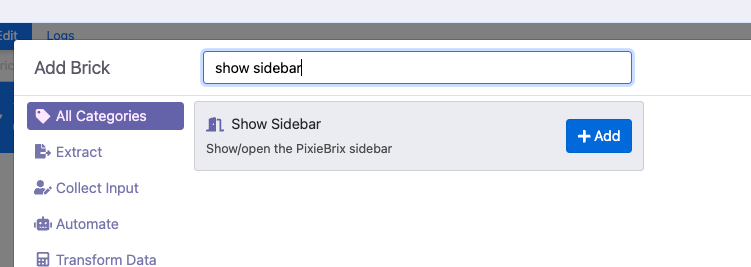
Next, click the '+' button located directly beneath the 'Trigger' brick in the second panel from the left. This opens the Add Brick modal. Search for Show sidebar, hover over the item, and click Add.
Set Checklist as the Table Title value and turn on the Force Panel option.
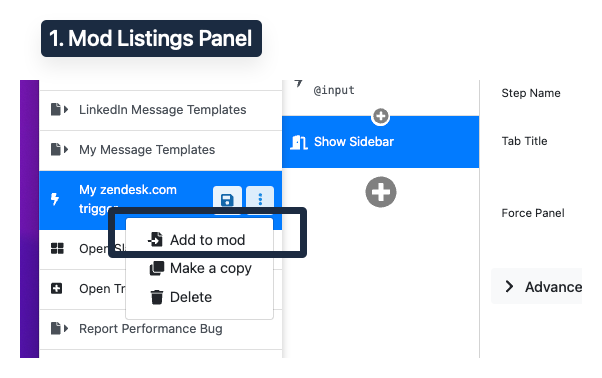
Now, we need to add this trigger mod to the other mod that we activated, which renders the sidebar. Look in the first panel on the left, and you should see a blue box with the title of your current mod, something like My zendesk.com trigger. Click the three dots on that row and choose the Add to mod action.
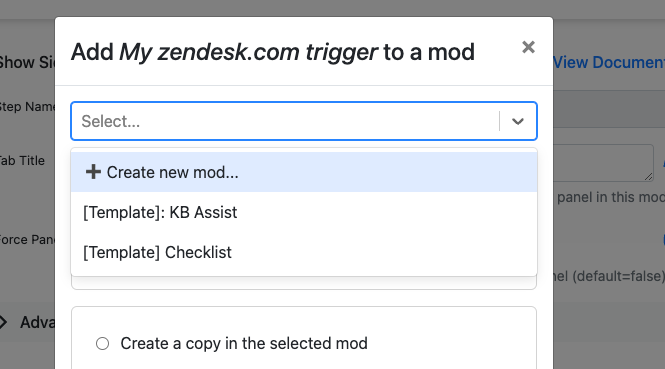
When prompted, choose the [Template] Checklist Mod to add your new mod into.
You'll now see your Zendesk trigger mod nested inside the [Template] Checklist mod. Click the Save icon, and you'll be prompted to Save as New. You may need to set an alias (like a username) if this is your first time saving a mod!
Next, click the Create button, and your new trigger is ready to go.
Close the Page Editor, and let's try it out! Close the sidebar if it's already open, then navigate to your home page in Zendesk. You should see that there's no sidebar.
Now, click on a ticket. You should see the sidebar suddenly opens and displays your checklist.
This is just the start!
How else would you like to automate your checklists? PixieBrix can help. If you'd like a checklist to appear when you select a macro, you can follow the process I made for launching a decision tree with a Zendesk macro.
Essentially, you'll add a new trigger that watches for when you click an element, not just when you load a page. This works for tags, assignees, teams, and essentially any element on your Zendesk page.
If you need help building automation for your support team, schedule a demo, to learn how PixieBrix can save your team time and prevent errors.