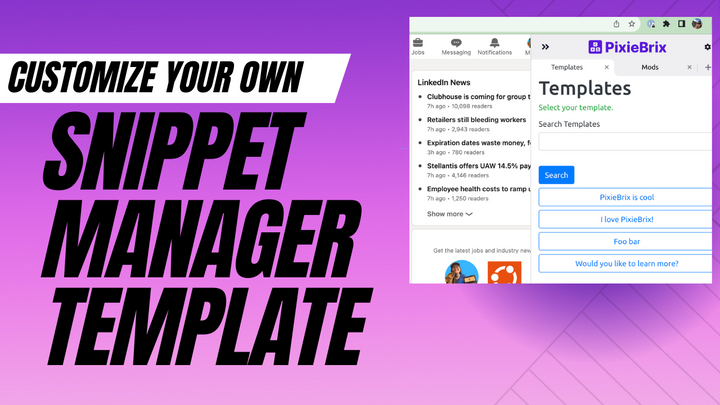
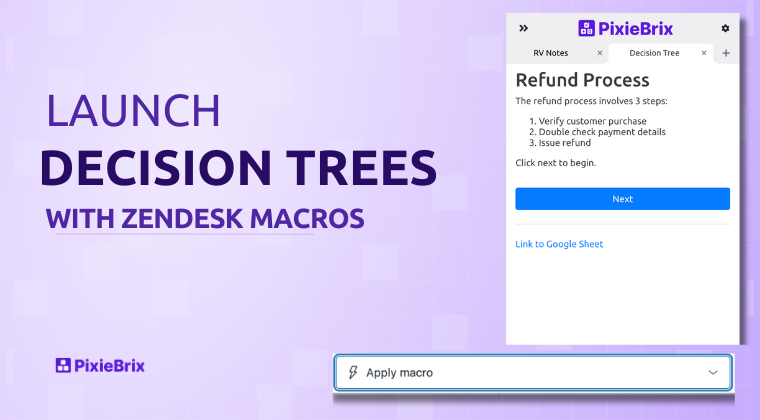
Launch a decision tree with a Zendesk macro
I've been playing around with our decision trees since they're so easy to activate from a spreadsheet, and I figured the only thing better than a decision tree, is a decision tree that automatically pops up when I need it to.
At PixieBrix, we use Zendesk to handle support requests from our users, and as Head of Developer Relations, I spend a good bit of time supporting our users. I wanted to see if I could trigger a decision tree when I selected a macro in Zendesk, and sure enough, I can!
Watch the video or read the steps below to learn how I did it.
Activate the Decision Tree template mod from PixieBrix
We've already done the hard work for you here at PixieBrix and built the Decision Tree mod that loads a decision tree that you've built in a spreadsheet. If you don't have one yet, you can just activate it and try with our built-in data then add your own spreadsheet later.
Once you've activated the Decision tree, head to Zendesk, and open the Page Editor.
Add a new Trigger mod
Now we've got the decision tree, we just need to add the trigger that launches it when a Zendesk macro is selected.
To do this, click the Add button from the top left of the Page Editor, and choose Trigger.
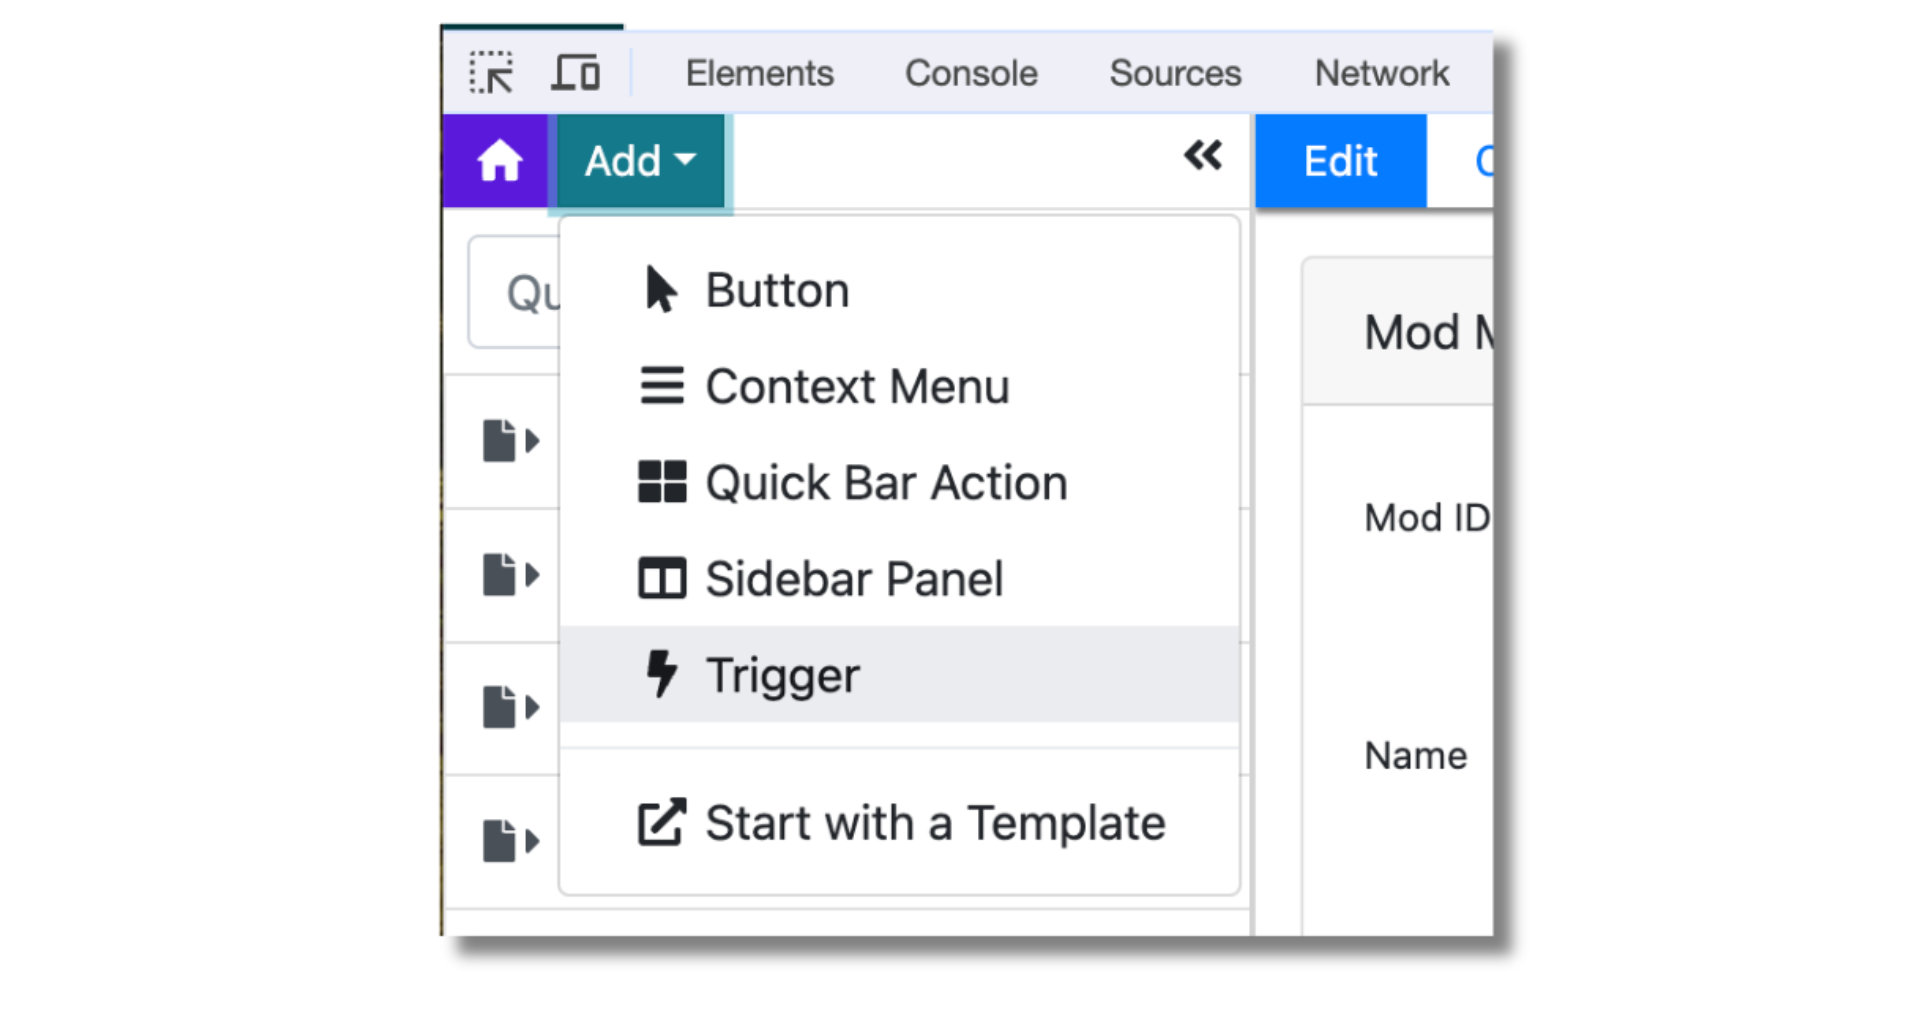
In the middle panel of the Page Editor, you'll see configuration options for your Trigger. You'll need to adjust the following to watch for when a Macro is selected.
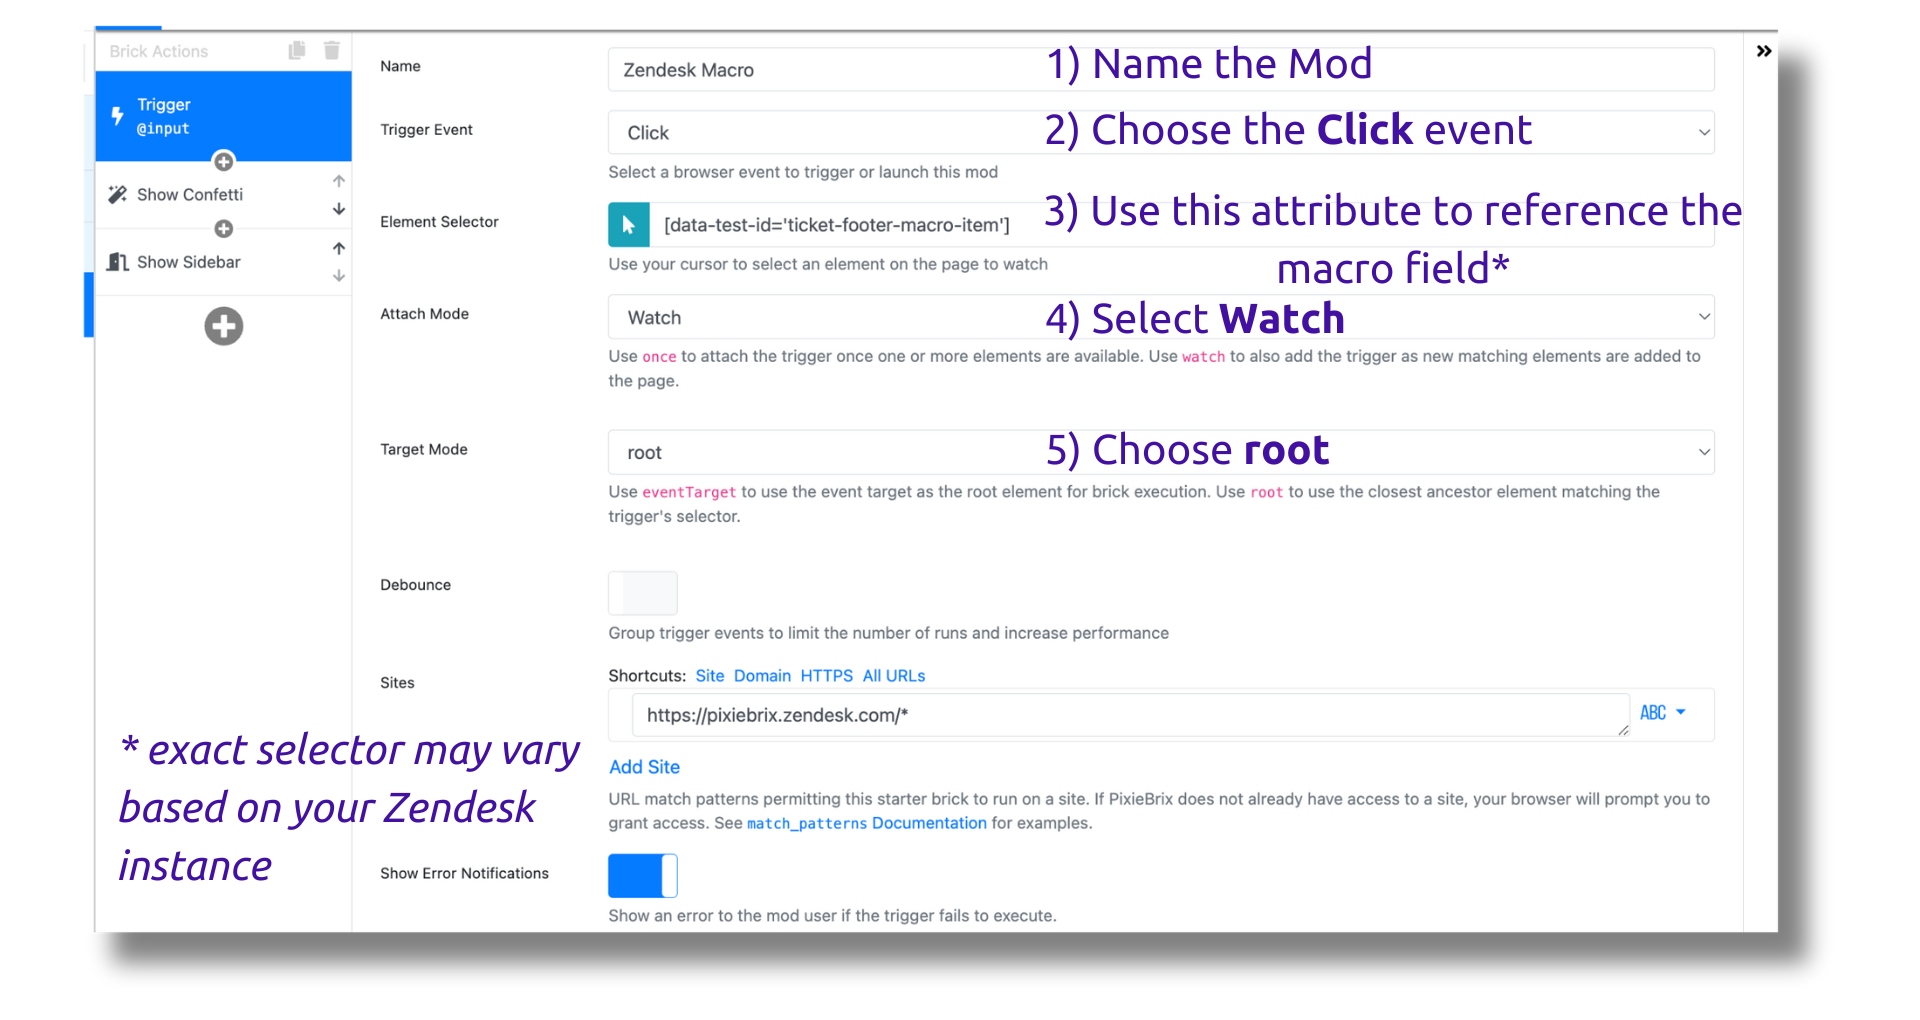
Once your Trigger brick looks like the above, you're ready to add your last brick!
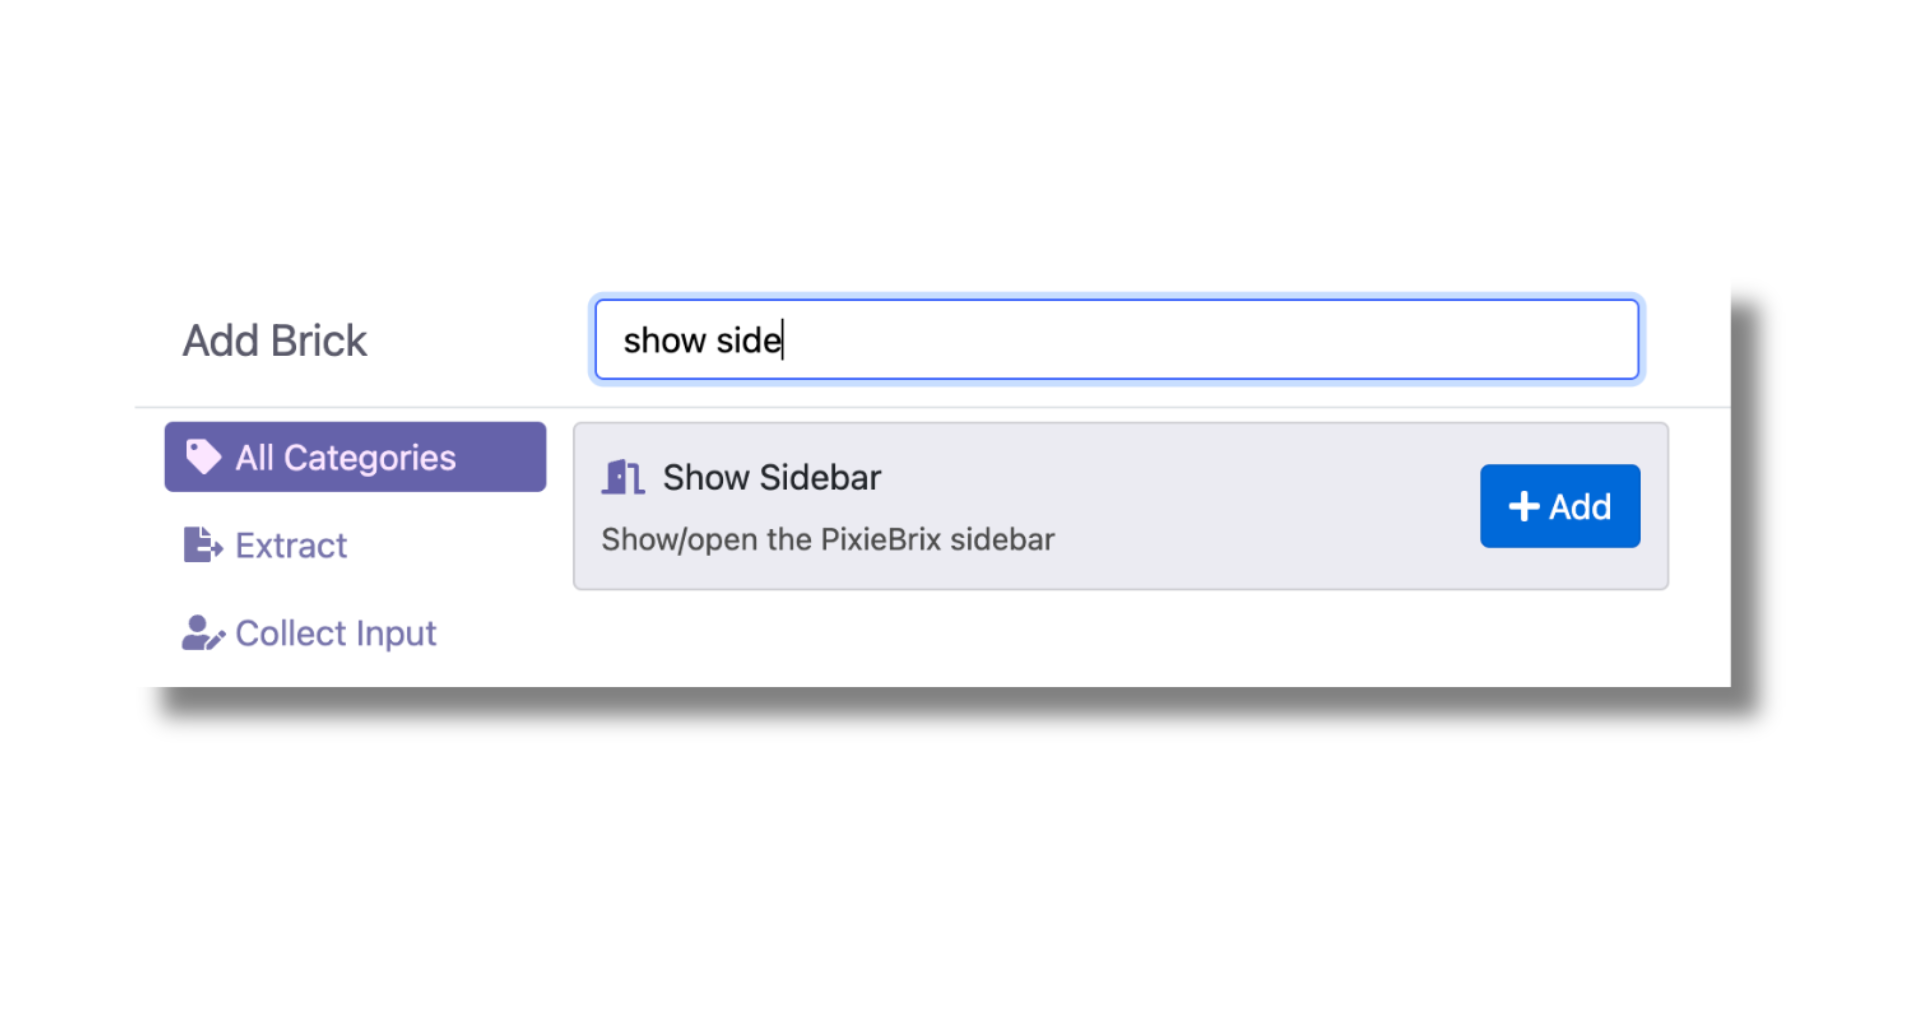
Add a Show Sidebar brick
In the second panel from the left, click the + button below the Trigger brick.
A modal appears asking you to select a brick. Search for the Show Sidebar brick, then hover over the brick and click Add.
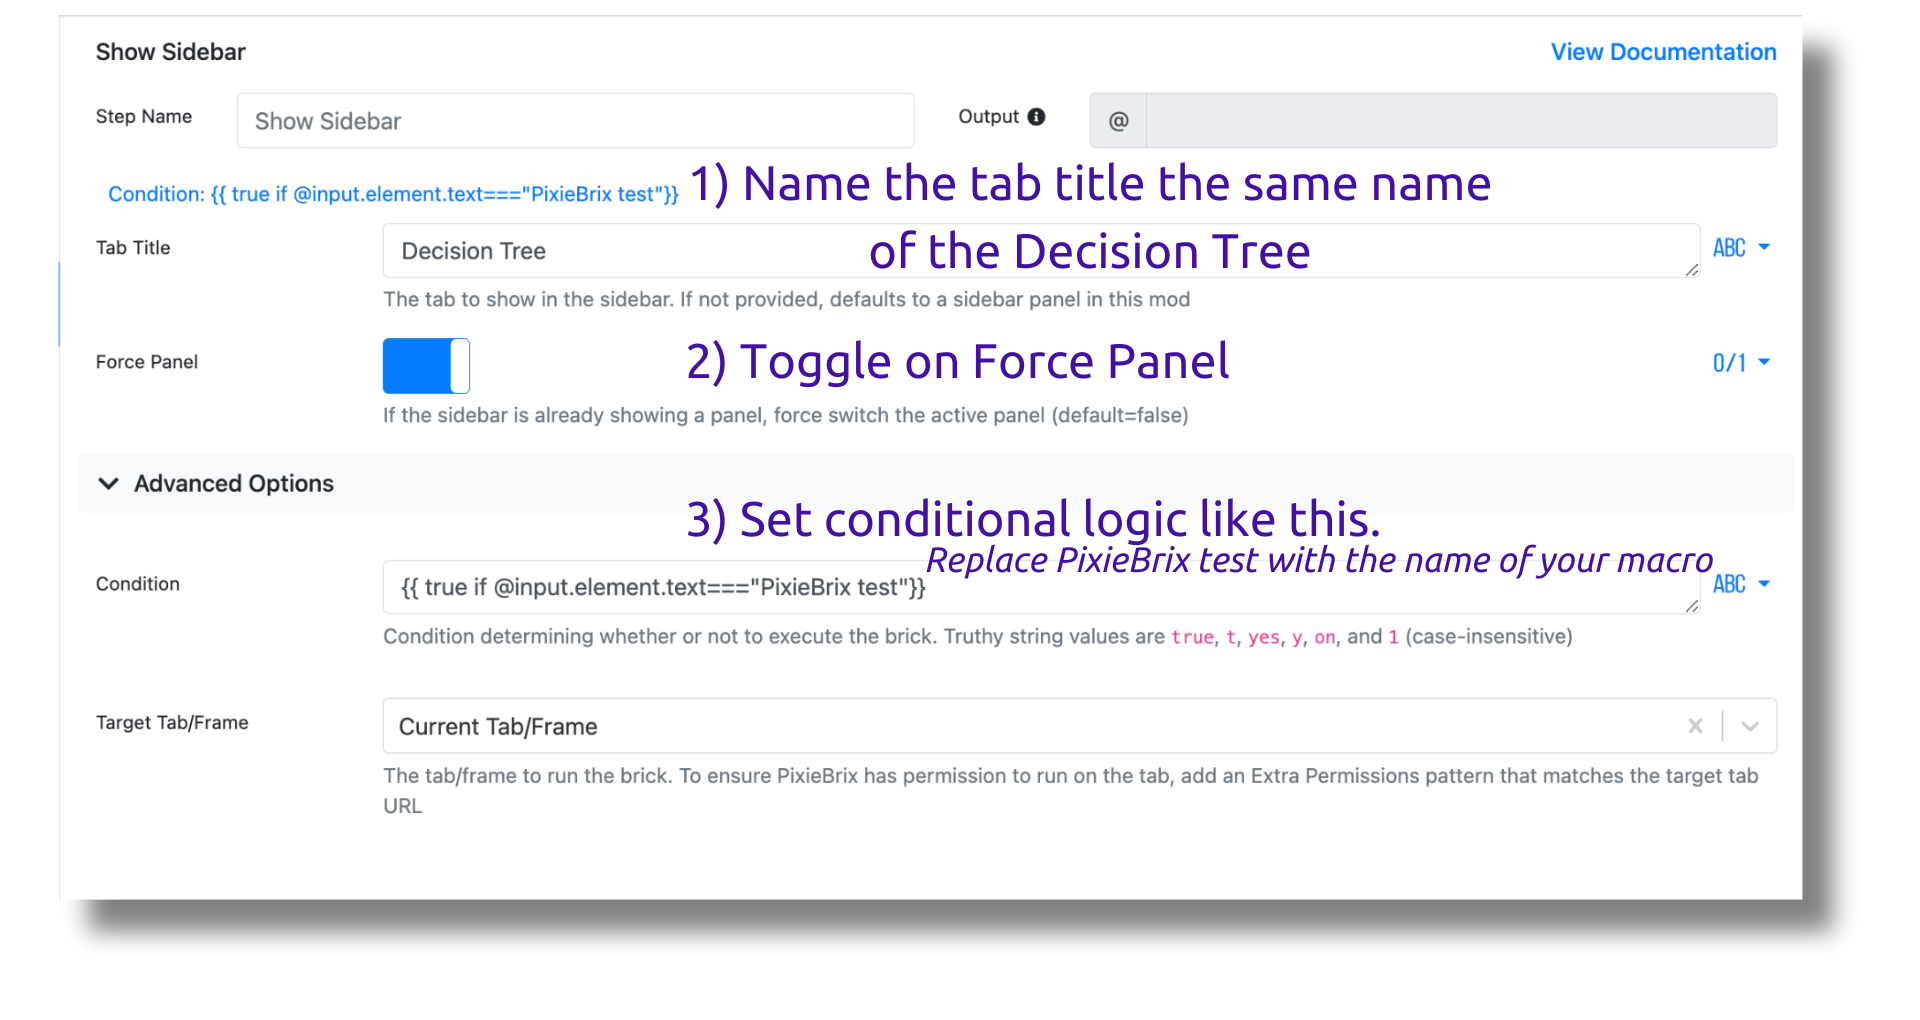
Configure the Show Sidebar brick by specifying the Sidebar tab that you want to open. In our case, it's Decision Tree.
Toggle on the Force Panel option so that this panel will show even if others are active at the moment.
Lastly, you'll need to open the Advanced options section of this brick to set the condition for when this brick will execute. We only want it to show the Decision Tree Sidebar if a specific macro is selected.
Copy and paste this text into the Condition field. Replace PixieBrix test with the name of your macro.
{{ true if @input.element.text==="PixieBrix test"}}When you're done, your Show Sidebar brick should look like this.
Now we just need to move this mod into the same Mod Package as the decision tree, and you'll be ready to roll.
Add to Decision Tree Mod Package and Save
Look on the first panel on the left for the Zendesk Macro mod. Click the three dots and choose Add to mod.
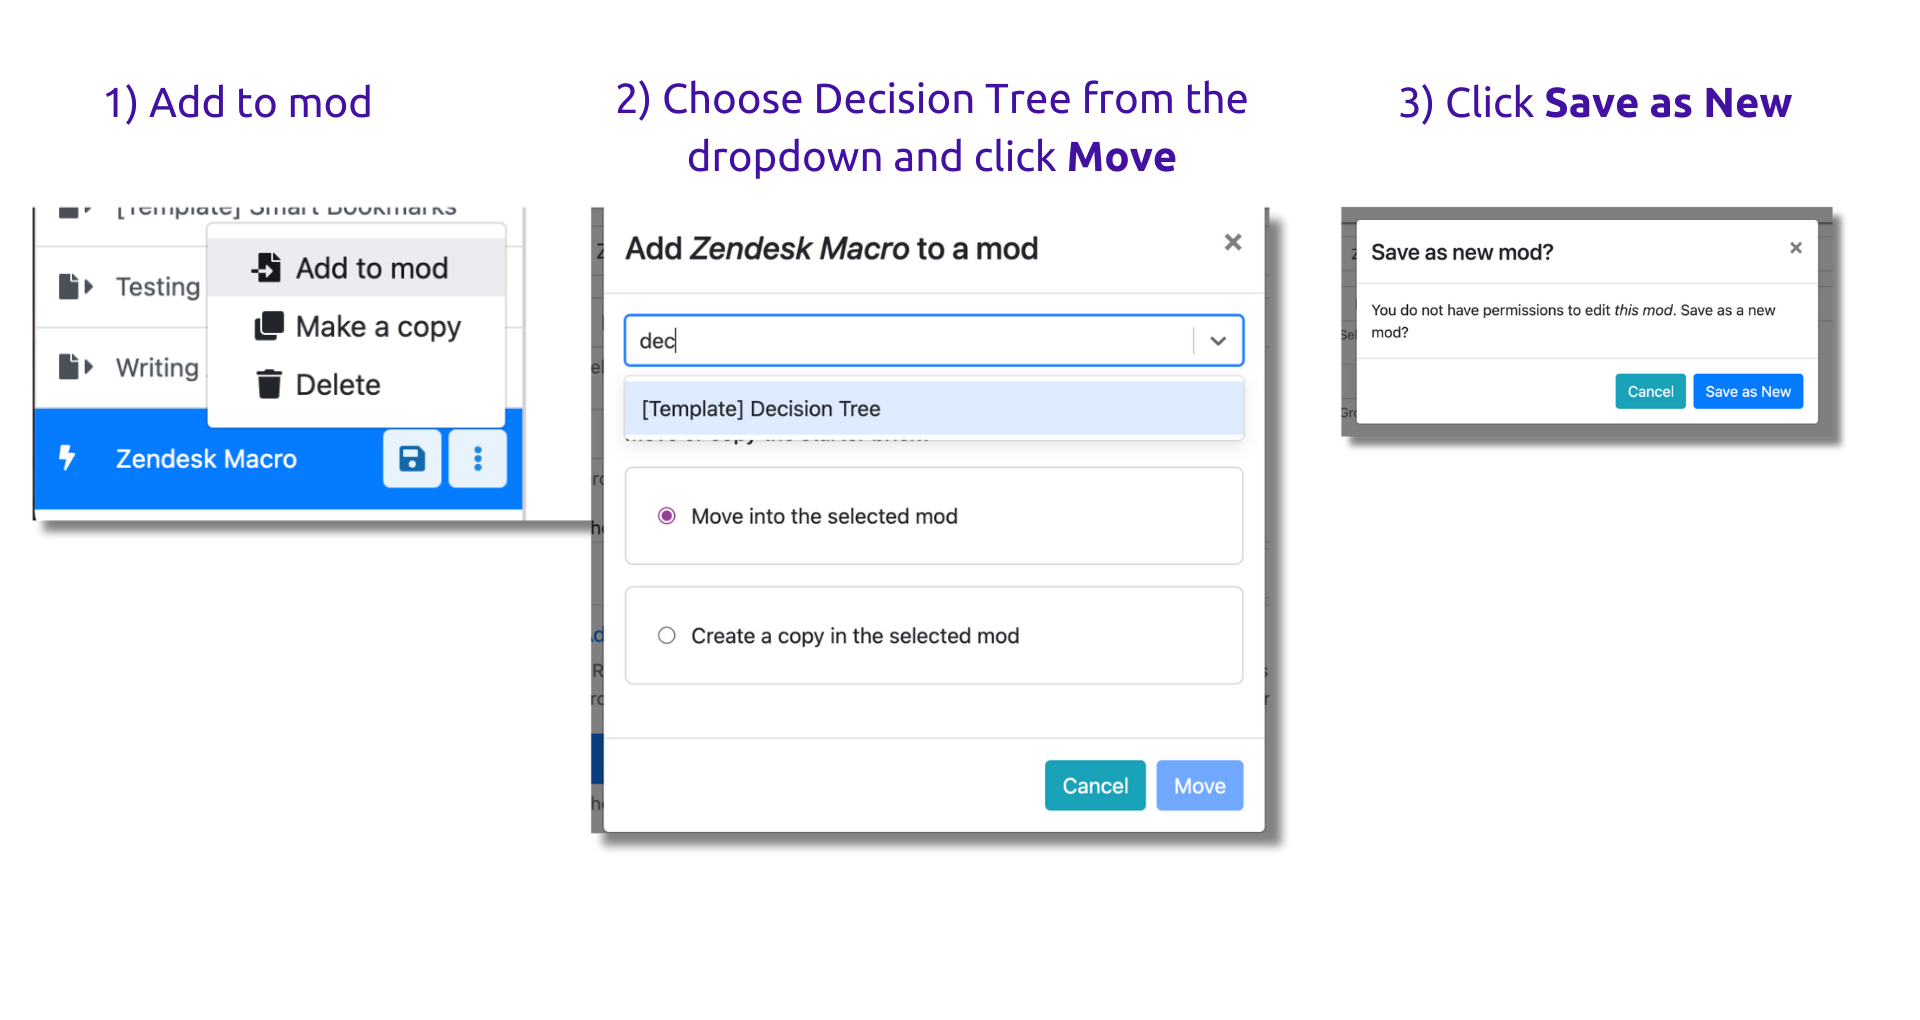
Search for the Decision Tree mod from the dropdown, and click the blue Move button.
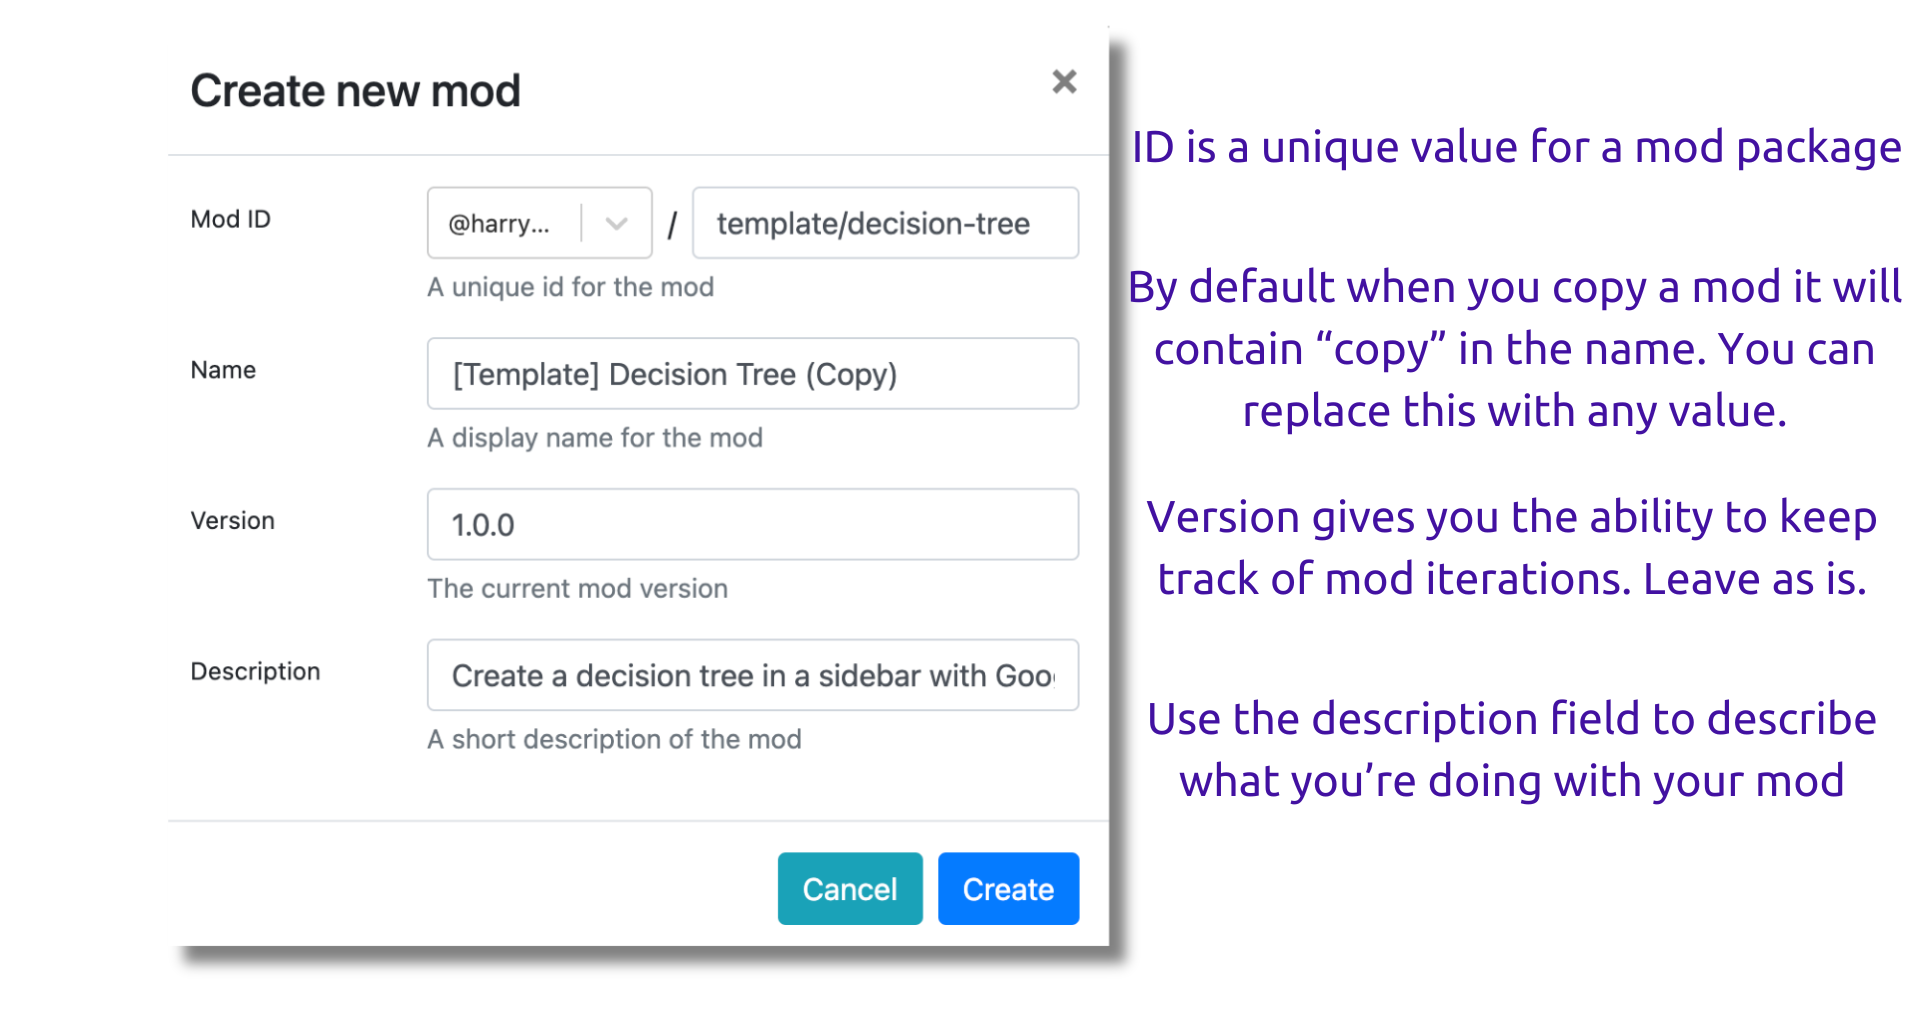
PixieBrix notifies you that you don't have permission to edit the mod template, but you can duplicate it and save it as a new version. Click Save as New.
A modal appears with options for creating your new mod. You can change any of the default values or leave them as is. Click Create when you're done.
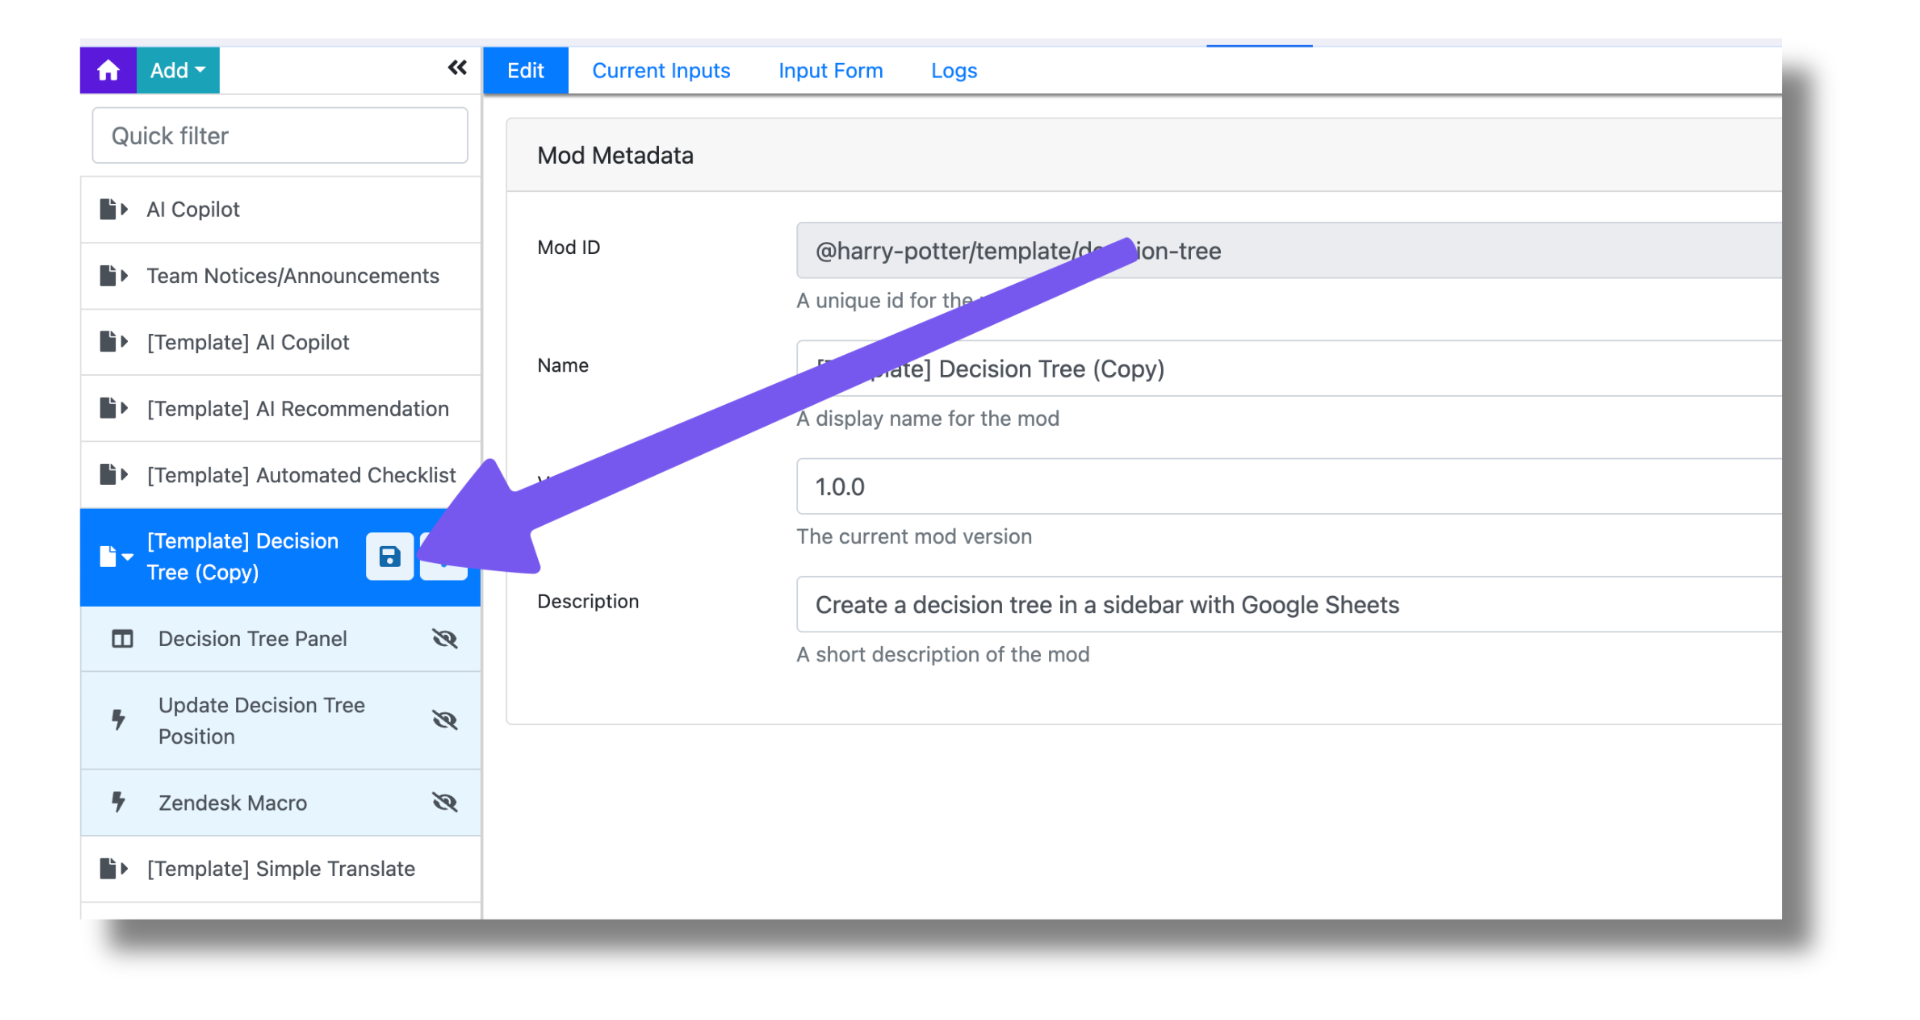
Lastly, in the first panel on the left, click the Save icon on the entire mod package.
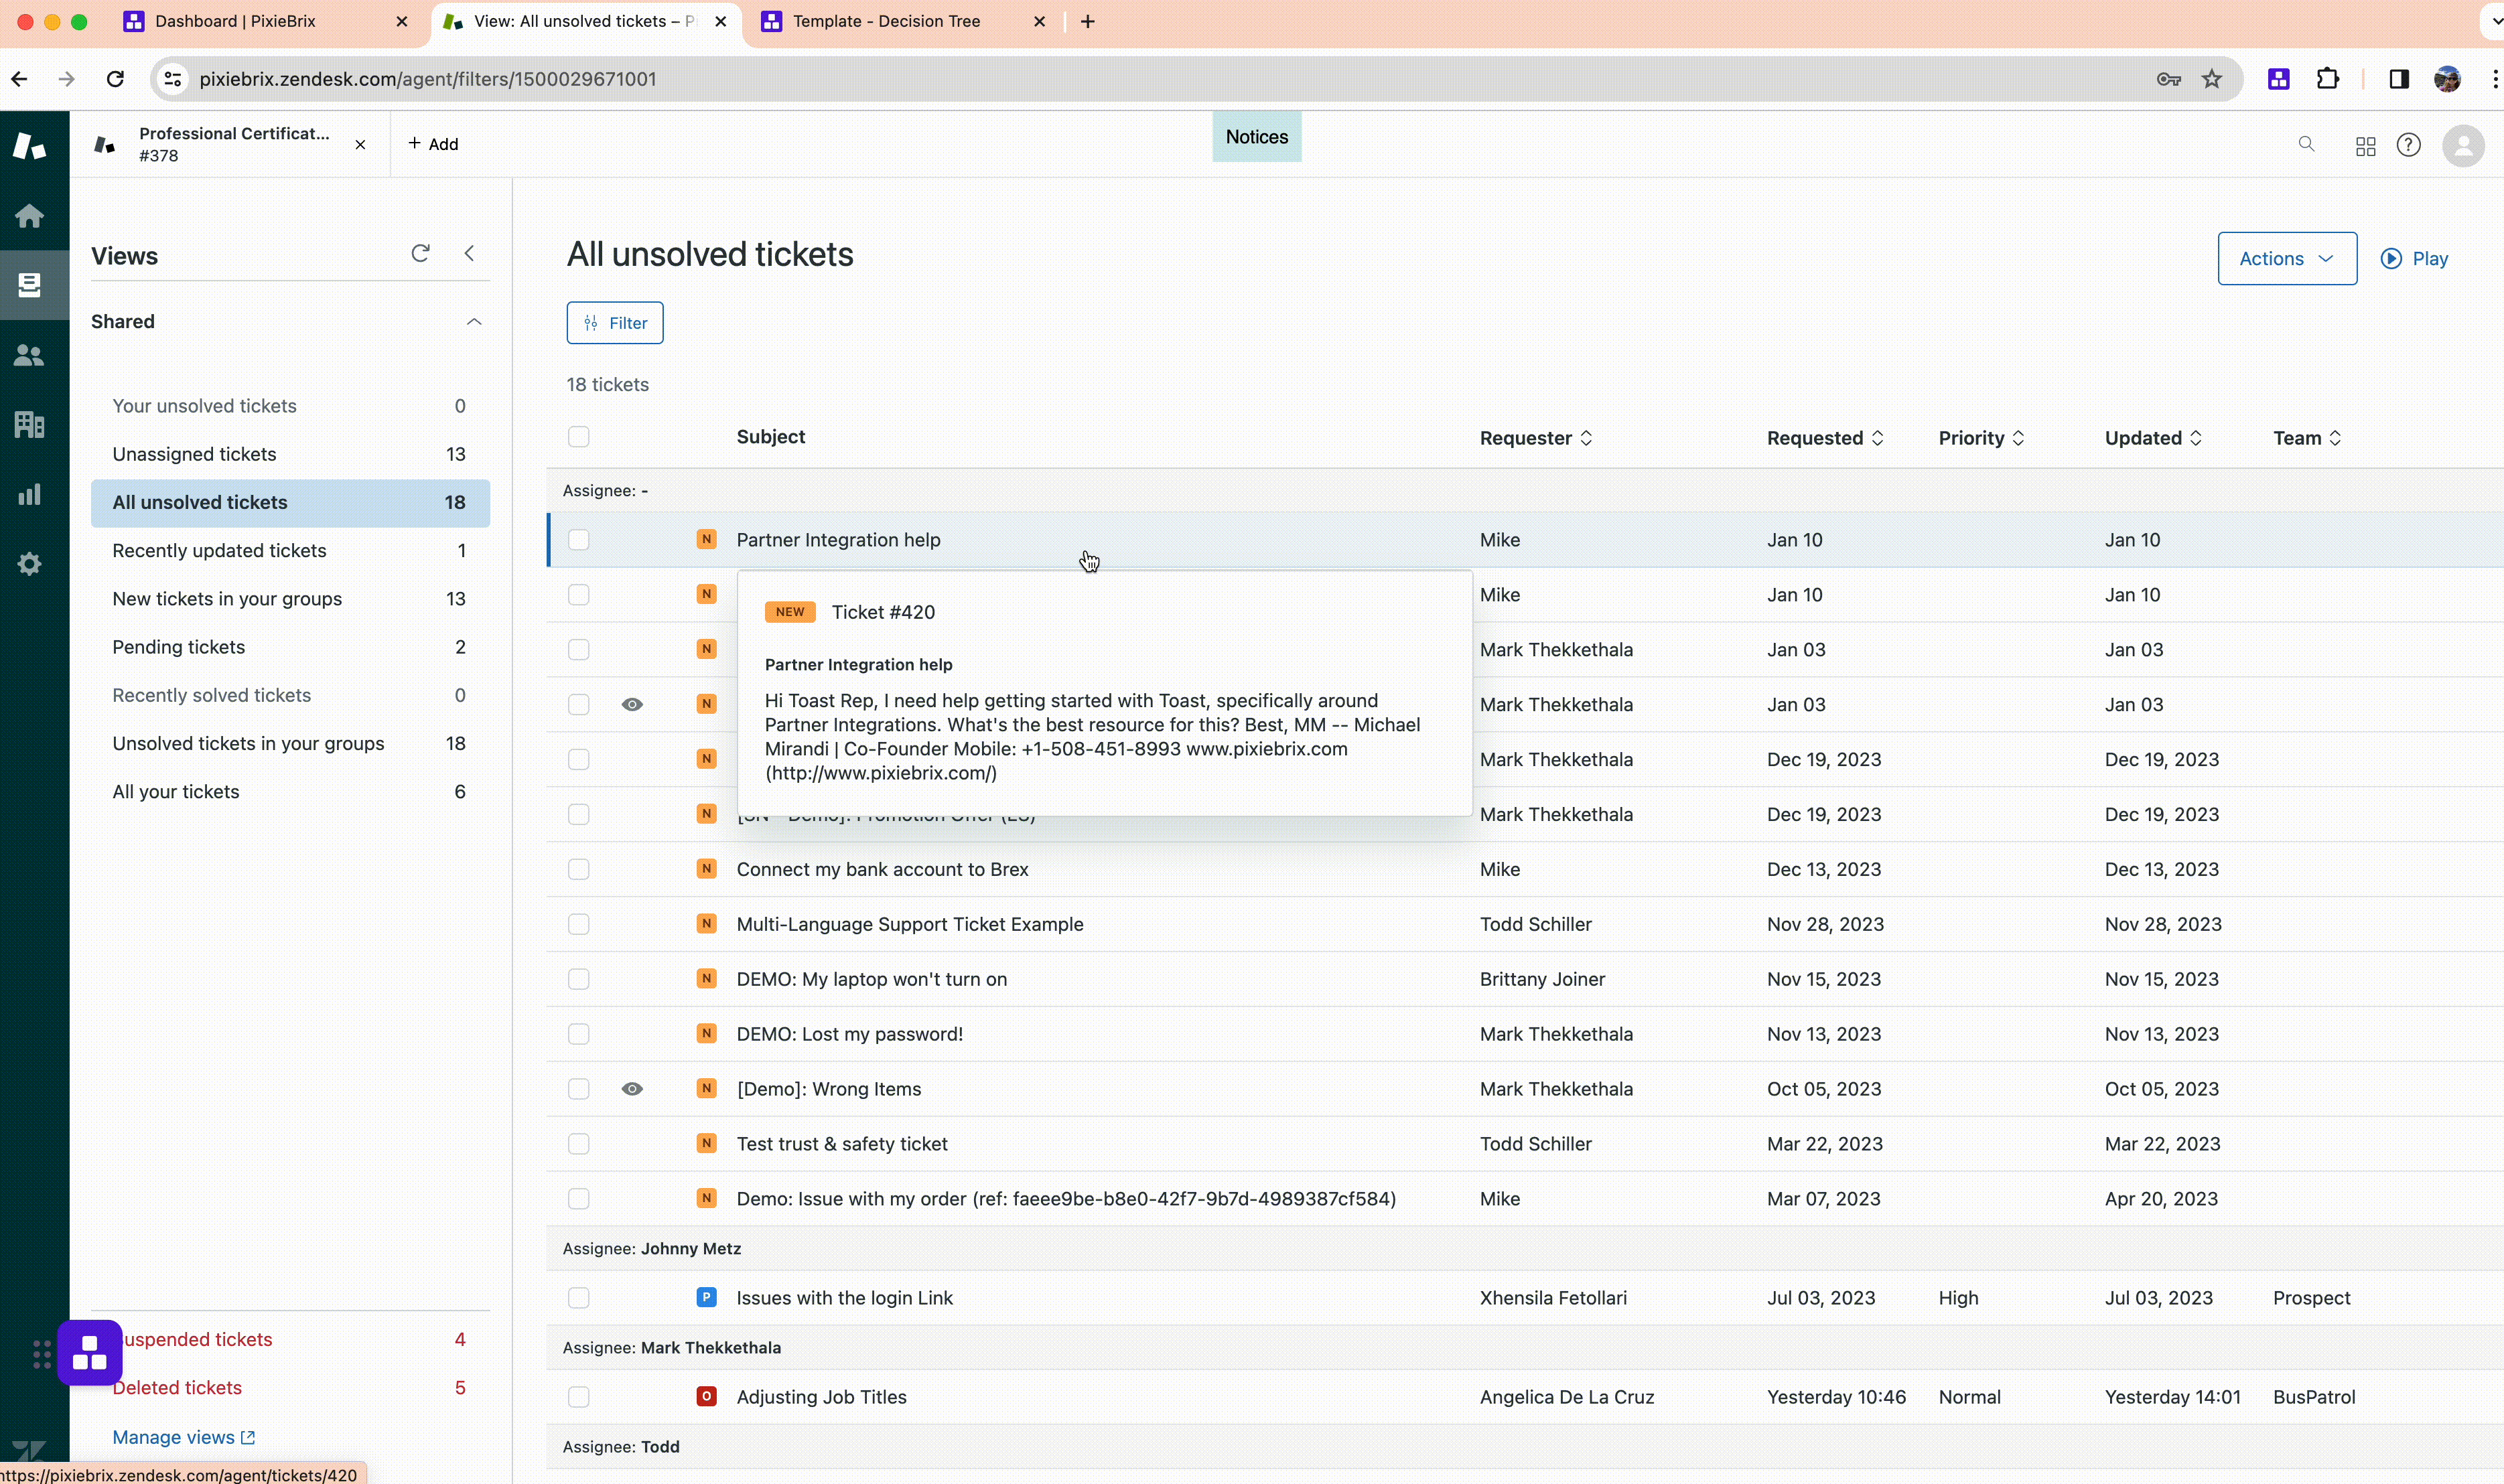
Time to test it out!
From Zendesk, select your macro that you specified in the conditional field of your Show Sidebar brick. Make sure the text matches!
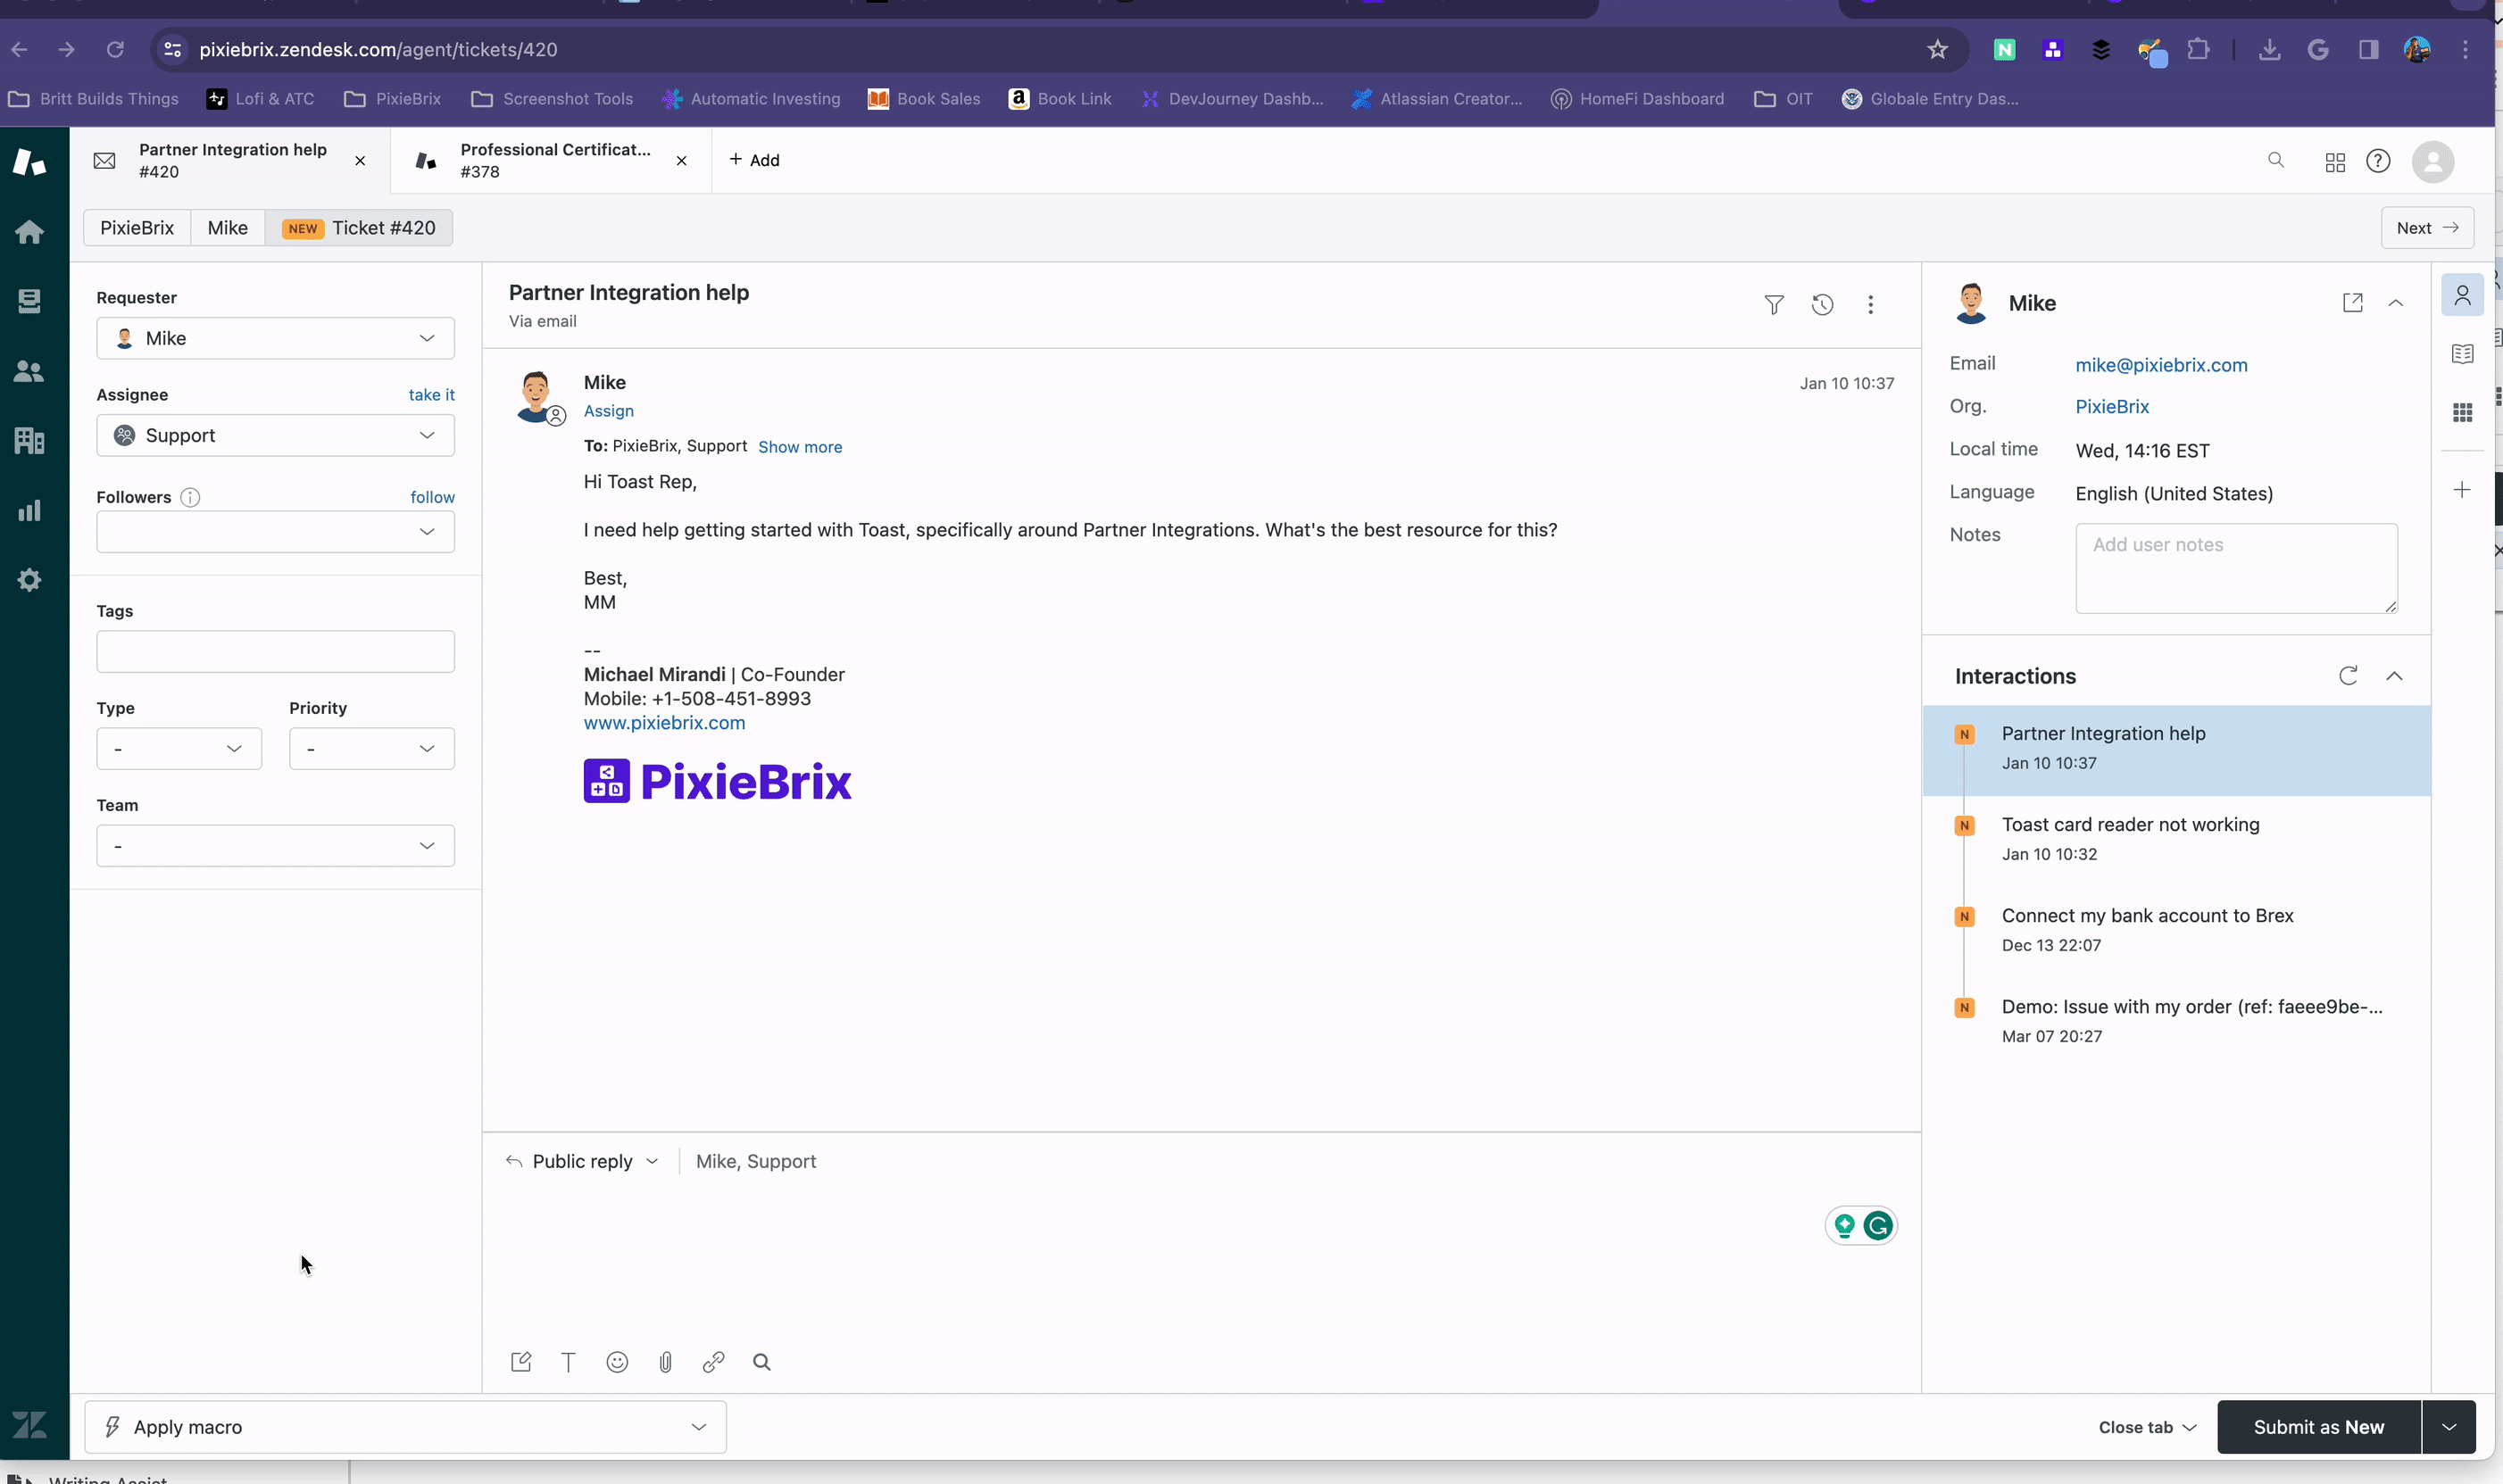
You should see the macro action take place, and the PixieBrix sidebar appears, prompting you to start your decision tree!
This is just the start of all the magic you can build with PixieBrix. If you want to build a sidebar that triggers in other places, or any other webpage enhancements just open up your PixieBrix toolbox!