How to Make Pseudo-Code and Why It Will Help You Build Just About Anything
If you’re new to PixieBrix and you’re not a developer, you might find yourself a little confused by how on earth you’re meant to make some magic happen in PixieBrix. If that’s the case, don’t feel alarmed! I’m going to be doing a series of posts to help people who are NOT developers feel more comfortable in something that might feel a little technical.
So what’s Pseudo-Code?
This is the first post in that series and it’s all about “pseudo-code”, which in and of itself might sound extremely technical, but it’s just a way of thinking about coding in a very non-technical way. In fact, it’s kind of just a fancy word for “workflow”.
When you want to build something… anything… with any tool, programming language, or software, you need to give some sort of instructions. While you might think that developers make a lot of money because they speak “computer language,” programming is really more of a skill of being able to think logically about these instructions and create enough rules so the instructions work every single time without running into any roadblocks or causing any unintended consequences (like when you fix one thing, but it breaks something else).
How do you define and explain pseudocode? We call this pseudo code, which literally means “fake code”, because it’s just a bunch of words (normal ones, that you and I would say over a conversation with friends) that describe what we want to build and how we want it to work.
What Does Psuedo-Code Have To Do With PixieBrix?
If you want to build something with PixieBrix, you might be intimidated if you just jump right into the chrome extension and click around. I’m a developer and even I was a little intimidated my first time couple of times.
It helps to take a step back, think about what you’re trying to accomplish to write some pseudo-code, and THEN try to figure out how to make that happen with tools you have available - like bricks in your PixieBrix mod. I’m going to explain more about pseudo-code, and then walk you through a live pseudocode example of how I used pseudo-code to create an impulse buy calculator with PixieBrix. You’ll see how I “built” out all the logic for it before I even touched anything on my computer!
How to Create Pseudo-Code
Start with a blank canvas. This could be a whiteboard, piece of paper, or even a mind mapping tool like Miro. You just need something to draw thoughts and ideas on and then be able to connect them together. You could even use a Google Doc if you want and just type out your steps.
When you have an idea of something you want to build, think of each action that needs to happen and any dependencies for that action. Then list them out, and move them around to build out your ideal workflow.
As you’re writing it out, you might think of “oh what if this happens?” and “oh it would be cool if when it does this then it could do that”. Don’t worry about how to fix it or how to make things happen at this point. Just write it out!
Eventually, you’ll take that workflow, translate all those words into action, and start building out the small pieces that together make your whole masterpiece! (Could be an app, could be a bookcase, could be a PixieBrix mod!)
Sounds easy enough, eh? Let’s walk through an example of how I did this with my most recent PixieBrix mod: an Impulse Buy Calculator!
Walking Through An Example of Pseudo Code (Impulse Buy Calculator)
Step 1: Whiteboard
Make sure you have something to write on. For me, I like to use my whiteboard 😊

Step 2: What’s the action?
Next, write down what you’re trying to achieve. No need to get philosophical. You’re literally just writing out what you want this “app” to accomplish. For me, I wanted it to calculate the real cost of an item, besides just the price. Write that down.
My goal was: Calculate the real price of an item.
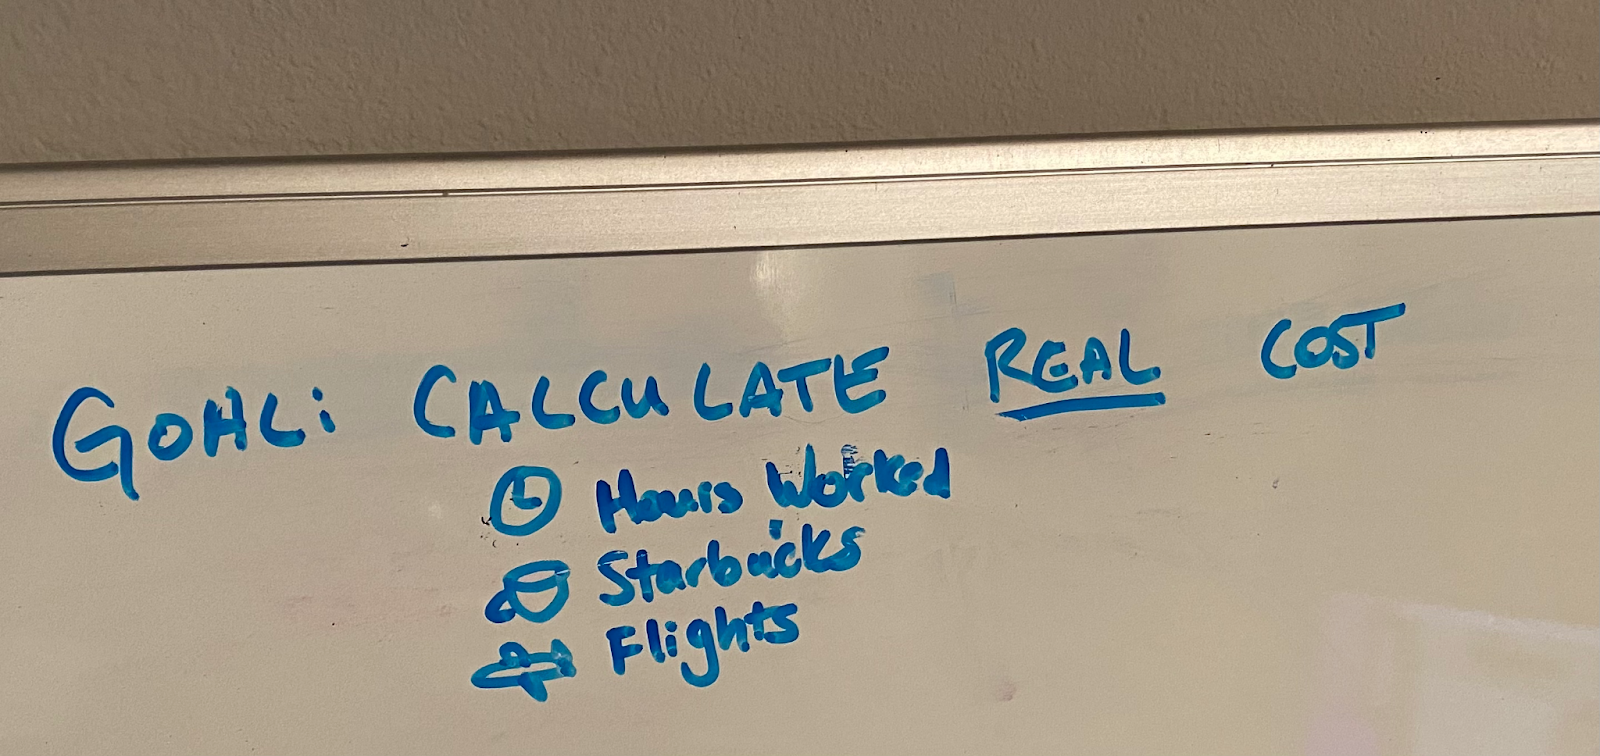
Specifically, I wanted to see how much an item would cost me in terms of hours I’d need to work to pay for it, and the opportunity cost of Starbucks and Flights. Yeah, that’s right - I wanted to see if this item I’m about to buy was worth how many Starbucks I was saying no to. I also love to travel, so I wanted to think of large purchases in terms of how many flights they were worth.
Step 3: When do you want this to happen?
In “technical” terms, we might call this a trigger. When do you want that action you just described to happen? For me, I needed this to happen when I was about to make a purchase. Where do I do a lot of my online purchasing? On Amazon. And when do I start to make a purchase? When I’m on a product page and start to click that buy button.
Write down this piece, as it’s going to be your starting point, and step 2 is your endpoint! Now all you have to do is figure out the steps to connect those two pieces!
Step 4: Connect the dots
Easier said than done. You might find it helpful to start from the goal and work backward. Each step should be something you need to get to the next step.
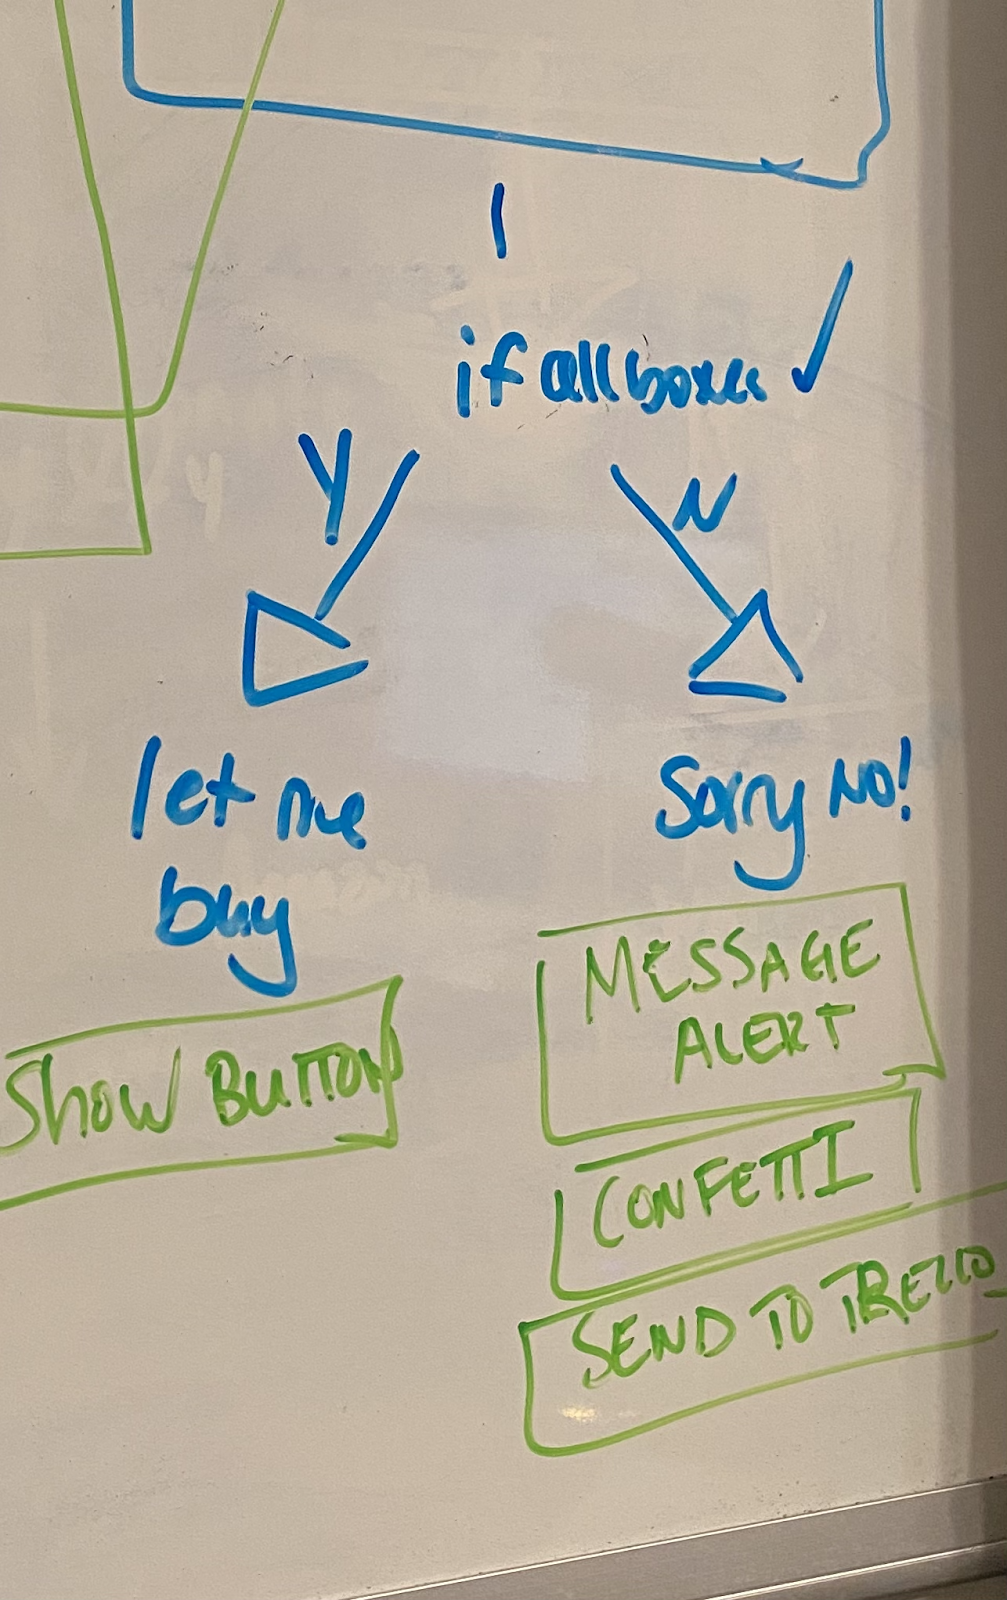
I knew I wanted to be able to actually buy something if and only if I was okay with the calculations I saw about the “real” cost. So I wanted something to show those actual numbers to me and force me to “accept” it at the end if I wanted to be able to move forward with the purchase.
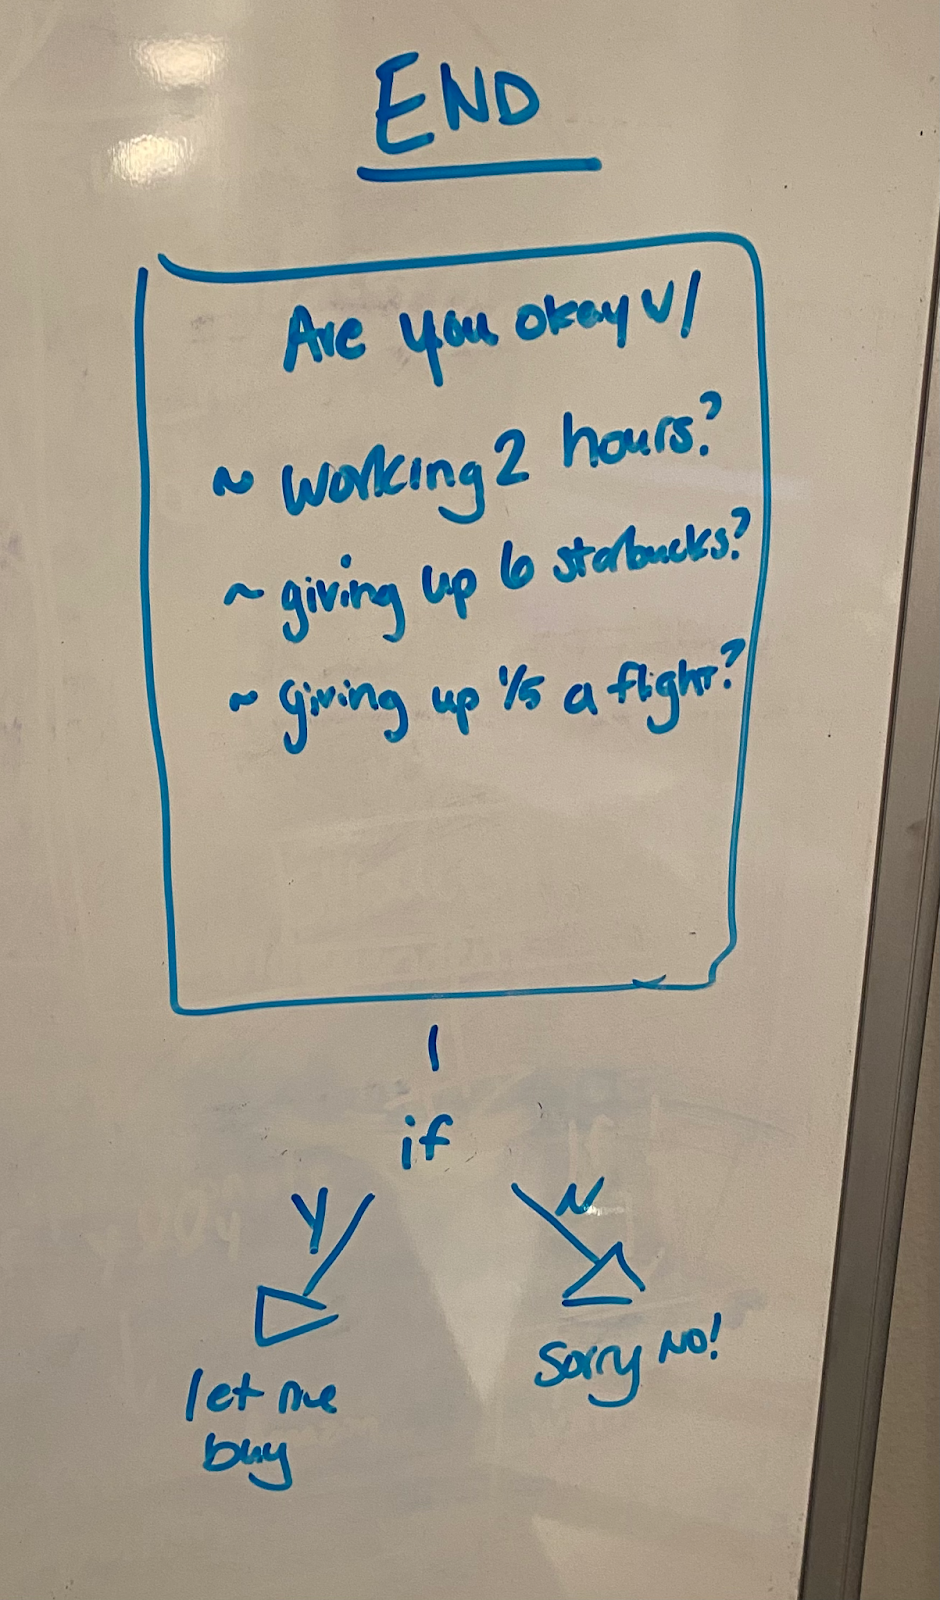
So working backward from that… what do I need to know to be able to calculate how many hours it would take and how many Starbucks and flights an item was worth?
This is where I stopped thinking about the code or the app for a second and asked myself “how would I answer this question if I was at the store?” (Because I often try to do this math in my head when I am in stores). I would take the price of the item I was considering, and then divide it by my hourly rate to get my “hours worked” cost, and then I would take the price divided by $5 (the average cost of Starbucks) and see how many Starbucks it would be worth. (Same process with flights.)
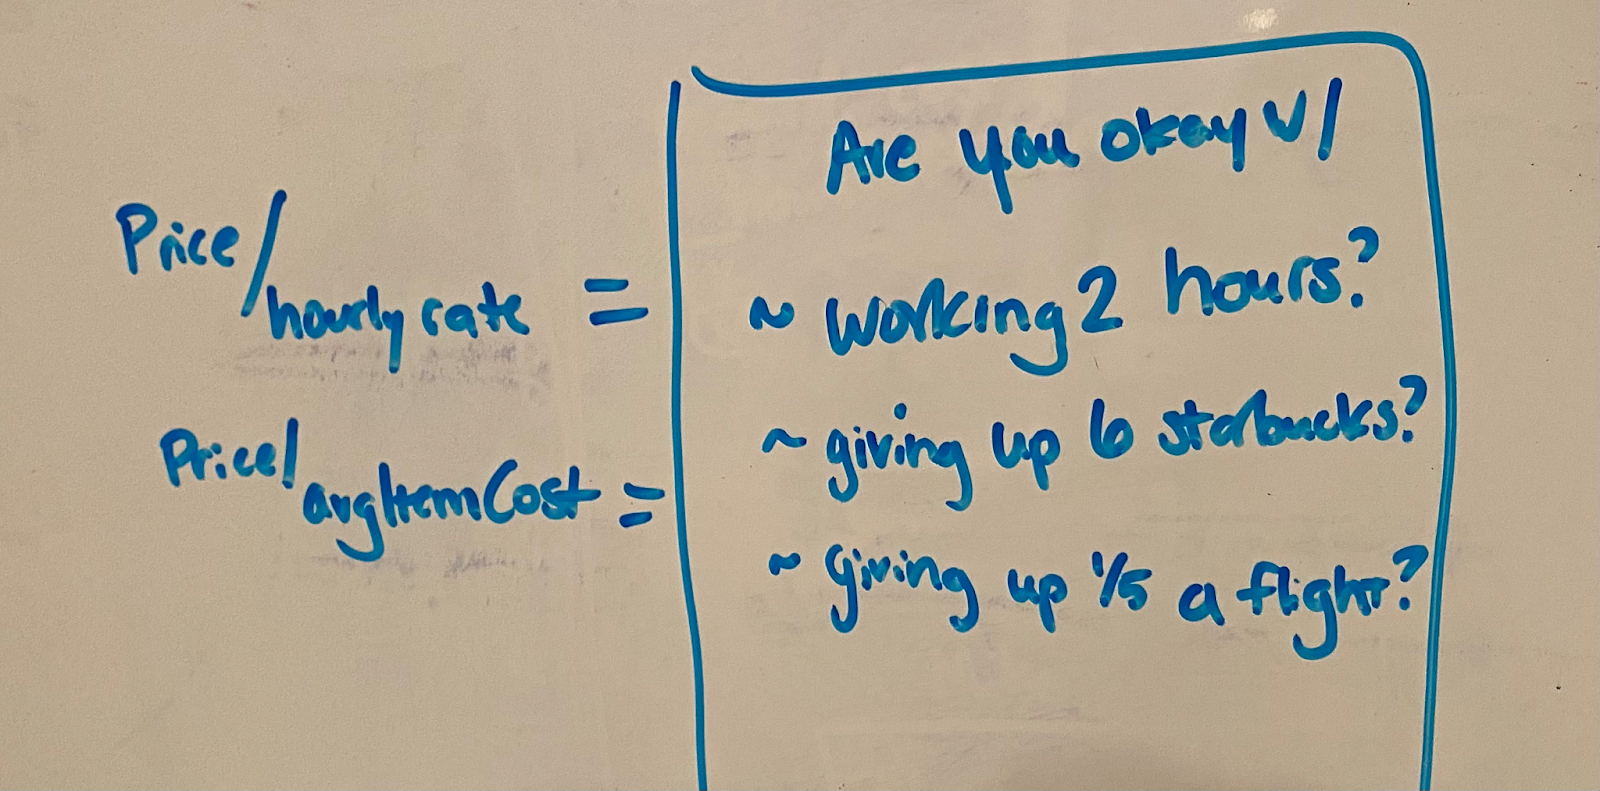
So to put that in psuedo-code, it’s a simple formula!
Price / hourly rate = working hours cost
Price / average item cost = opportunity cost (aka how many starbucks/flights id be missing out on)
Now, keep going!
I asked myself, what do I need to be able to calculate those things? I needed:
- Price of the item in question
- My hourly rate (which is your annual salary divided by 2000)
- Average cost of my comparison item (starbucks)
- Average cost of my second comparison item (flight)
I put these in blocks, because the next step would be to determine where to get that info from.
Step 5: Figure out how to implement each step, one at a time
So by this point I roughly had my framework. I needed to go from a product page, to get certain variables, to then use my formula to calculate a few things, and then to show me the results of those calculations and give me a way to confirm them.
Around this time is when you might start to think about what language or tool you’ll be using because you’re turning the “what’ into “how”.
This is where the magic happens. You still don’t need to know exactly the words you’ll use or how you’ll do it, but you want to start figuring out which pieces are roughly involved and a general idea of how you’d achieve it. Don’t worry about the exact wording of your code (or what we call “syntax”), just think about things you know and how to make them work.
For example, I knew I wanted to build this with PixieBrix. I drew out my workflow and tried to think through what types of bricks I’d use to accomplish each step. It looked a little like this.
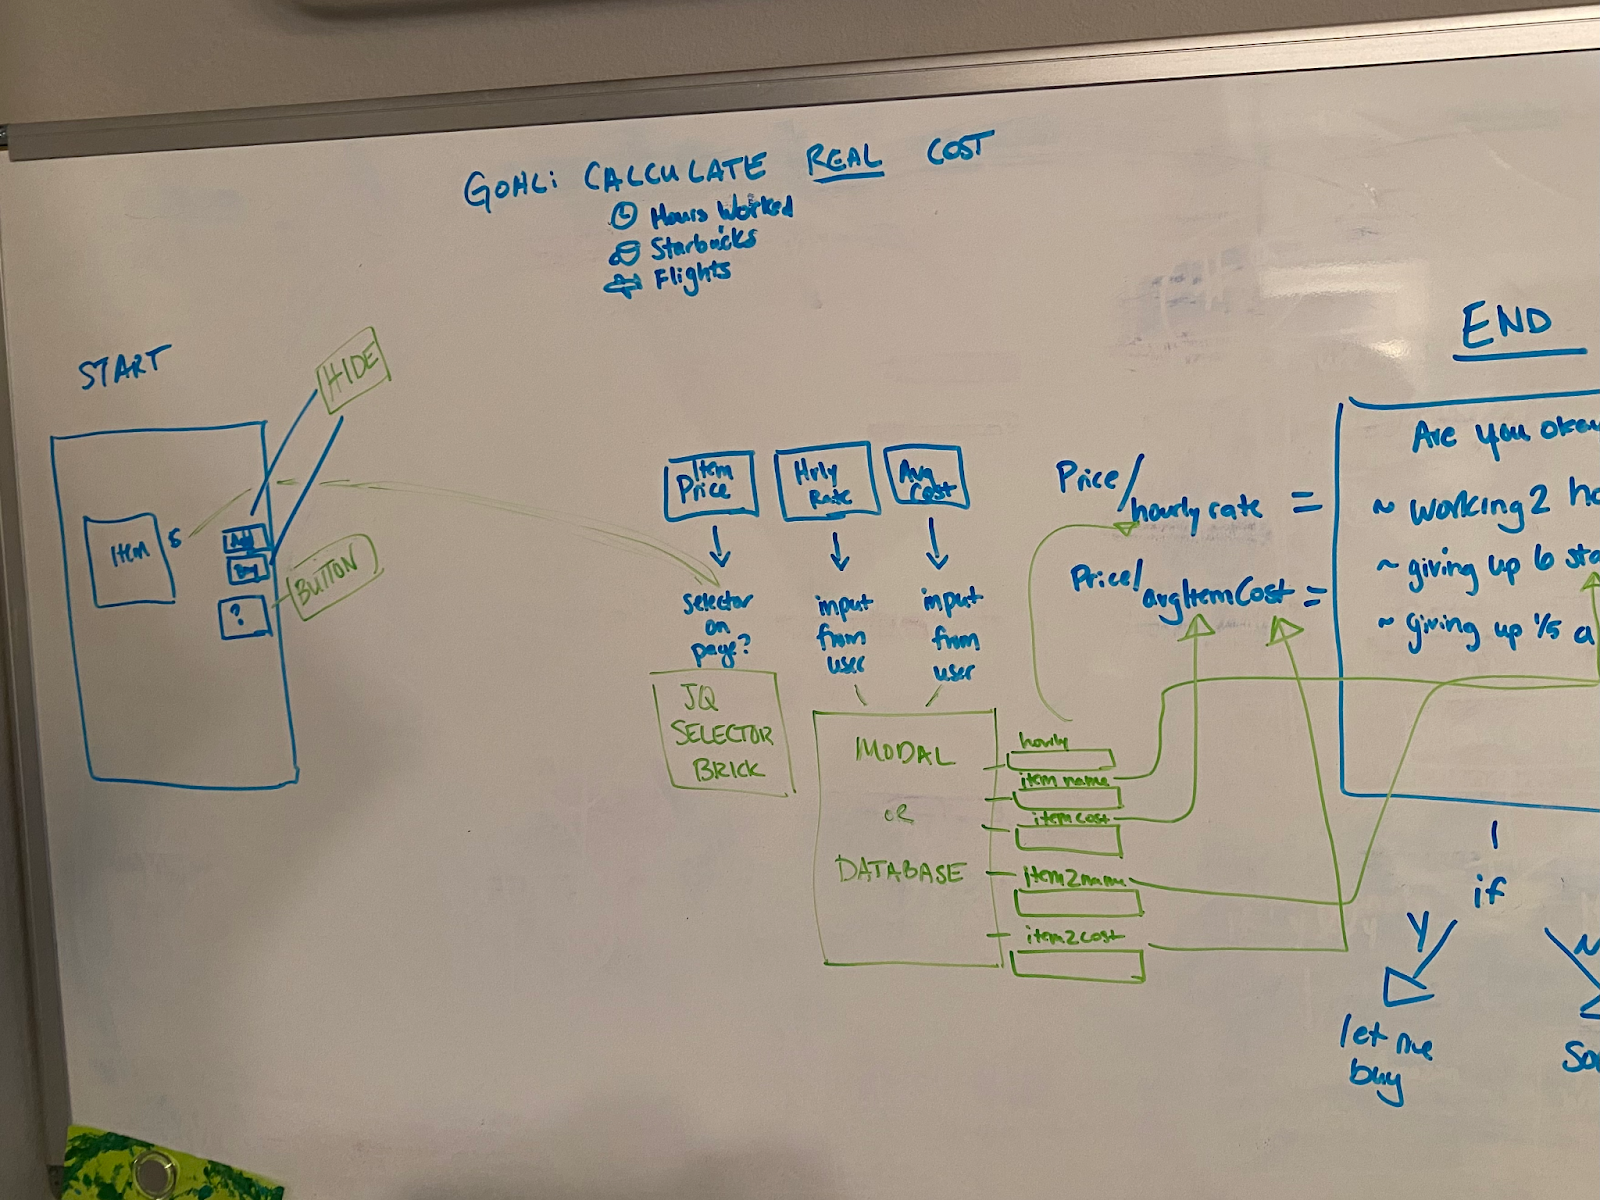
It actually looks kinda like a workflow now!
I also had some extra ideas of what should happen if not all all the boxes were checked for that “end” calculation page.
So now, all I had to do was basically “translate” all of that pseudo-code into bricks in PixieBrix!
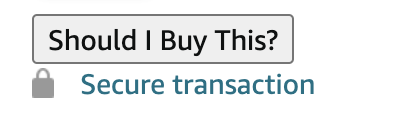
Was it that simple? Nah. I still had to figure out a few things along the way, like how to select the right element to hide those buttons on Amazon pages and how to style my button to look like this:

And not like this
I had to figure out how to let people set and save that information about hourly rate, opportunity cost item and its cost.
But don’t worry, I had some help along the way! The PixieBrix team was really great at helping me take my pseudo-code and turn it into actual bricks and figure out exactly what I needed to make it happen.
Try This Next Time You Want To Build Something!
So next time you want to build something, try to step away from the computer and head to a blank canvas to pencil out your thoughts. You’ll find it much easier to come back to the computer and then plug that in.
If you get stuck at any point, or if you have any idea but need help thinking of the pseudo code to build something, head over to the PixieBrix community and post your idea. Many of us will be happy to jump in and help!