Using the PixieBrix Sidebar to Focus on What's Due Now
I built a browser sidebar with PixieBrix that shows me what cards are due today no matter what website I'm on. It's a great reminder that, if I've got a tab open, it better relate to something that's due.
It's easy to get sidetracked with all the tasks you have on your plate. It can feel really overwhelming to know everything you need to do but to be unsure where to start.
I'm an avid Trello user and love to keep track of everything in my Trello boards. I have — quite literally — thousands of cards with pretty much every idea I've ever had. Some are prioritized into my Life Dashboard, but even then I have a lot of cards. And while it's easy to filter my board in Trello to see which cards are due soon, that's only helpful if I'm actually inside Trello.
Which is why I built a browser sidebar with PixieBrix that shows me what cards are due today no matter what website I'm on. It's a great reminder that, if I've got a tab open, it better relate to something that's due.
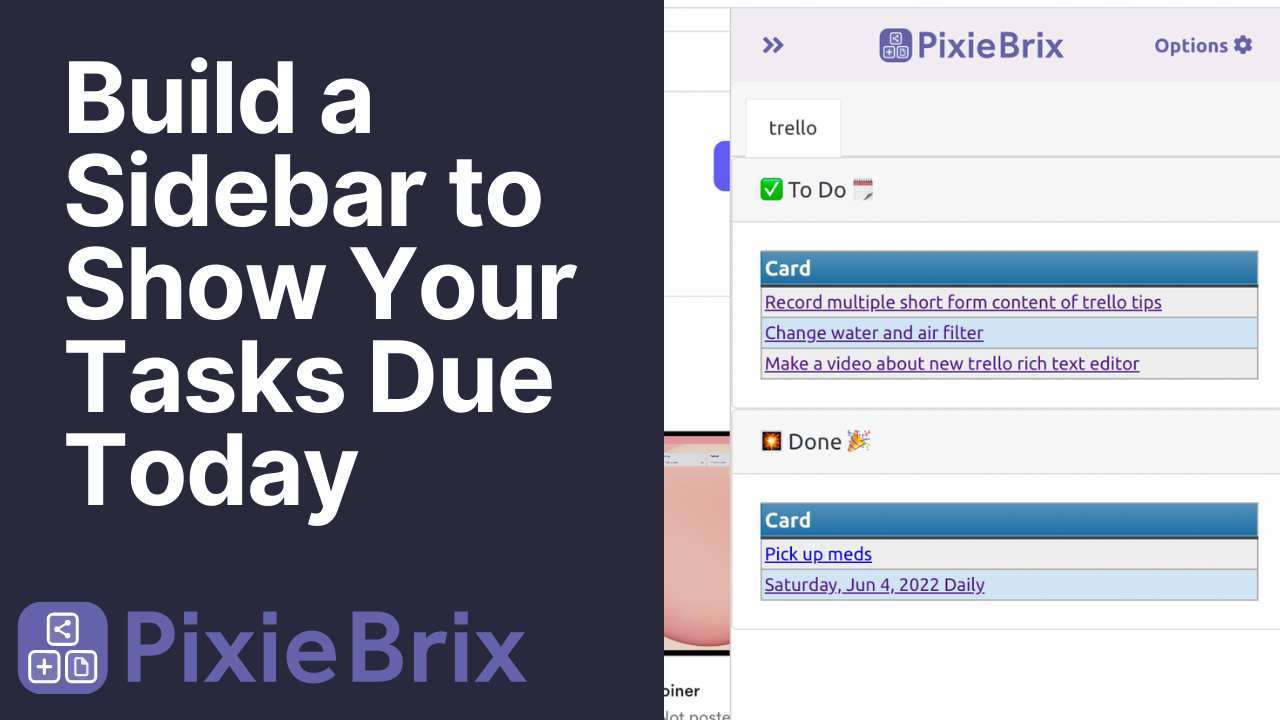
Here's how it looks
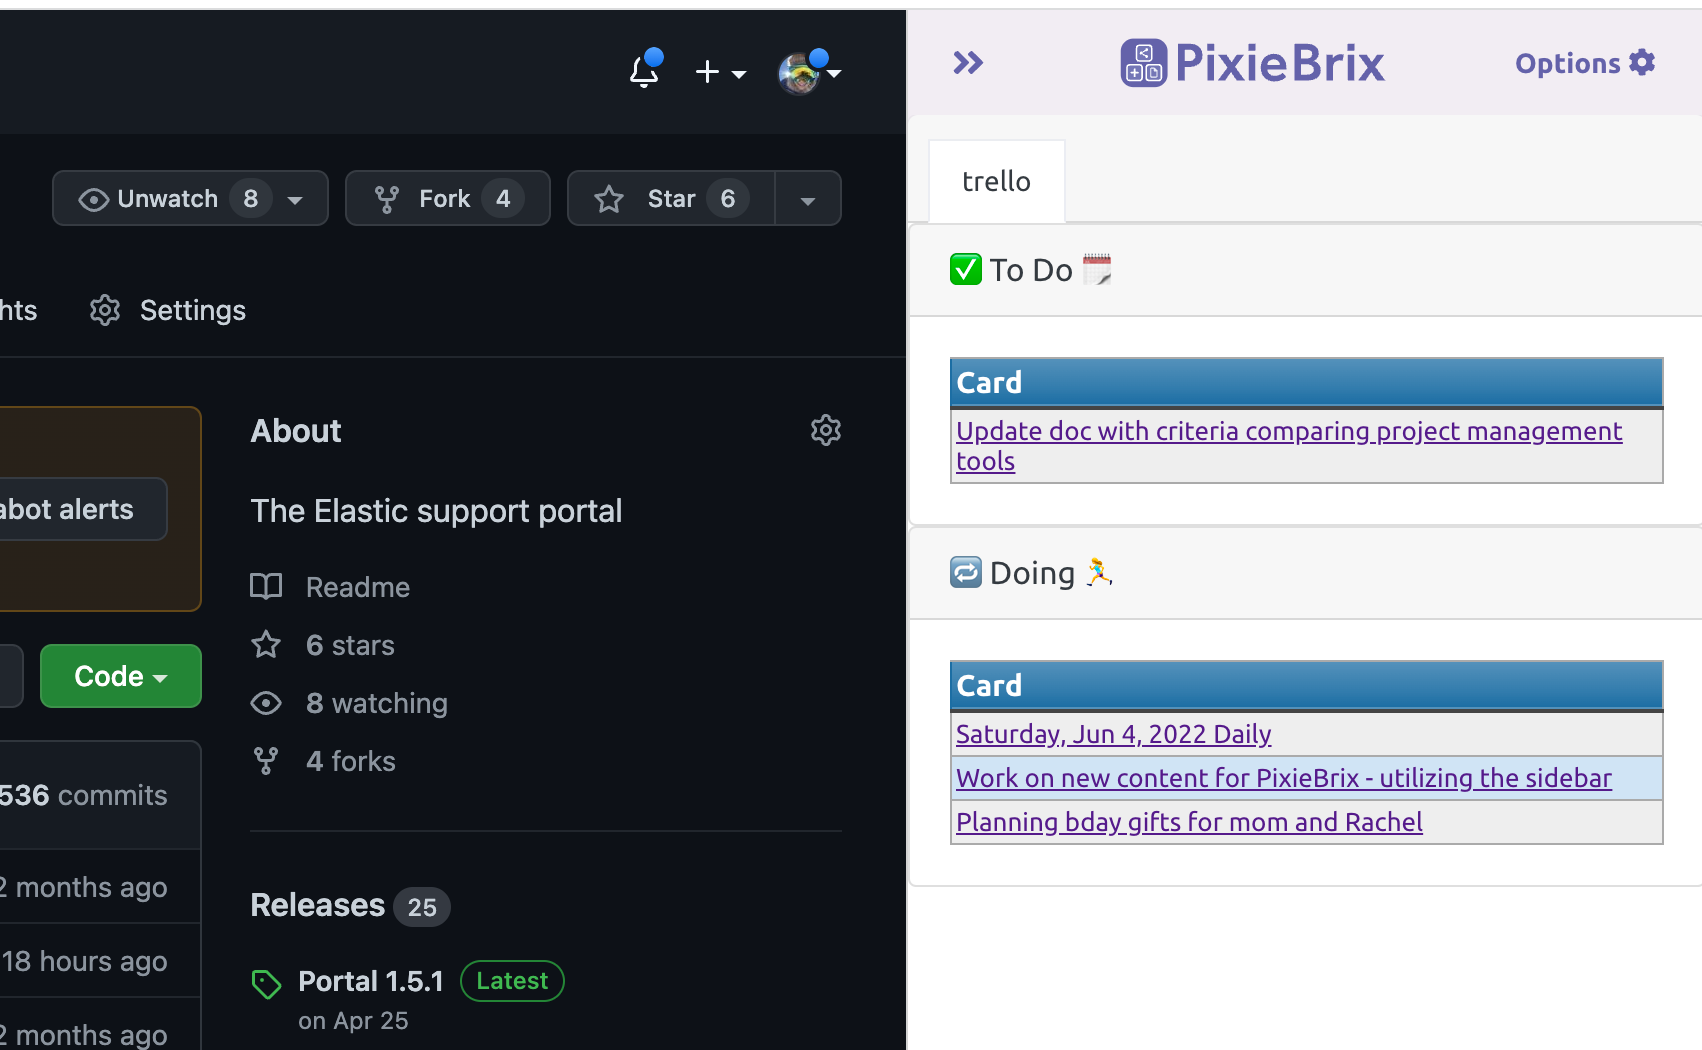
This sidebar is accessible anytime I load a webpage and reminds me of what cards I have queued up for the day. If I need more clarification, I can click the links to go straight to the cards. It even shows me which list they're in to help me categorize them.
Here's how to build it yourself
I created two mods to make this work. One to actually render the content in the side panel and another to bring up the side panel anytime I open a webpage.
Start by rendering the content in the side panel. This one might seem complicated, but you're really just doing a couple things:
- Getting the current date
- Getting a list of Trello cards due on the current date
- Displaying those in a table with the name and links for those cards
Prefer to watch? Here's a video showing you exactly how this works.
Step 1: Add a sidebar panel
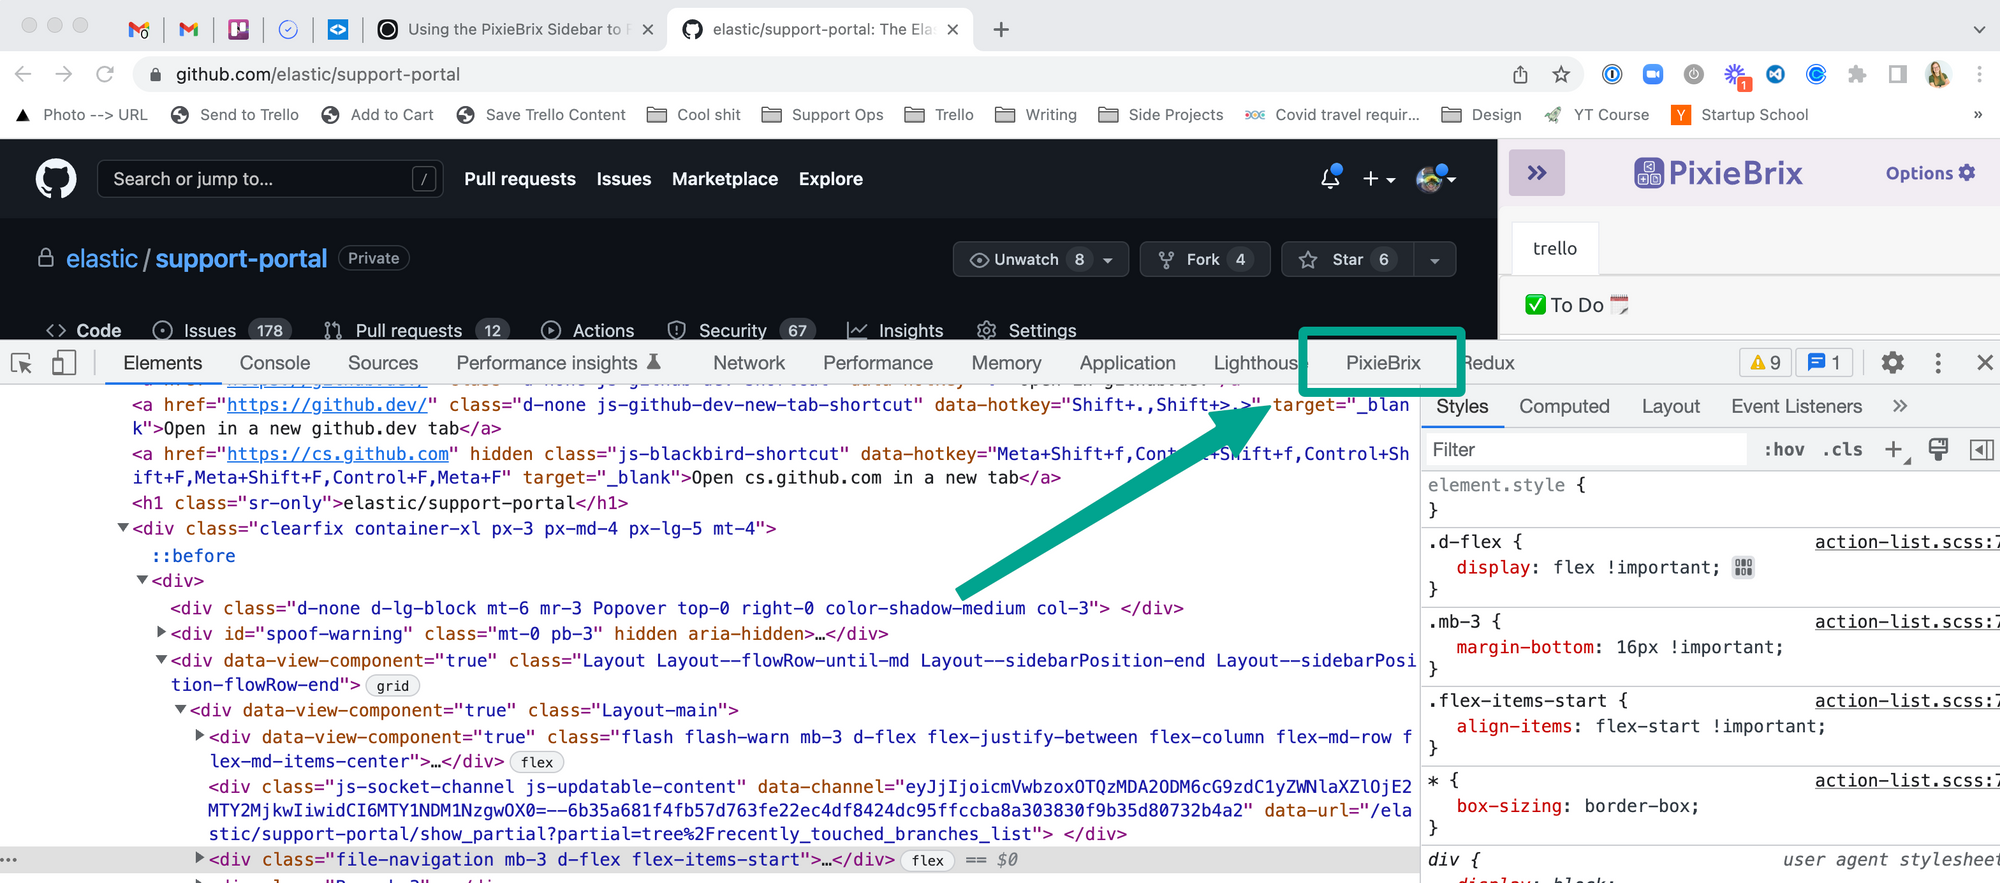
Make sure you've added the PixieBrix Chrome Extension and created your account. Load up the page editor in Chrome by right-clicking any webpage, then selecting "Inspect" followed by PixieBrix.
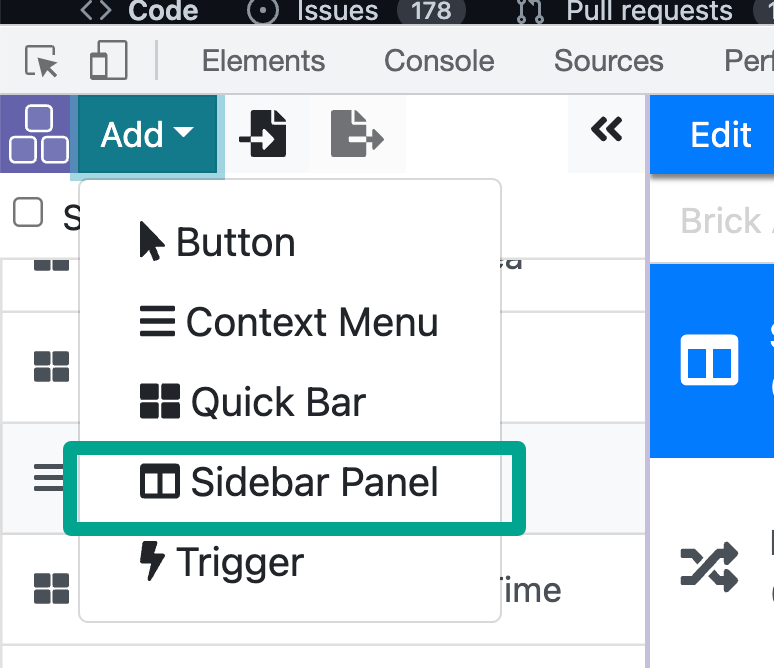
Click the button on the left that says Add, and select Sidebar Panel.
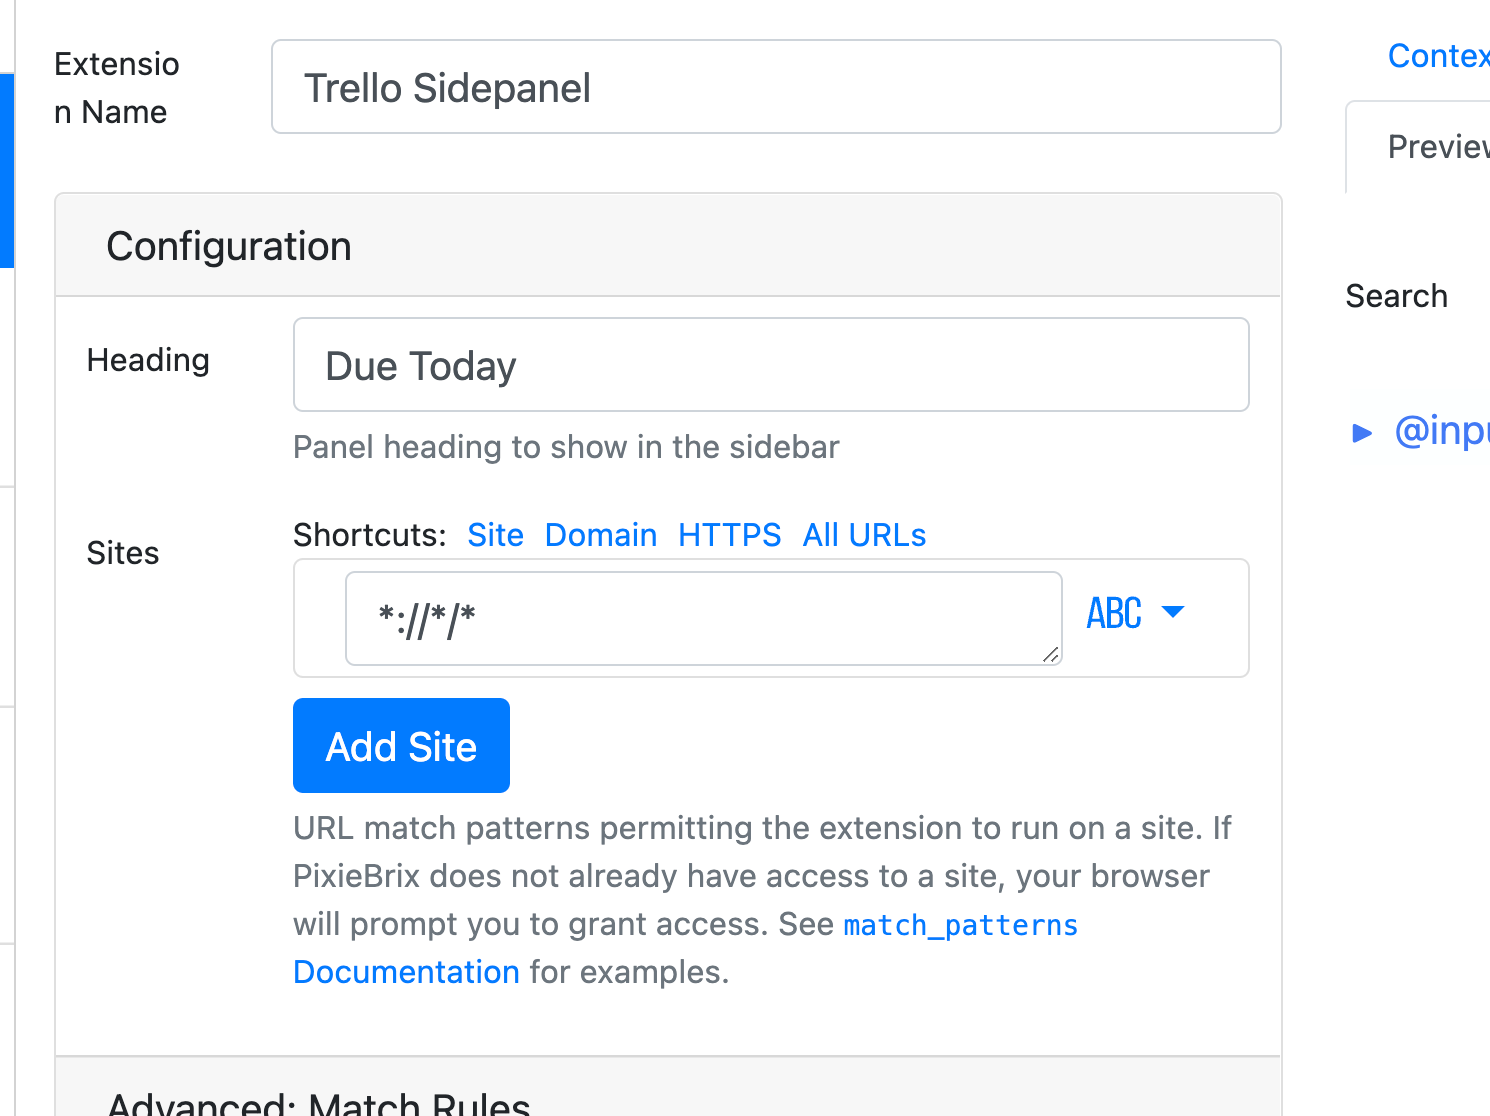
From there, you'll just name your mod (I called mine Trello Sidepanel) and give it a heading that will show up in your sidepanel. Then select the configuration for "All URLs" in the Sites section.
Step 2: Get the date
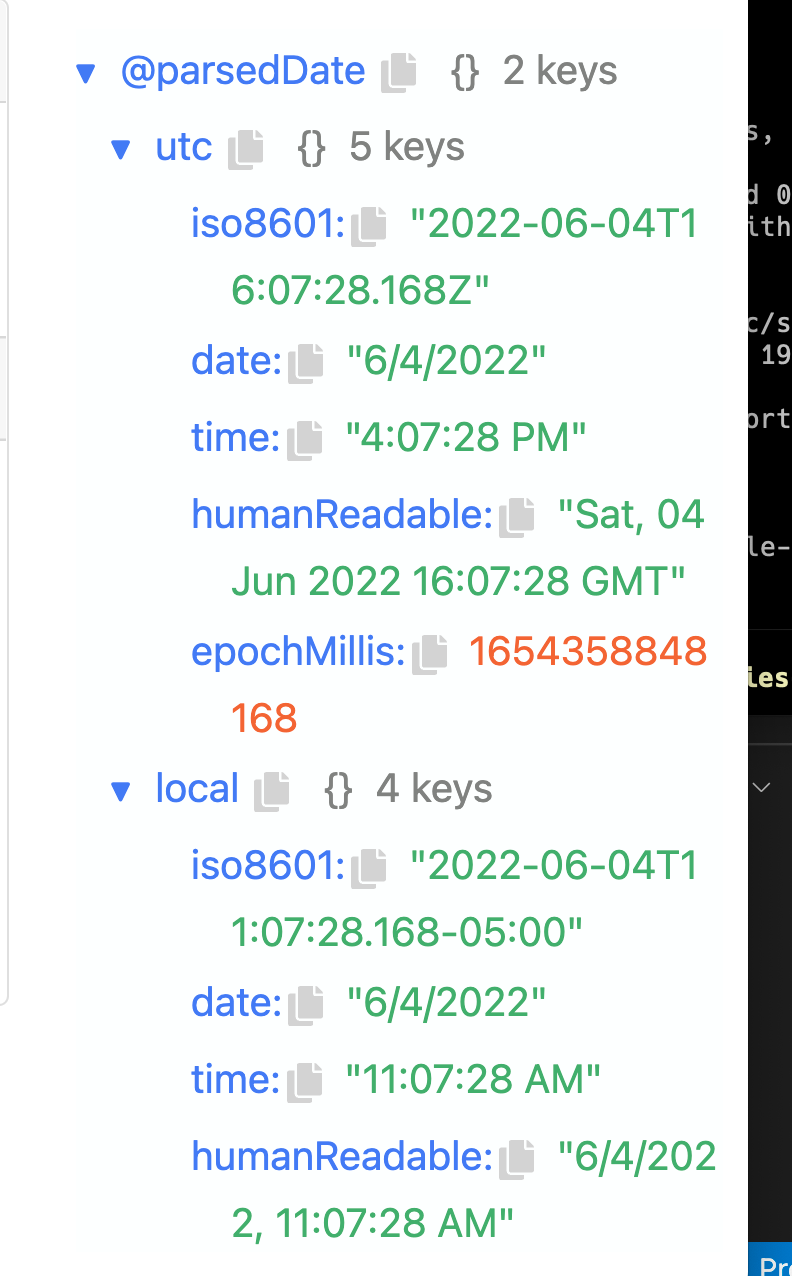
Have you used the Parse Date brick yet? It's basically magic. Just add this brick, and type "now" in the Date. This will give you an object with just about anything you could want for the date — like various formats, local time, timezones, etc.
You'll reference this date later when we want to look for cards that are due today.
Step 3: Get all your Trello Cards
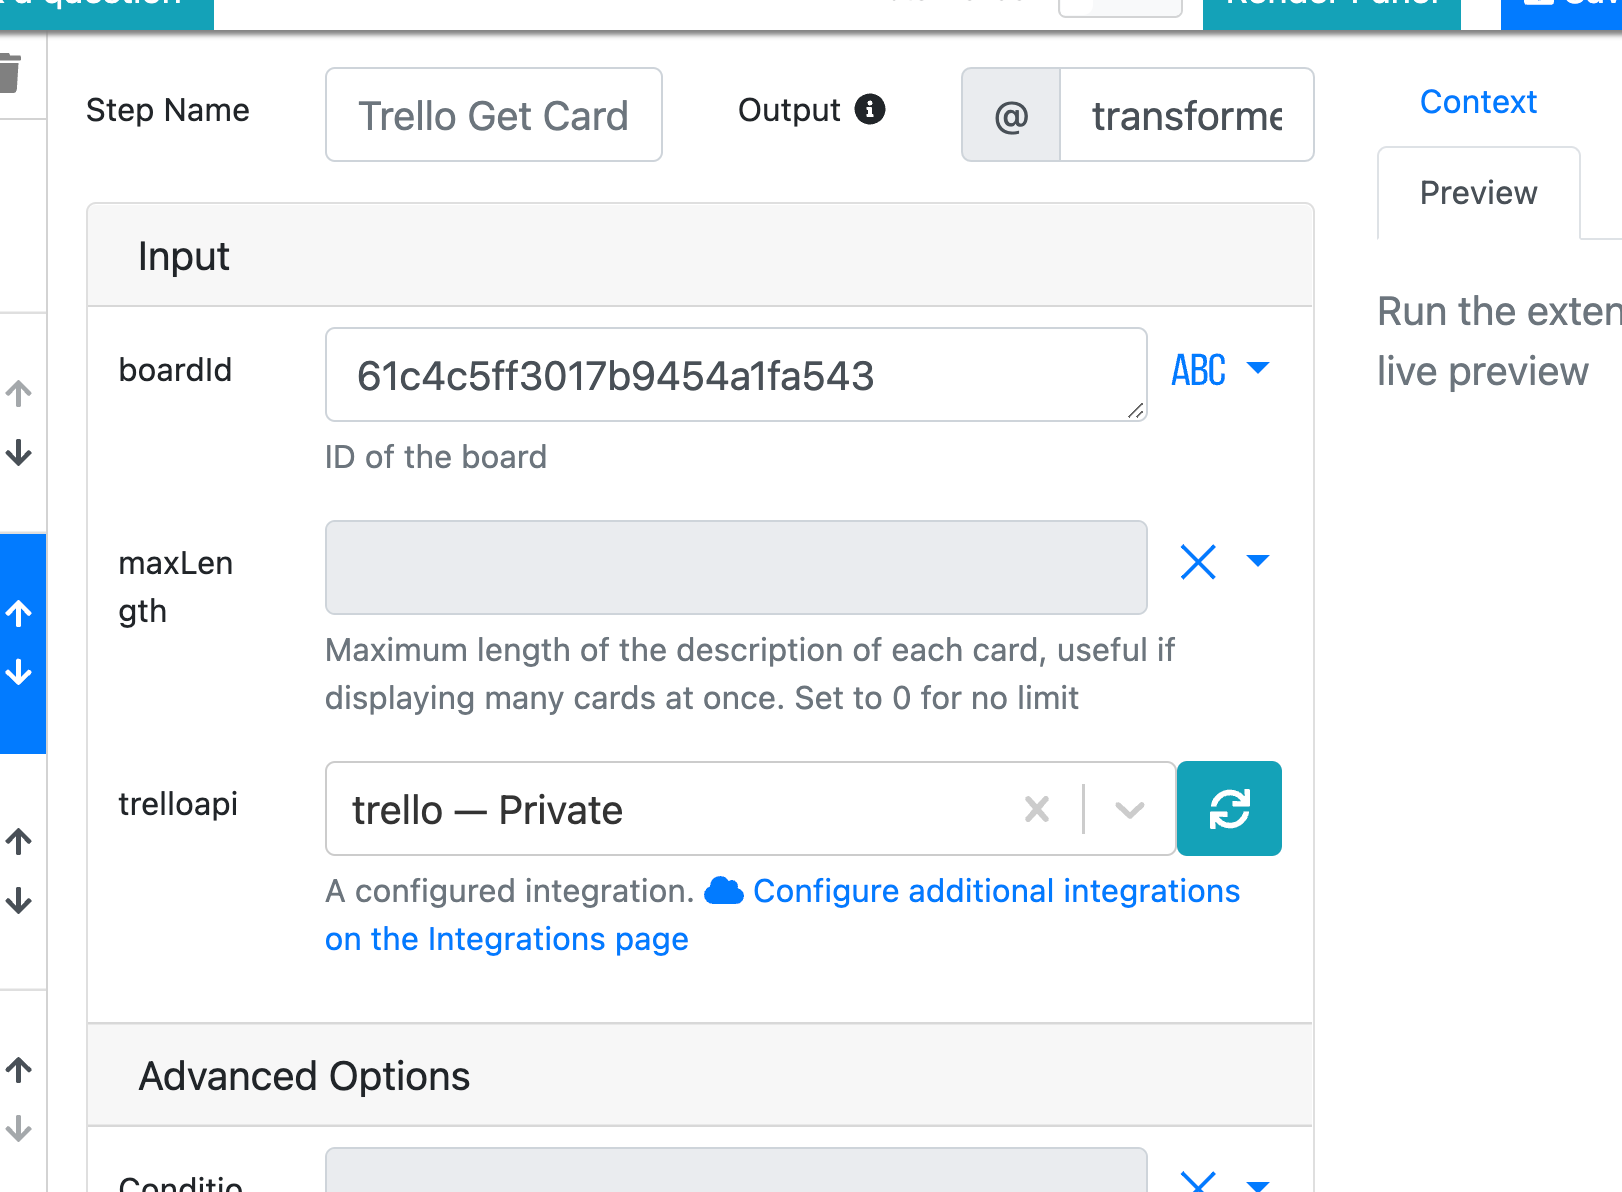
Add the "Trello Get Cards" brick, in which you provide a board id and it will return an array of all the Trello Cards on that board.
To get your board id, just go to the board you keep your to do's in, and add .json to the end of the URL.
For example, this is the URL for my board: https://trello.com/b/1vL3cyl4/make-it-happen-2022 . To get the board ID, i just make the URL https://trello.com/b/1vL3cyl4/make-it-happen-2022.json and then you'll see a string of letters and numbers right after the words "id" (use Cmd/Ctr + f to search for that if you don't see it, but it should be the first thing you see)
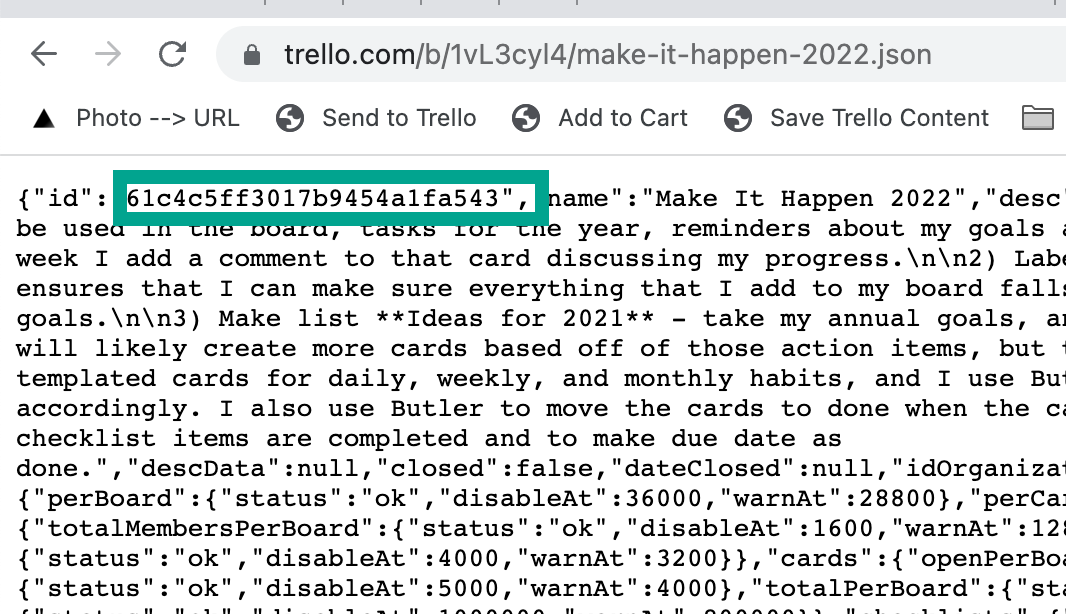
Copy that into your brick where it says "boardId" and you're good to go!
Step 4: Filter your cards to only ones due today
We get a little fancy in this one so buckle up.
Add the "Jq-JSON processor" brick.
Let's start with the data section. You'll need to select the "object" type because you're bringing in two pieces of data. The Trello cards and the date.
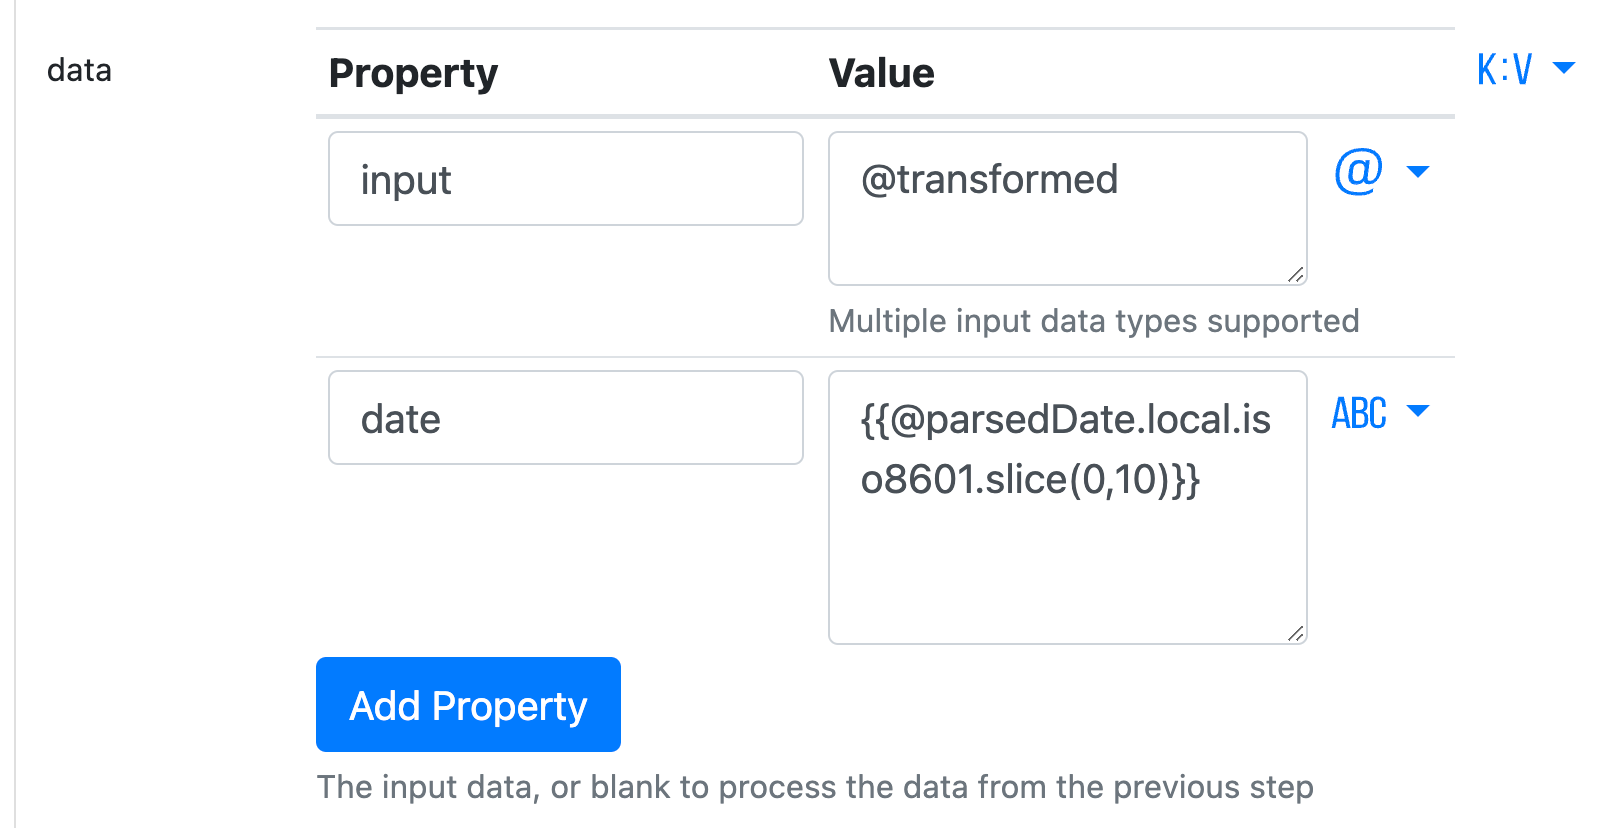
The first property is input which is the Trello data. You'll reference that by setting the value of @transformed (or whatever you see under the "Trello Get Cards" brick name — if you didn't change it, it should be @transformed).

Next, you'll add a property for referencing the date. Call it date and for the value, you're going to do a little javascript on it to get just the date and not the entire timestamp. Select the "ABC"/text option for value type, and then set it to {{@parsedDate.local.iso8601.slice(0,10)}}.
That's going to pull your local time and grab the first 10 characters to get the date.
When you're done, your object should look like the screenshot at the start of this section.
Next, you just need to set the filter for your data. Just type this in the filter section.
.date as $date | .input|.cards|=(del(.[][]|select(.due[0:10]$date|not)) | del(.[]|select(.[])))That voodoo right there is saying to grab the dates and the cards and only return the cards that have a due date that matches the date.
Now on to the last step to render these cards!
Step 4: Render the cards as a table
Add the Render Document brick.
The way you interact with this brick is by clicking the elements in the preview and selecting what you want them to be.
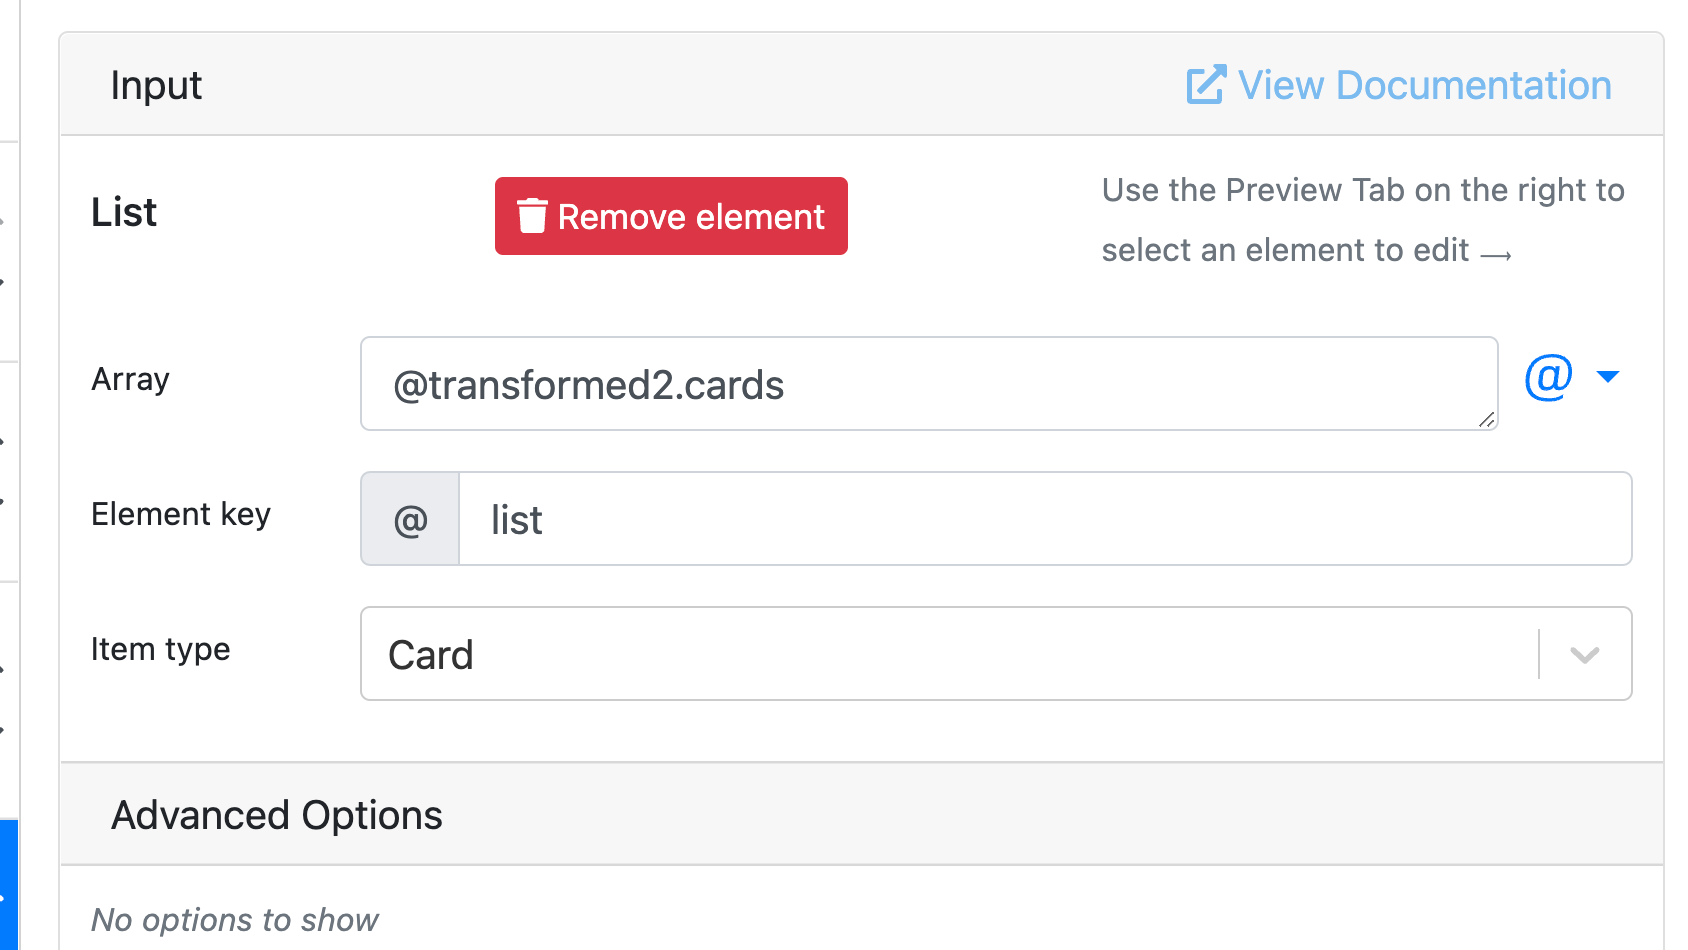
Start by clicking the root element (the biggest box at the top), then click three dots and and select "List".
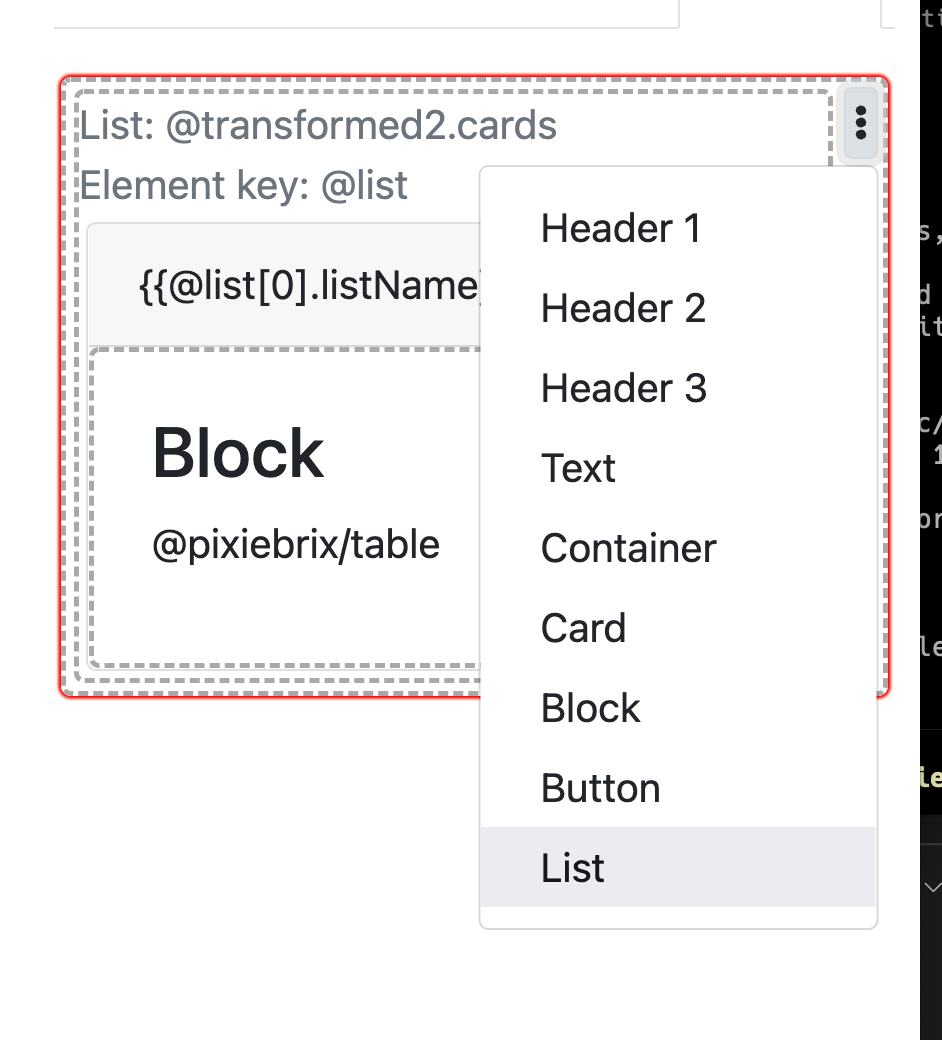
Configure the list to create, well, a list of the cards. To do that, you'll need to provide it an array of cards. Good news—you already did that in the previous brick! So just type @transformed2.cards to grab the filtered cards from the previous brick.
Name the element key list since you'll reference this later. And select Item type of "Card". (Note: this is a component type and is just coincidental that you're using this for Trello cards.)
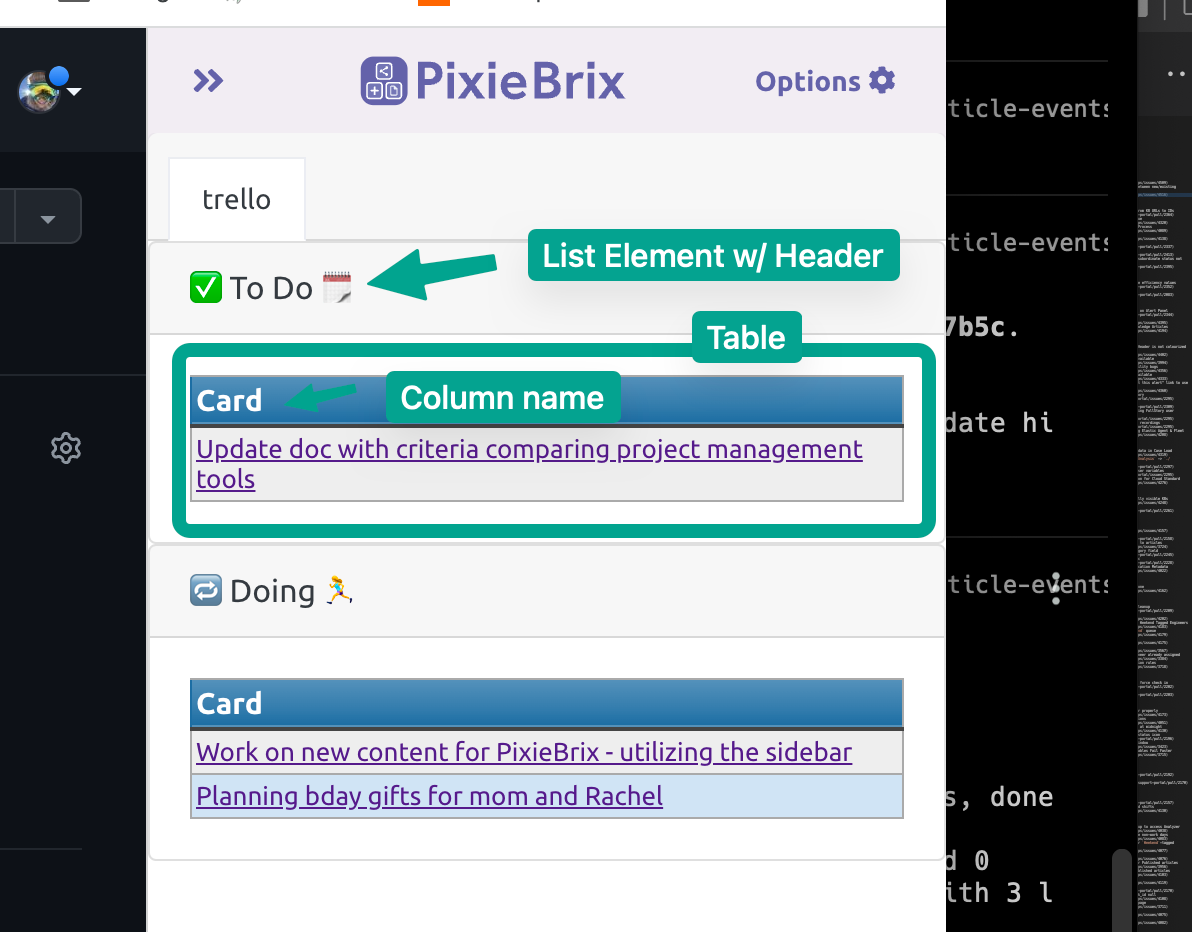
Now click the "Card" element that was created and give it a header. I used the name of the list that the Trello cards were found in, but you could call it something else if you want. To reference the list name, just type {{@list[0].listName}}

Okay now let's go inside the block to define the table of cards.
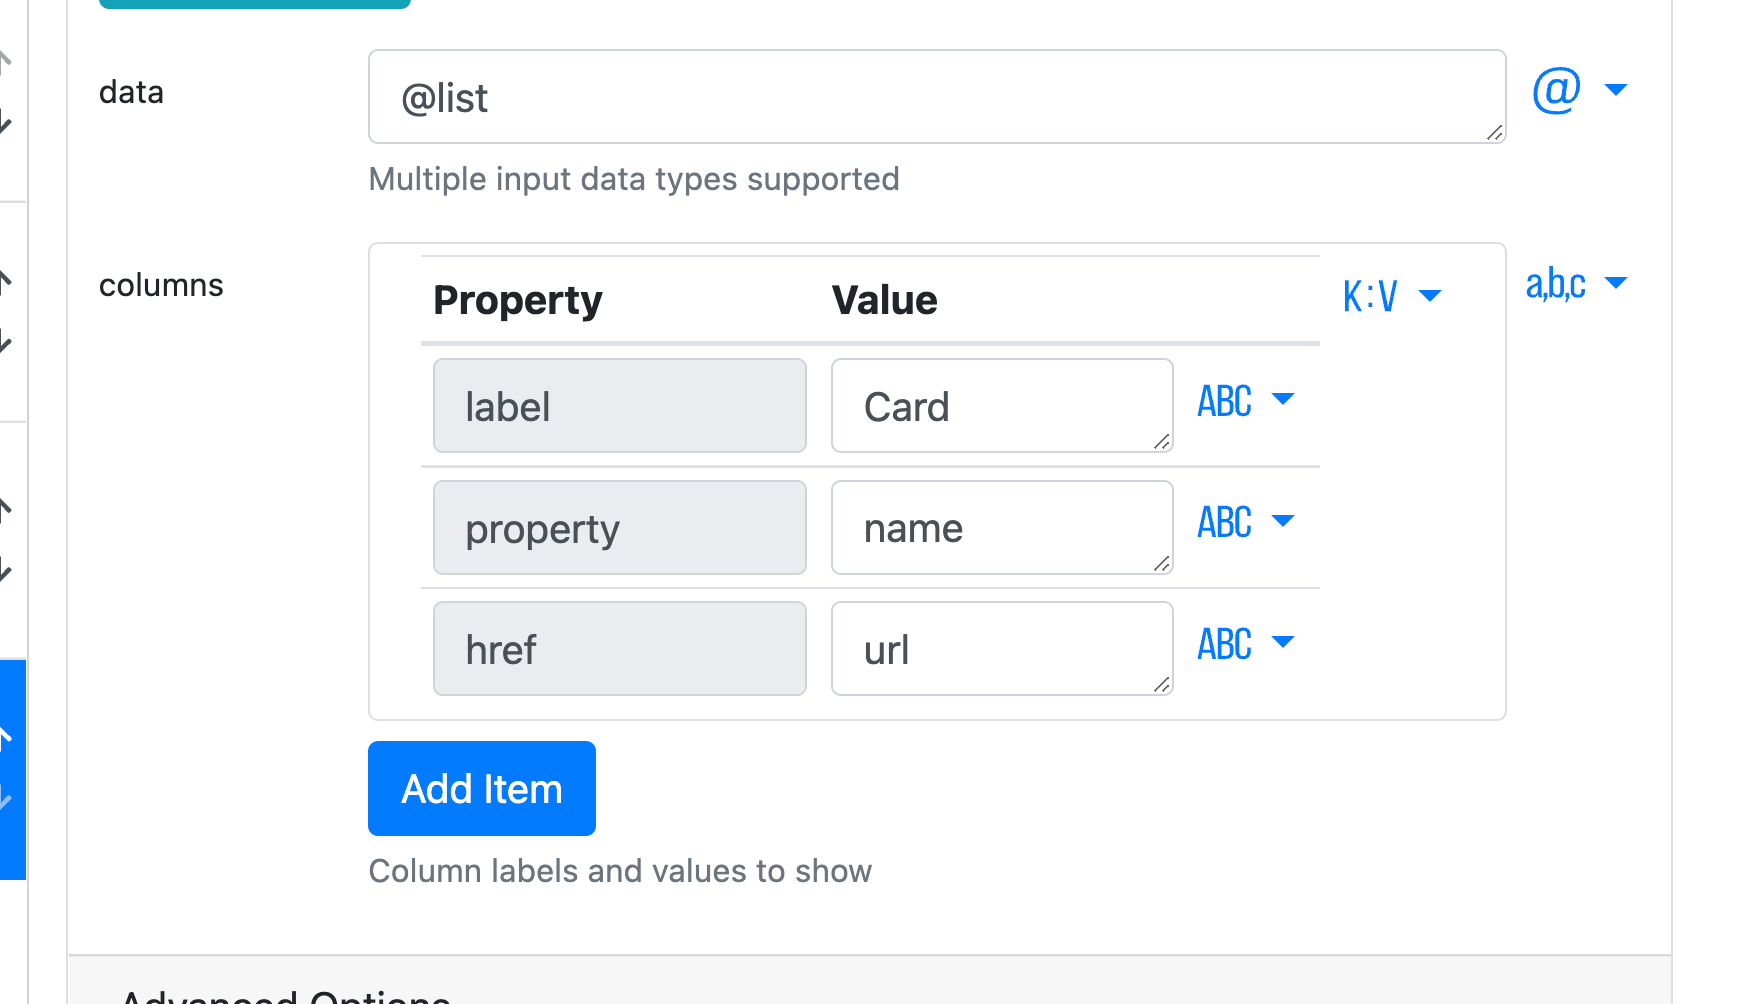
Click that block, and you'll see the option to Select a Brick. Choose the @pixiebrix/table option.
Select list for data as it will reference the key that you defined in a previous step. And now you just define each column! Each column has a name, property, and href prop. Name is simply whatever you want to call it (in my case, card name), property is the value you want returned in that column (in my case, name), and then href is anything that you want to link that item to.
Note — it's very important that if you want to reference something you need to call it exactly what it's referenced as in the list object. Not sure what that is? Go back to your JQ brick, click "Render Panel" in the top right, and then preview what info you have available to you. Just keep clicking the arrows to get to the card data, like this.
If you just want to reference the card name and be able to link to the card, you can copy my configuration.
And you're done! Your side panel will look like this.
Now all you need to do is add one more mod to make it show up whenever you load a webpage!
Add the show side panel trigger
This is easiest of all.
Click the Add button in the top left, just like you did to create the side panel, but instead click Trigger.
To configure this step, just select Page Load. And then select the All URLs option next to sites (unless you'd prefer this to only happen on certain sites, such as Twitter or Reddit, or other distracting sites perhaps. In which case, just specify the URLs. You can add as many as you want!)
Next, add the Show Sidebar brick. No need to configure anything here — it just tells PixieBrix to push up the sidebar and anything you've configured it in, which you just did!
Time to stop procrastinating!
Now your browser will tell you every time you open a tab exactly what you need to focus on. Go forth and conquer!
If you get stuck building this, don't hesitate to reach out to the PixieBrix Community, and even if you don't get stuck, come hang out with us on the PixieBrix Community Slack!