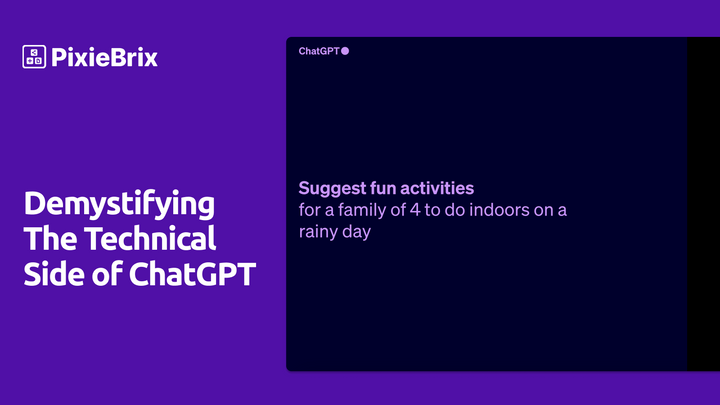
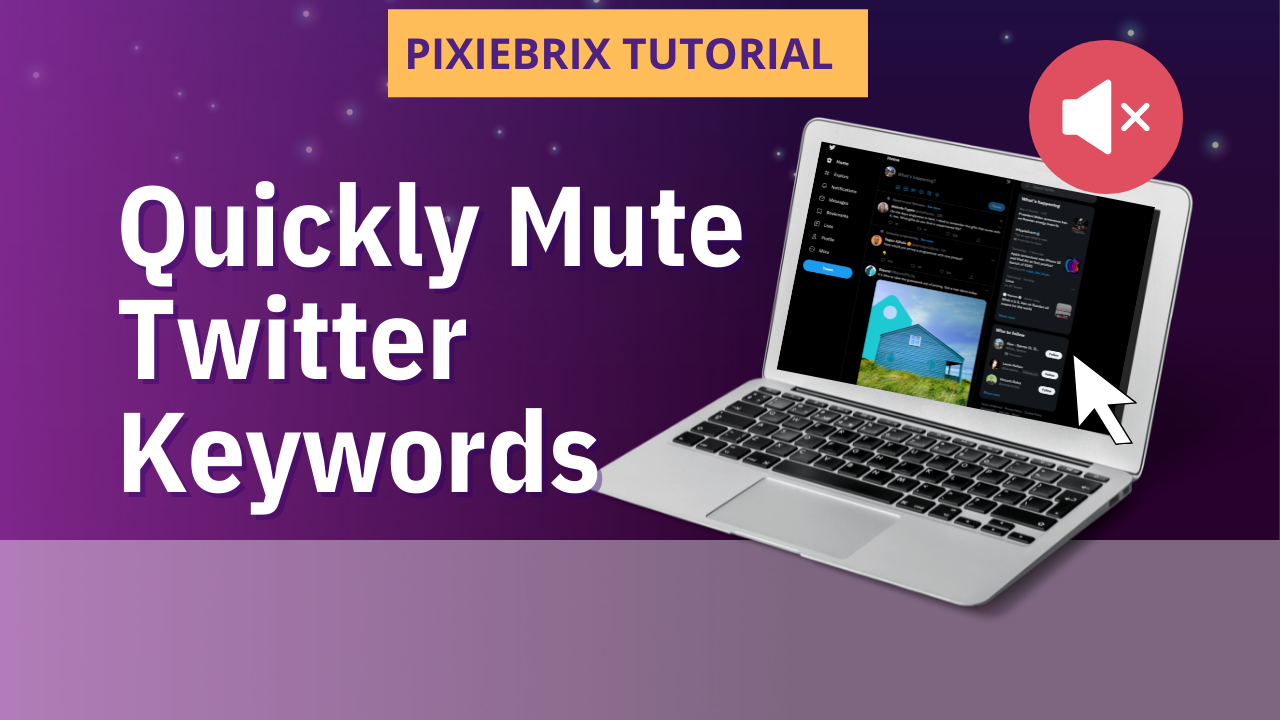
Quickly Mute Words and Phrases on Twitter with PixieBrix
Twitter is great, but sometimes it can just be a bit much. Newsfeeds are full of “web3”, “is HTML a programming language”, and well, *gestures wildly* the news. Sometimes we just don’t want to see certain content. Thankfully, Twitter has an easy solution - muted keywords!
But sometimes when you’re in the middle of scrolling, it’s not a simple process to mute a keyword.
You have to hope you remember where that is in your settings, and if you don't, then you must google where it is. Then you have to remember the phrase and type it perfectly with no typos. Then magically remember what you were looking at and navigate back to that.
PixieBrix has got your back to help mute Twitter.
With the Mute Keywords mod for Twitter, you can add a right-click menu that automatically takes you to Twitter’s Add muted word menu whenever you highlight specific text. No need to fumble around Twitter’s many sub-menus.
To use this mod, just add the Mute Keywords mod from the PixieBrix marketplace. Don't have a free PixieBrix account? Don't worry, we'll get you set up from the marketplace. No extra steps required, and no coding necessary. Just like that, you get a custom shortcut you can use whenever you run into a word you need to mute.
And because PixieBrix is such a flexible platform, this is far from the only way you can customize Twitter to your needs. The PixieBrix marketplace is full of Twitter mods that make your life easier, from hiding the “What’s Happening” sidebar to automatically tweeting a link from any webpage. All with one low-code, flexible platform.
Want to see how it all works? Here’s how easy it is to build the Mute Keywords mod with PixieBrix. Note that you can also use this basic process to create your own mods or customize any mod you find on the PixieBrix marketplace.
How to build PixieBrix’s Mute Keywords Twitter mod
I wrote about pseudocode, which isn’t actually code at all, but just words and drawings that describe the steps in your workflow. I prefer to use an actual whiteboard, paper, or Whimsical to draw it all out but you can do it however you want! Listing out the steps you want to happen makes it less intimidating before jumping right in.
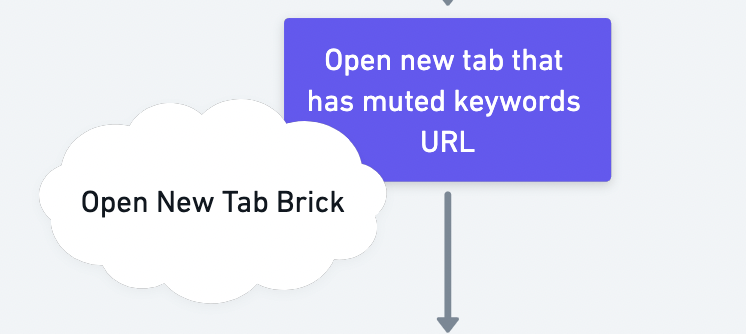
Here’s my drawing for this workflow
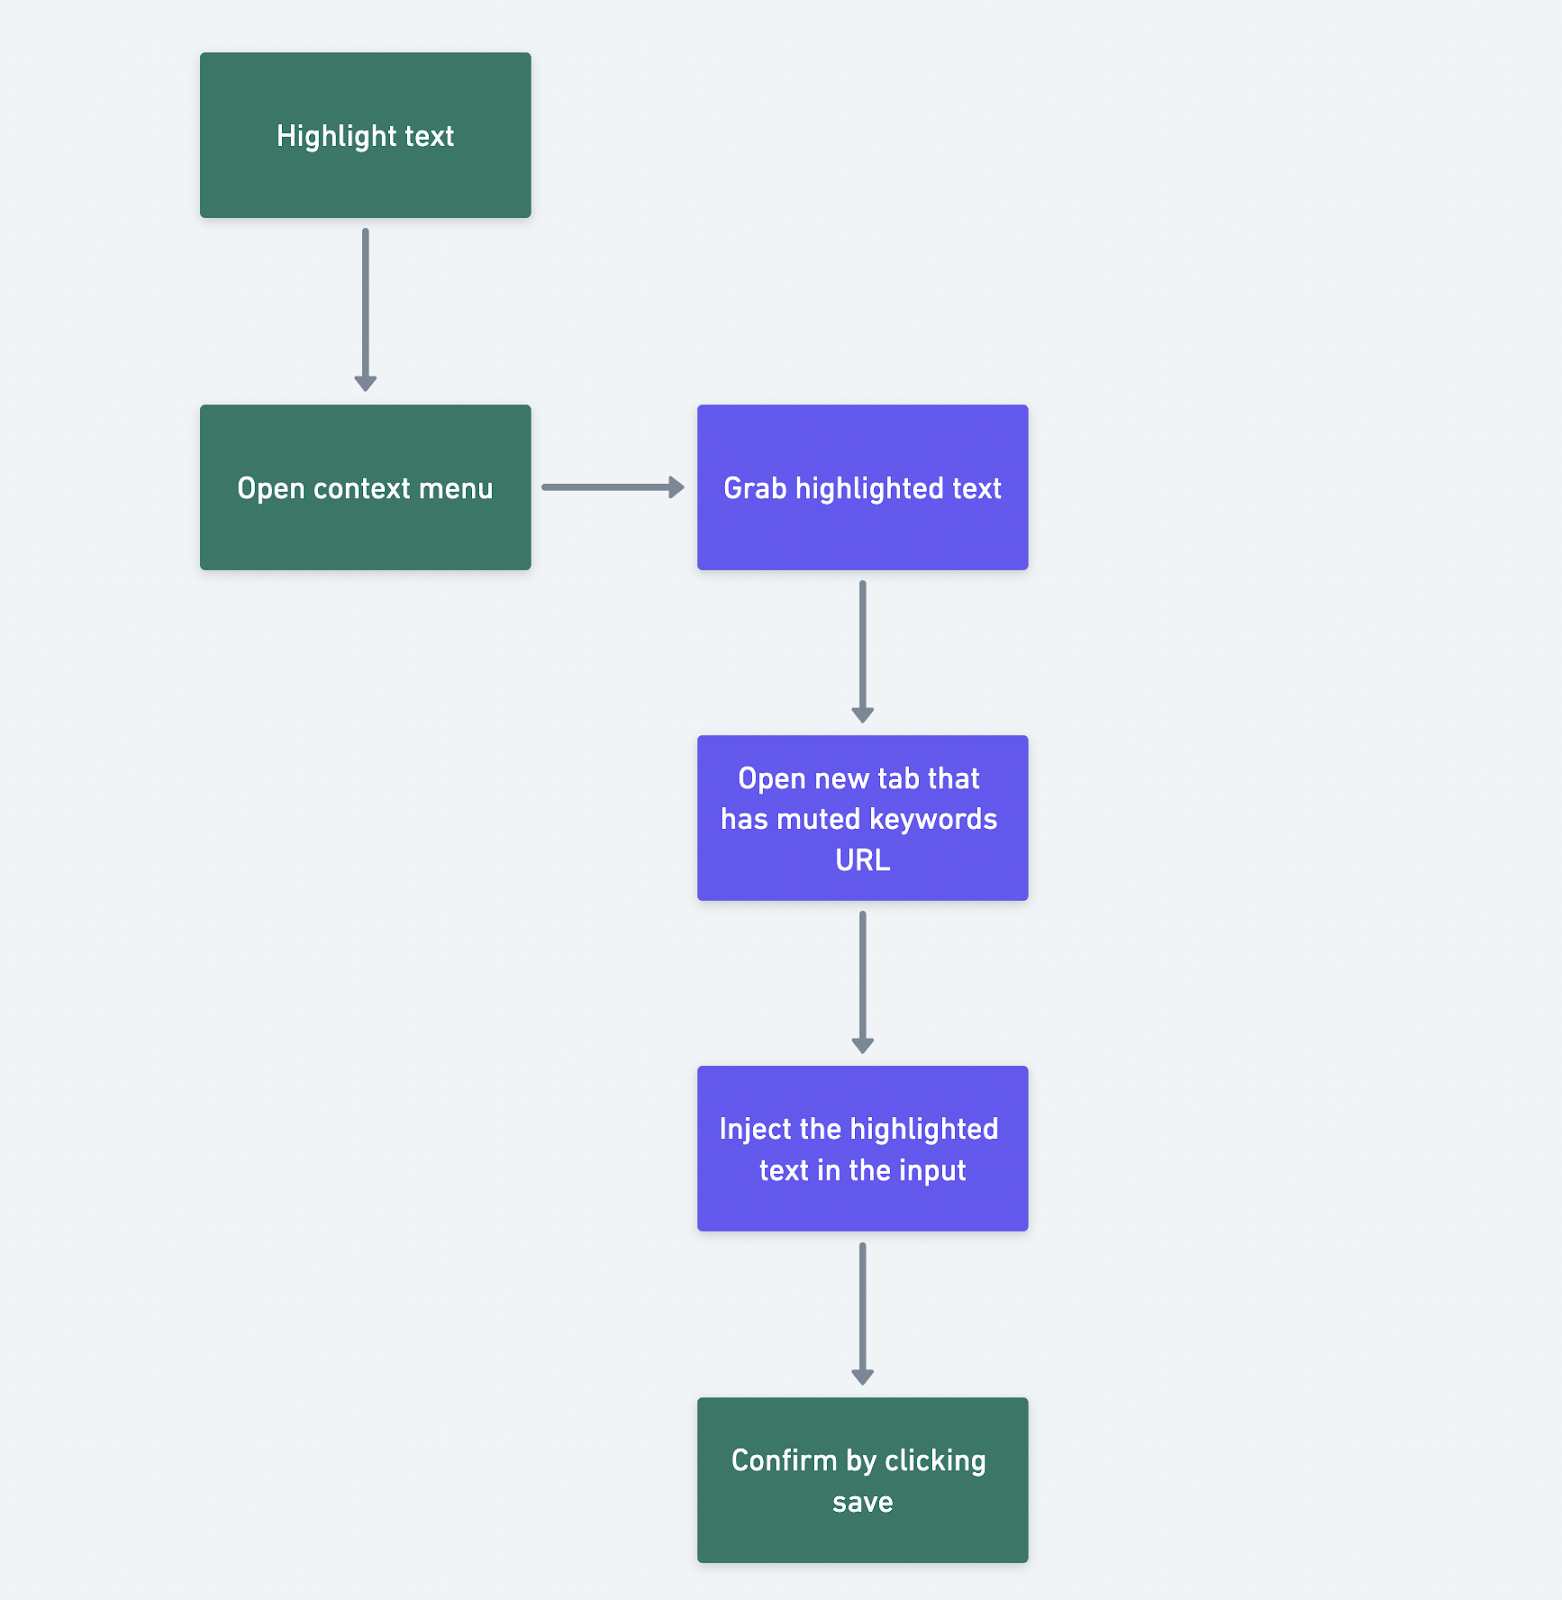
Ideally, we’d like to highlight some text, then insert that into the input on the Add Muted Keywords page on Twitter.
From there, you can double-check that it grabbed what you wanted, then submit and you’re done! Seems like a workflow you want? Let’s build it together.
Let’s head over to the PixieBrix Page Editor by right-clicking anywhere on a web page and then selecting “Inspect”. Then just slide on over to the PixieBrix tab.
If this is your first time using PixieBrix on Twitter, you might need to grant PixieBrix permission! You’ll see a message prompting you to do so if that’s needed.
Step 1: Add the context menu brick
While you could make this a button, I prefer to just right-click on a page and open up the context menu. (The menu that shows up when you right-click on a webpage!)
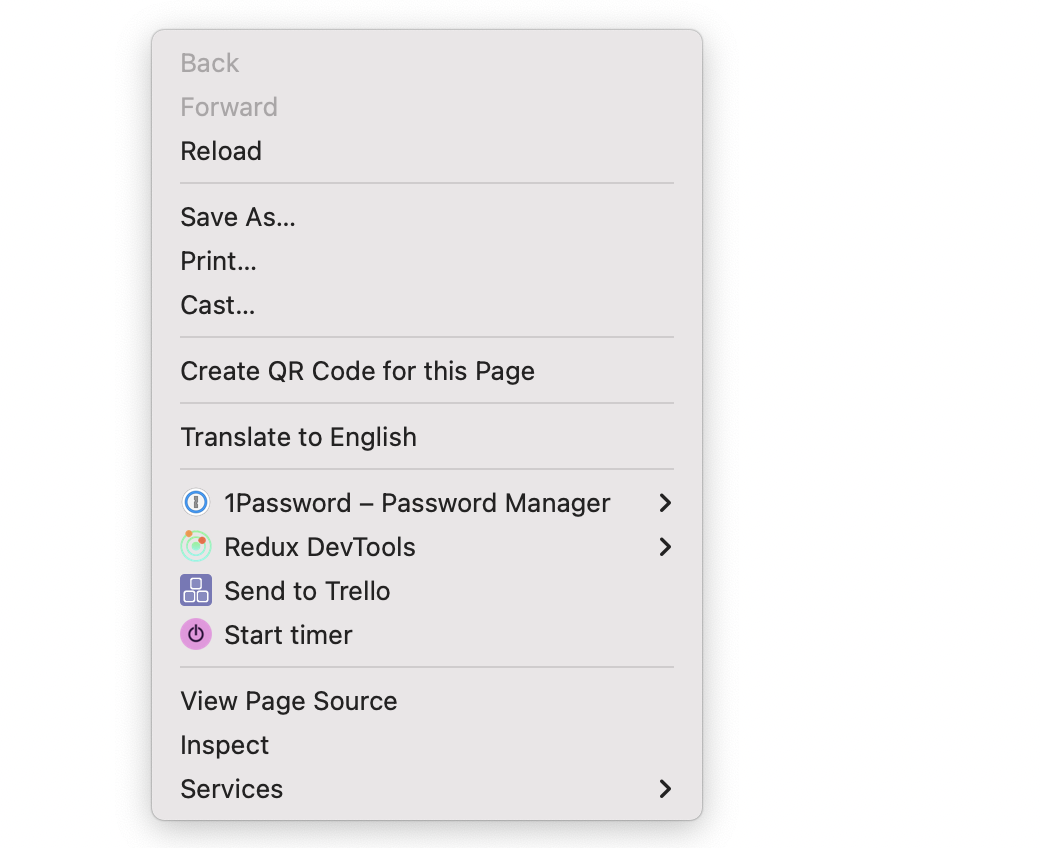
To add a PixieBrix workflow to that menu, just click the “Add +” button in the top left corner of your PixieBrix page editor and select “Context Menu”.
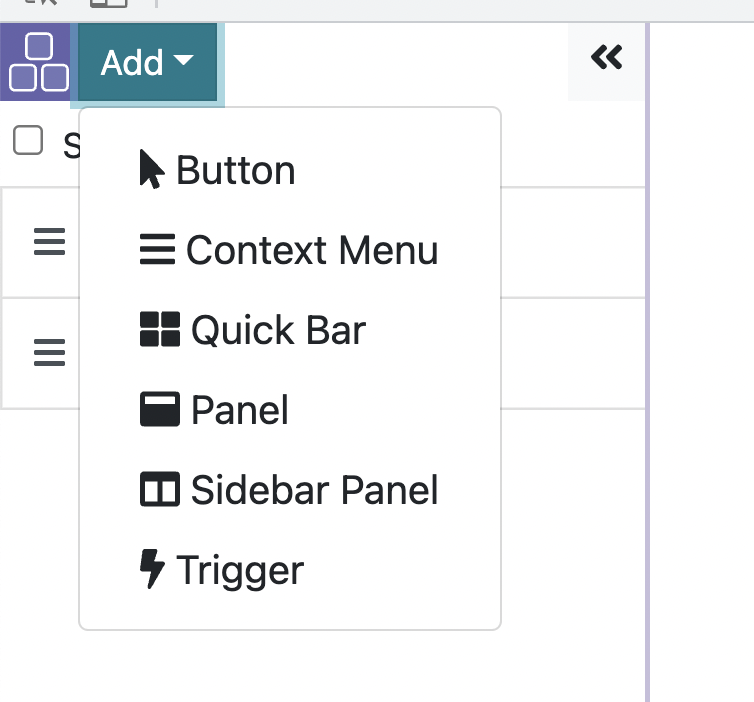
This is your first PixieBrix brick, specifically a trigger brick. A brick is a PixieBrix action in your workflow (we call those mods!).
From there, you can name your context menu whatever you’d like. The name at the top is going to be the name of your mod (aka, your workflow) and the “title” name is the name that will show up in the context menu when you right-click on a page. (I named mine Mute.)
You won’t need to change anything else, as “All” should be the default in the Context area, and that will allow you to access all sorts of things, including the “selected text” (which is the highlighted text. We’ll use this later!)
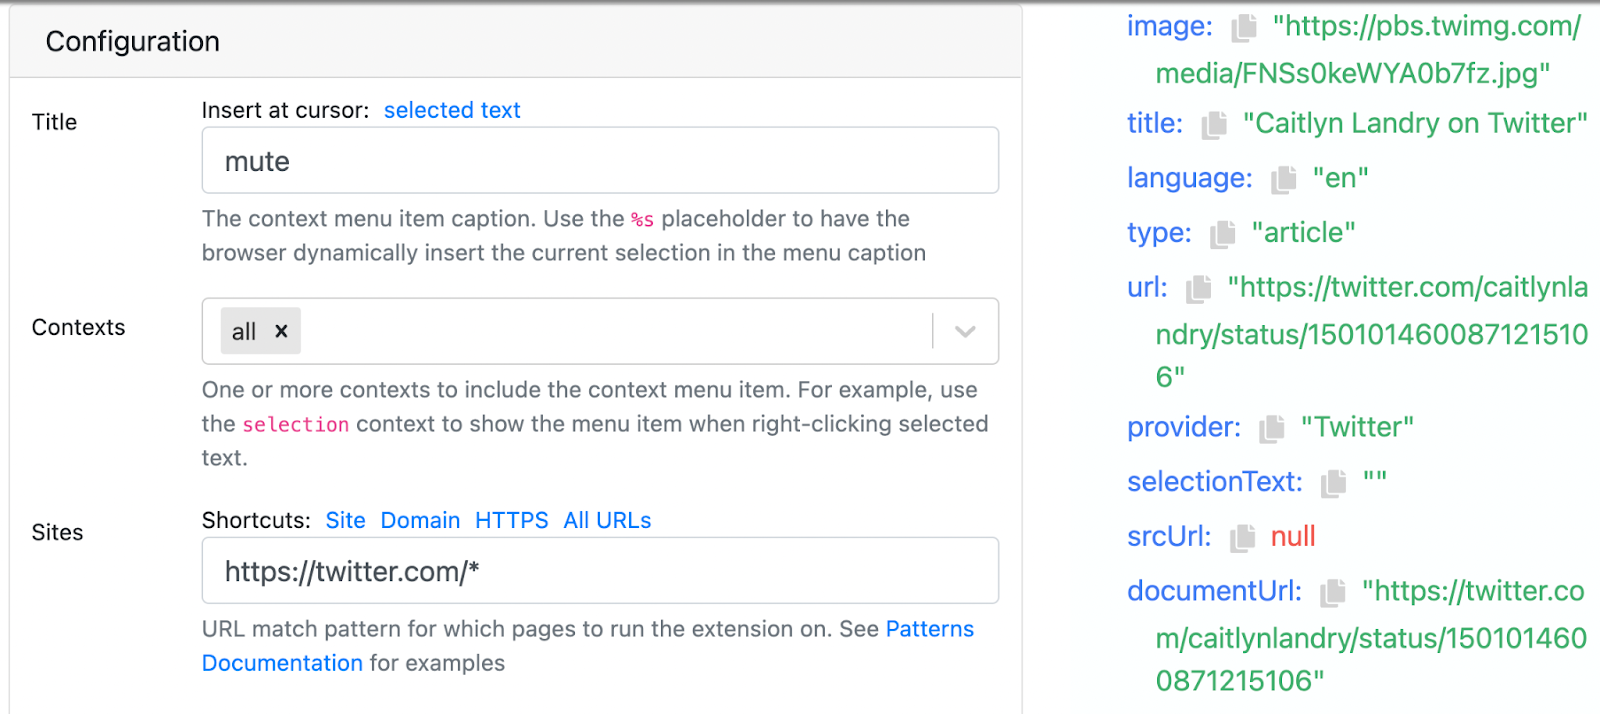
Don’t see anything in preview on the right tab? Don’t worry—that’s normal if you haven’t run the mod yet! You’ll need to save the mod, then go to the webpage and run it by right-clicking the page, then going to the context menu and selecting the command, in my case “mute”. Then you should see data populate with the page you’re on and the highlighted text.
Here’s how our workflow should look so far, complete with the bricks doing the work. (I drew cloud shapes to distinguish which PixieBrix bricks are doing those actions.)

Step 2: Open the muted keywords link
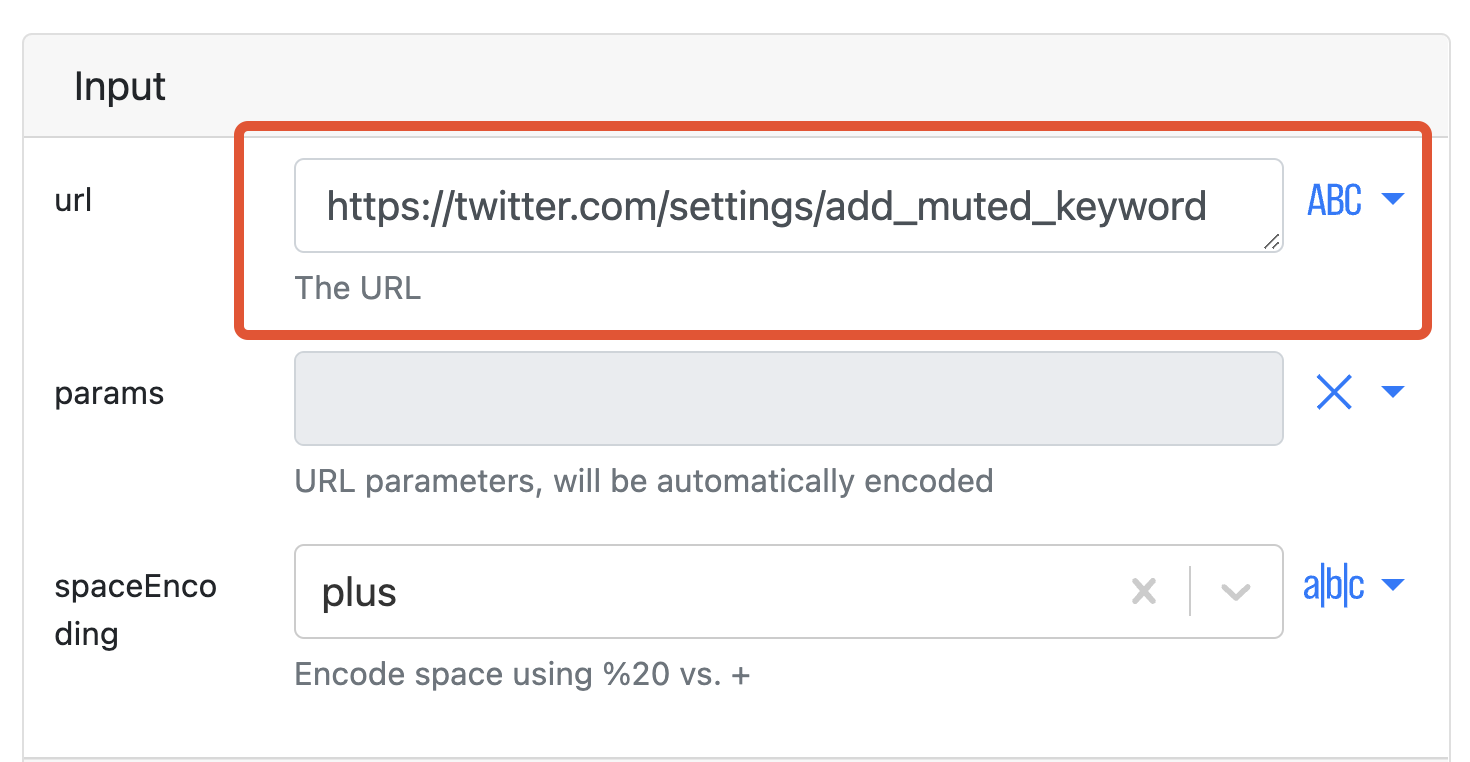
Twitter has a URL that takes you directly to the place to add muted words/phrases. `https://twitter.com/settings/add_muted_keyword`
That’s easy for us! We just need PixieBrix to navigate over there, and inject our highlighted text!
Use the “Open a Tab” brick, and set the URL to that value.
This will open a new tab with the URL instead of redirecting your current tab, which could possibly disrupt your experience.
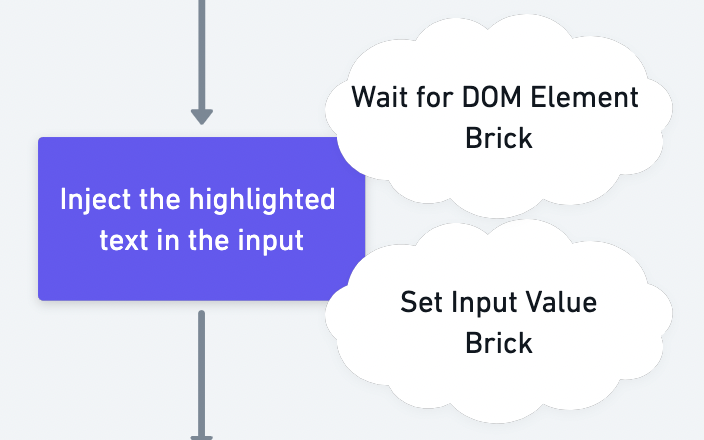
Now, we just need to inject the highlighted text in the input. We’re one step closer!
Step 3: Wait for the input element to load, then set it
This step actually requires two bricks. The reason for this is that we want to make sure the input loads before we tell PixieBrix to type something into it (sometimes PixieBrix moves faster than my internet can load my browser!)
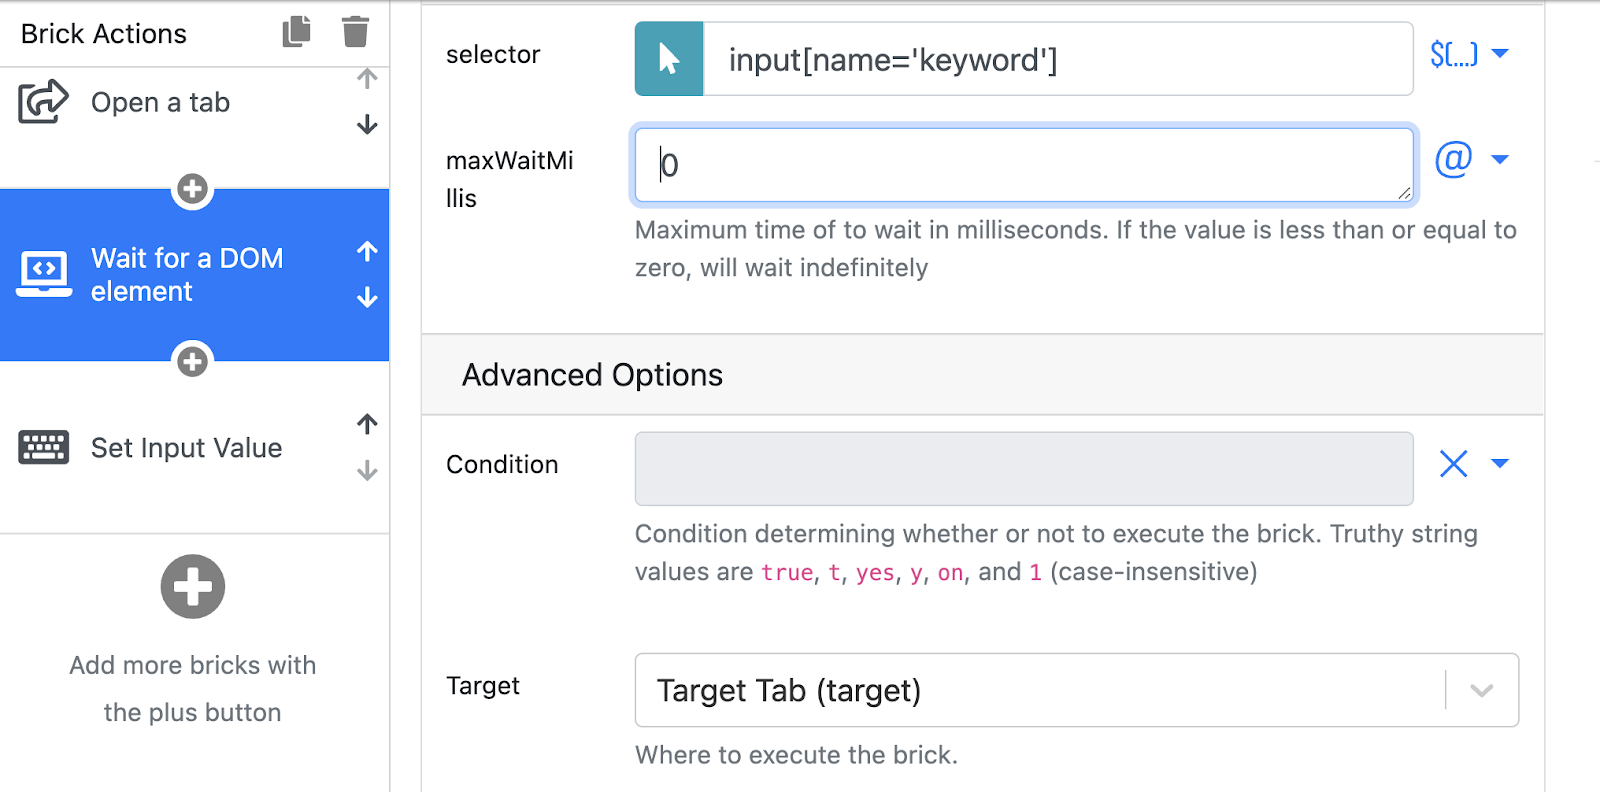
Add the “Wait for DOM Element” brick.
For “selector” type `input[name='keyword']`, which is going to select the input field that receives the muted keywords.
I defined a `maxWaitMillis` of 0 just to make sure it actually waited for this to load. (This tells PixieBrix how long to wait for the element to load. Setting the field to zero tells it to wait indefinitely.)
One more important thing to note - scroll to “Advanced Options” and make sure to select “Target Tab (target)” for the Target option. This will ensure it’s looking for that input in the tab that was just opened and not the original tab that you started this workflow in.
Now add the “Set Input Value” brick.
You’ll want to use the same selector that you just used in the “Wait for DOM Element” brick because now that it’s loaded, that’s what we want to inject the highlighted text into!
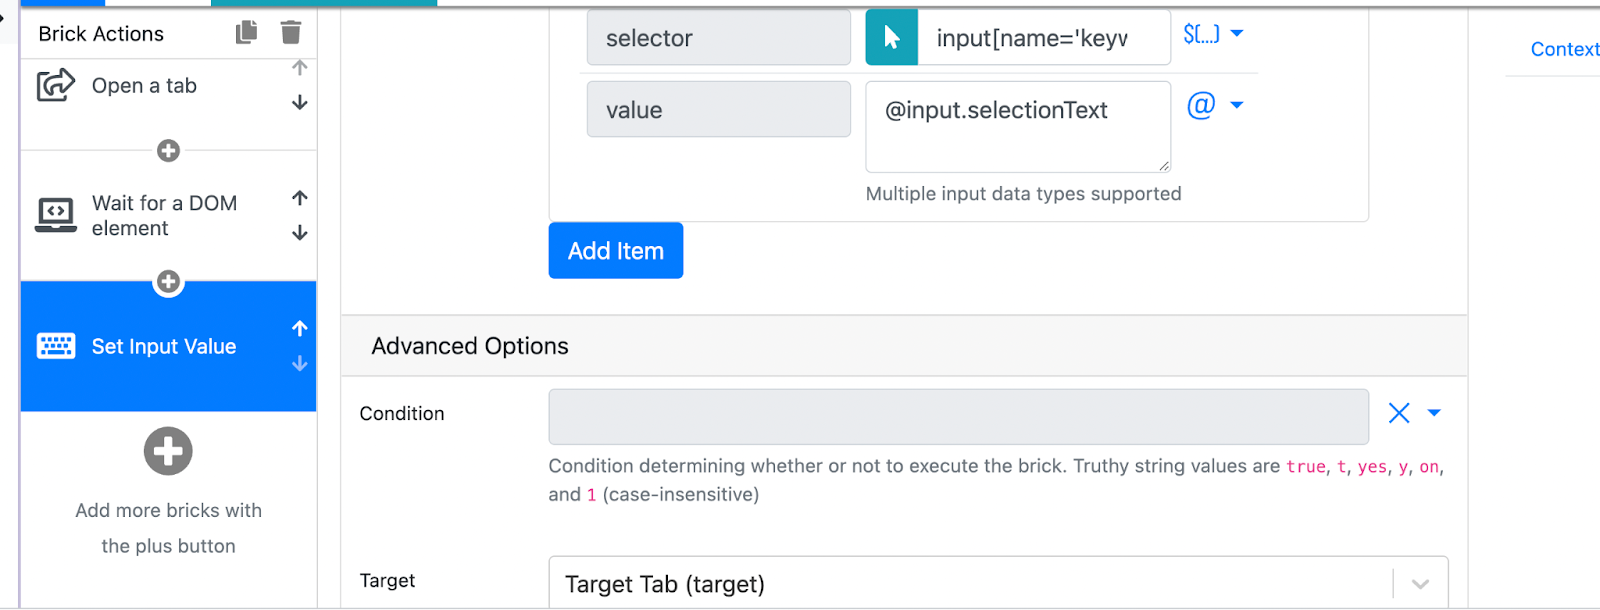
For the value, you’ll just need to reference the highlighted text from when you started the action. To do that, type `@input.selectionText` and make sure the type at the end shows and @. (If it doesn’t, just click the arrow and change it.)
Once again, make sure your target is set for Target Tab (target) in the Advanced Options, and we’ve finished our workflow!
Step 4: Test it out!
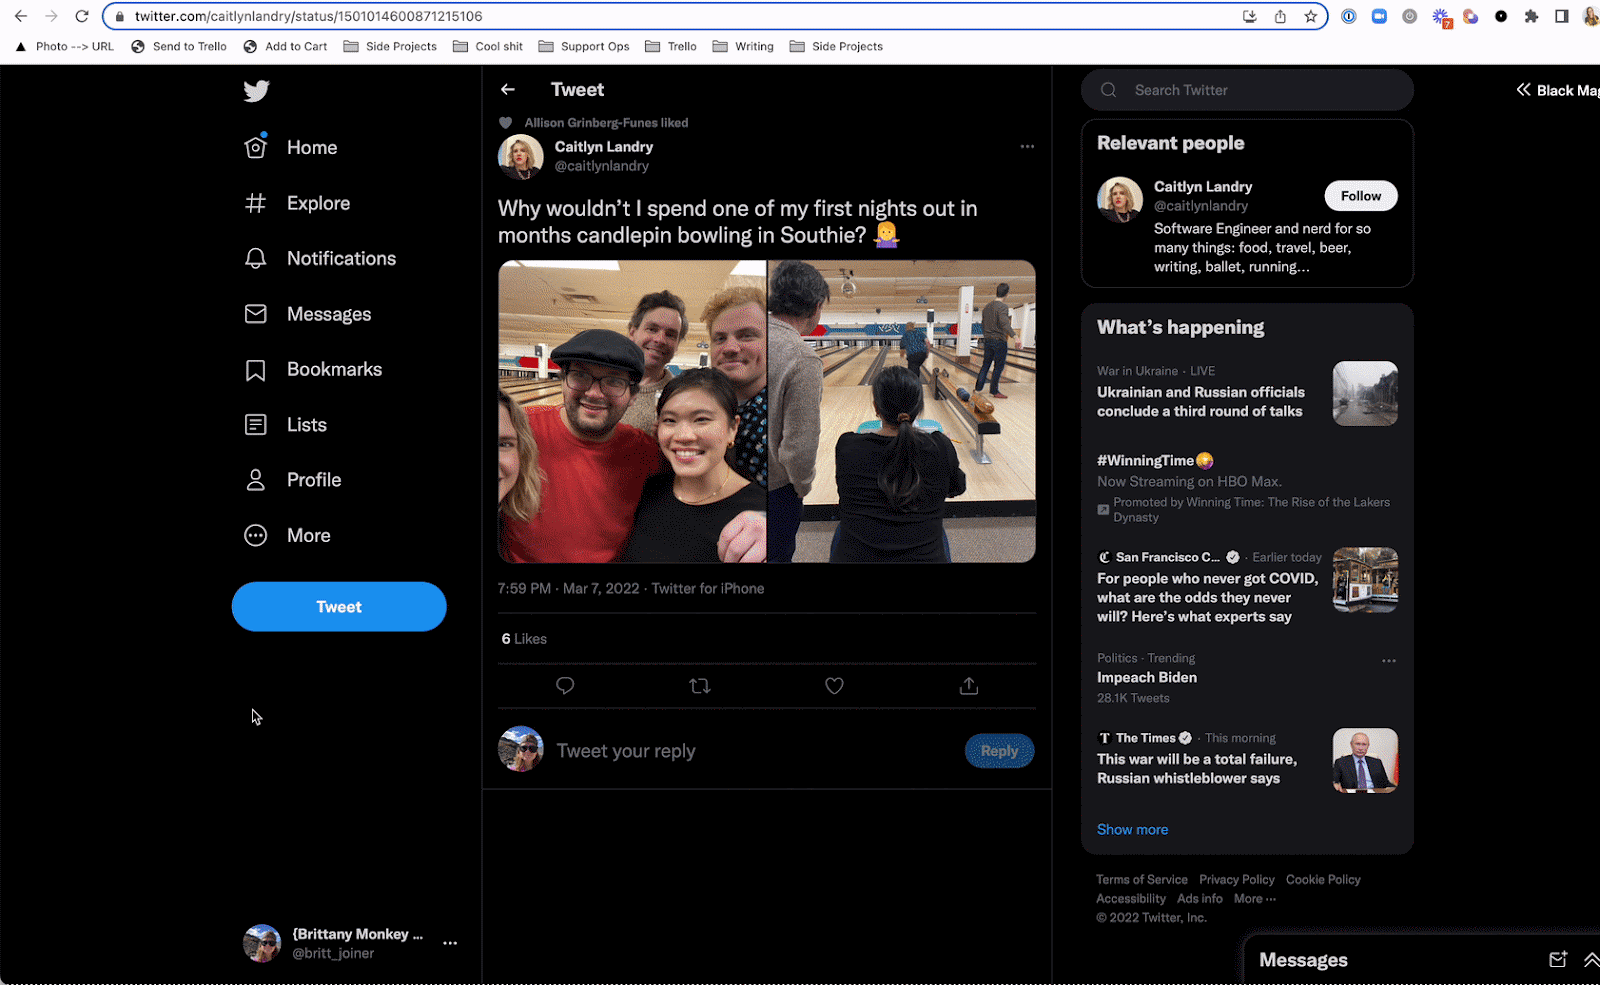
Now, let’s take it for a spin! We should be able to highlight some text on Twitter, right-click and select “Mute” from the context menu, and then arrive at a tab that shows the text in the input ready for the user to hit save.

If you have any trouble making this work, just reach out in the PixieBrix Community and someone will happily jump in to help troubleshoot! Btw, if you haven’t joined the PixieBrix Slack Community, consider this your official invite and come join the PixieBrix party.