
Build a Custom Sidebar Mod with PixieBrix
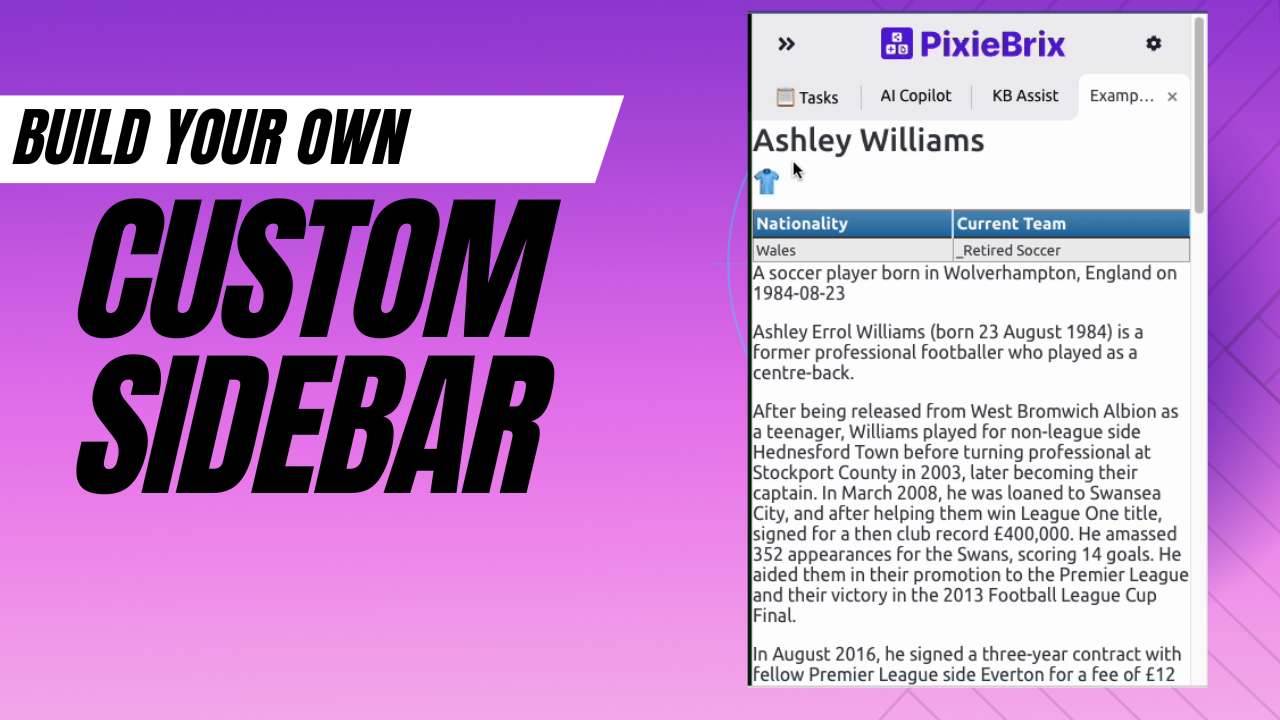
Sidebar extensions are becoming very popular: let's build one together. This extension fetches data on any soccer player from a public sports API and visualizes it in the sidebar.
When you’re in the zone, productively working away at your next task or project, the last thing you want to do is break your rhythm by jumping into a new tab or Google search. Wouldn’t it be nice if the information you needed came right to you instead? That’s the idea behind sidebar mods.
A Chrome extensions sidebar mod brings information onto whatever page you’re currently looking at. You can stay put while the mod pulls data from an API and displays it on the side of your window.
There are infinite ways to use a sidebar mod—both work and non-work-related. And while many great pre-built mods exist, PixieBrix allows you to build a chrome sidebar mod to meet your specific use case.
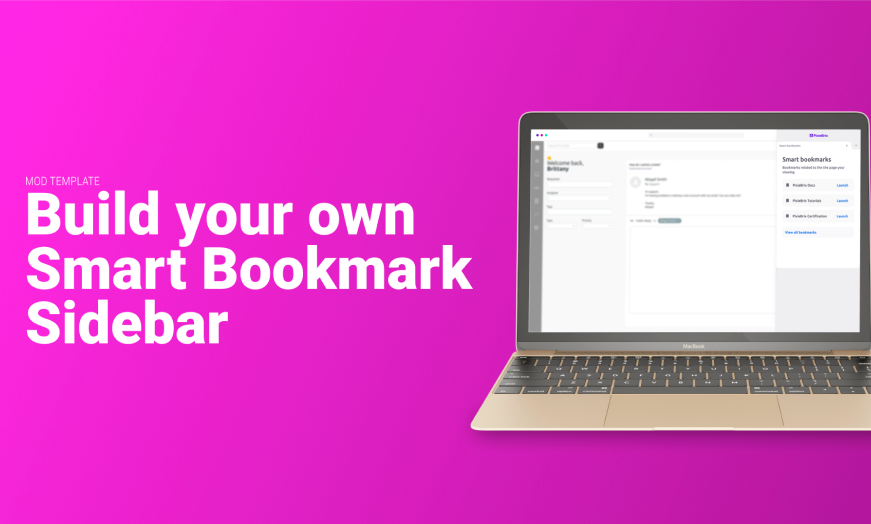
Want to get started ASAP? Check out this template to build your own Smart Bookmark Sidebar.
We’ve assembled a walkthrough explaining how to build your sidebar mod. In our example, we'll build a mod that pulls in information about professional soccer players, including statistics and photographs, visualizing it in your sidebar. This video shows the example mod in action:
The walkthrough will cover the following elements:
- Building a trigger when you highlight a player’s name with your mouse
- Setting up an HTTP request to pull all the data relevant to the player
- Modifying that data with a jq filter expression so you can view it in a useful way
- Returning the data in a sidebar and styling it to look the way you imagine
Watch the video or read the steps below!
Let’s dive in:
Sign up for PixieBrix
You need to create your PixieBrix account before building a mod. Once you’re signed up, you’ll be prompted to install the PixieBrix Chrome extension. Then you can start building.
Step 1: Add a new "Quick Bar" brick
From any website, right-click and select “inspect” from the menu that appears. Scroll through the inspect menu options until you see the PixieBrix Page Editor and open it up.
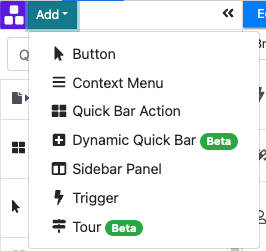
As with many awesome PixieBrix mods, you’ll start by adding a new Quick Bar starter brick. This brick allows you to trigger your mod using a keyboard shortcut that you define. Choose it from the Add menu.
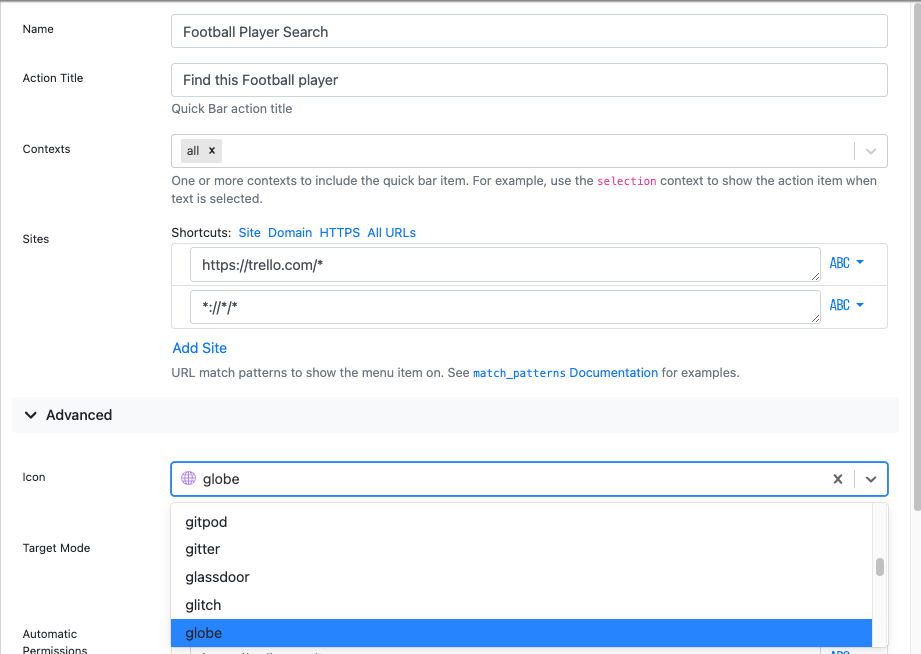
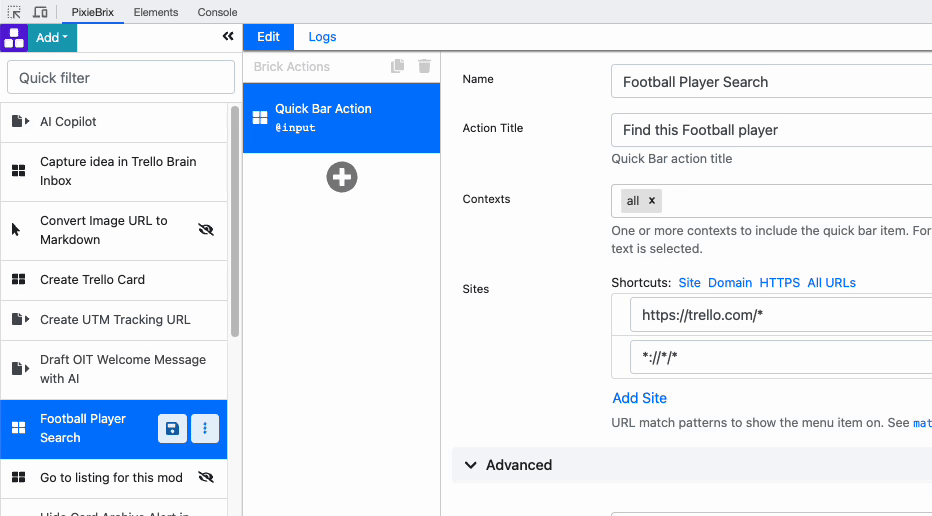
After adding the Quick Bar brick, configure it like this:
- Name:
Football Player Search - Action Title:
Find this Football player - Sites: click on All URLs
Then under Advanced:
- Icon:
globe
Your brick should look like this
Step 2: Add a new "HTTP request" brick
This brick allows you to perform an HTTP request (of any kind) to an endpoint to get some information. This lets you fetch or send information. Although every API endpoint is a little different, most will have documentation showing you the important information you need, like the methods and endpoints, and optional parameters to pass for GET requests, or what kind of information you can send in a POST request.
To add another brick after your Quick Bar Action, click the + button that appears in the second panel from the left.
Once you’ve added it, configure the rest of the brick as follows:
- url: Enter whatever API you want to use for your mod. In the case of our soccer example, the url is
https://www.thesportsdb.com/api/v1/json/3/searchplayers.php - method:
get
This passes the variable @input.selectionText as a parameter to the url.
Now go to the Search Parameters field and click the X icon at the end of the row, then choose K:V Object Properties to create an object, like this:

The reason you need to do this is that in this GET request, the endpoint expects the name of the player to be passed on as a parameter p—that’s the p?={{@input.selectionText}} part.
Now we need to learn the data we get from the response before we can display it nicely.
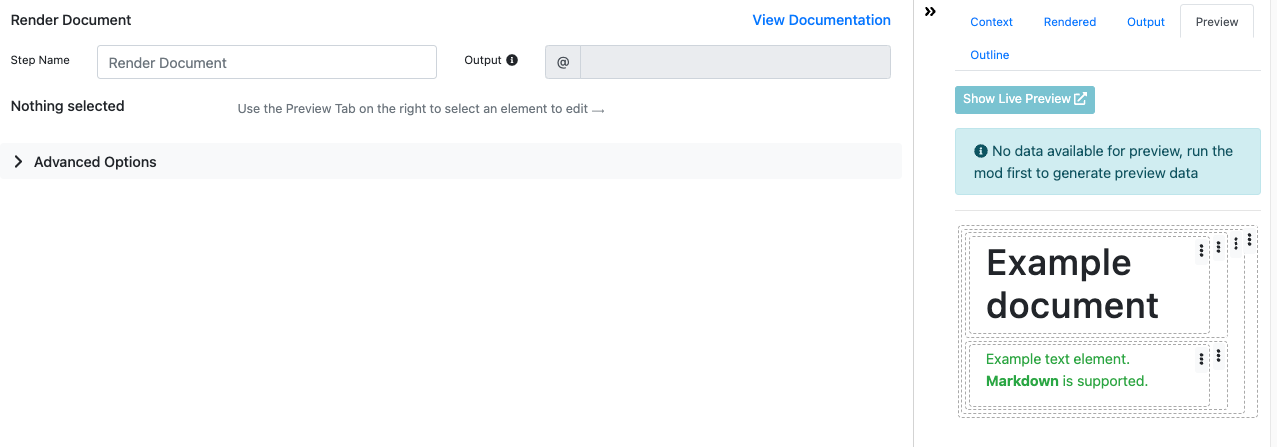
Step 3: Add a Display Temporary Information brick
Just below the JQ brick, add another brick called Display Temporary Information. This includes a Render Document brick that will let you see show the data we've retrieved from the API.
Click the Render Document brick and you'll be able to see in the Preview Data panel (on the top right of the Page Editor, under the Render Panel button).
Now highlight the second largest box, as shown in the picture below.
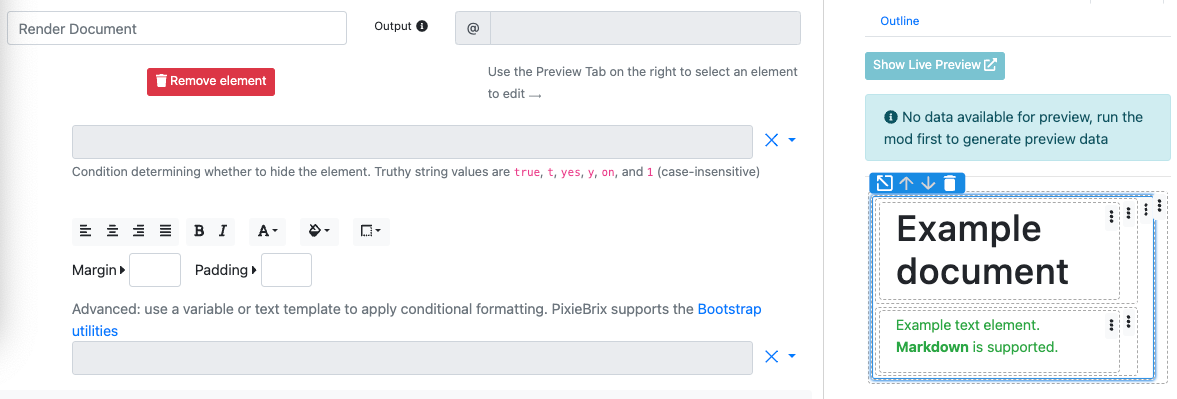
You'll see a button called Remove Element appear in the Page Editor. Click it to remove all the scaffolding that comes by default with the page editor. You can also click the trash icon inside the Preivew Panel.
Now the Page Editor will show you only having a body container.
Add a Header
Click on the three dot menu and select Header
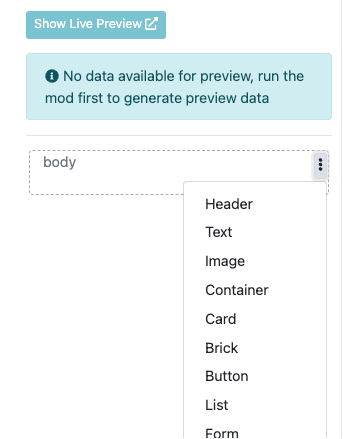
You will see a big block of text in bold called Header appear in the Preview Panel. Click it
Change the title of the header to {{@response.player[0].strPlayer}}
This will create a header containing the name of the player as its value.
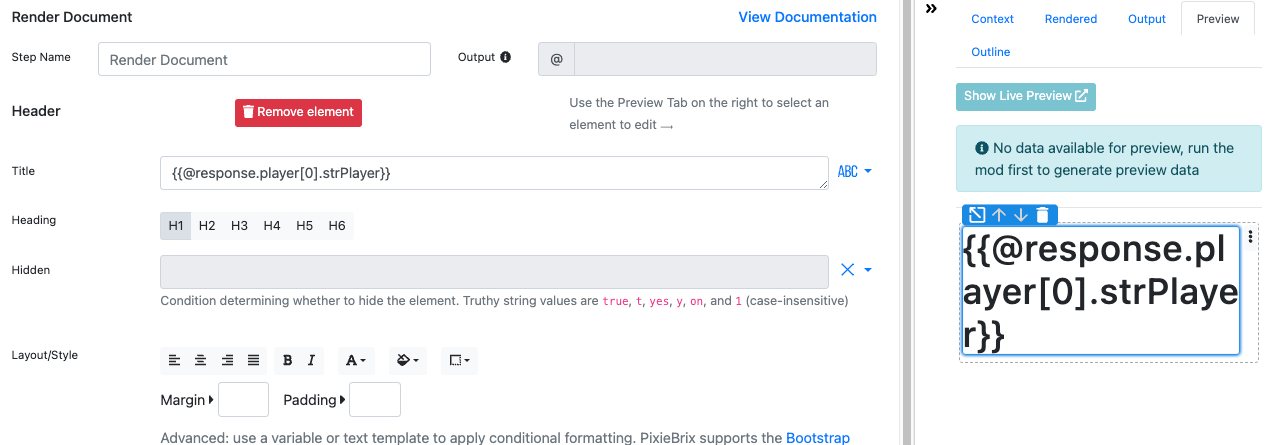
You can choose the Heading type below the text to adjust the size. H3 is usually a good size, but you can make it larger or smaller if you'd like.
Add another Header
Click the three dot menu again and add another Header element.
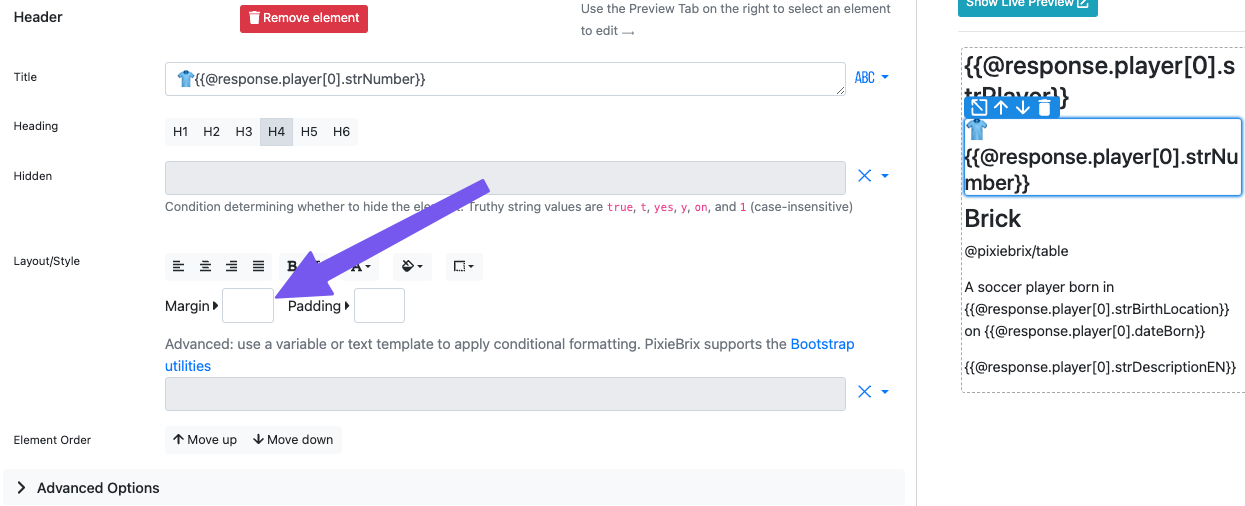
Then after clicking it to activate it, set the title field to: 👕{{@response.player[0].strNumber}}
The emoji is used to indicate the player's jersey, and the variable retrieves the player's jersey number in question from the API response. Obviously, you can customize this for your own mod.
Let's make this one an H4, so it's slightly smaller than the Header above with the player name.
Add a paragraph of text
From the three dot menu, select Text this time instead of Header.
This adds a paragraph of text that you can customize. Click to activate it.
Then configure the Text field to this:
Here, you’re using variables to create a dynamic paragraph of text that pulls some dynamic data, such as the player's birth location and the date.

Add a block
Head back to the three-dot menu; now add a Brick.
A brick in the Render Document brick appears and allows you to compose more sophisticated sidebars by adding other Pixiebrix bricks inside; in this case, we want to add a table.
Notice in the Brick Actions pipeline a new section appeared under Render Document that says Brick. Click the + button below that, search for the Customizable table brick, then click Add.

Once you’ve added the brick, you can see the fields open up for customization in the Page Editor.
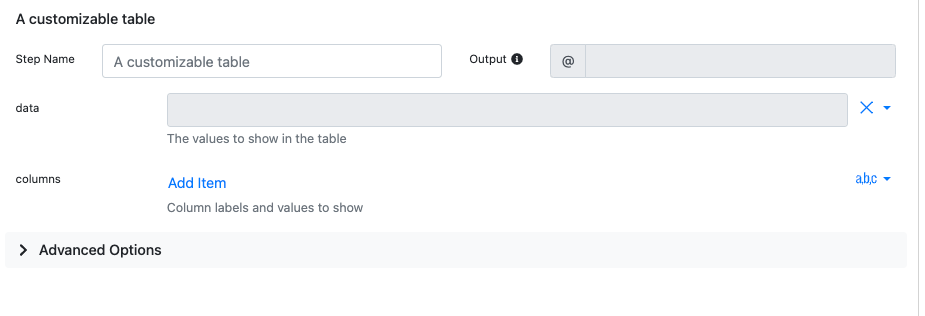
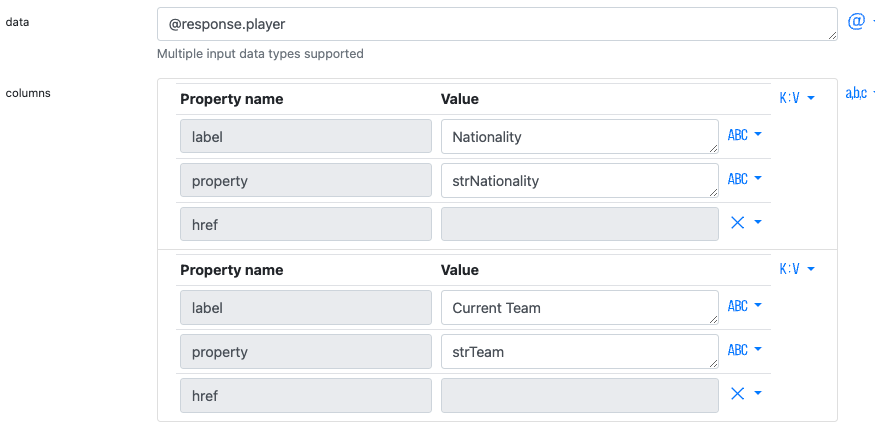
Set the data to be the array of data from the response. Use @response.player

Next, we need to configure the columns of data. To do this, click the Add Item button next to the columns. Click it again whenever you want to add a new column. We'll add two for the sake of this example but you could add as many as you want.
For each item, you'll need to set the label field, which is the text that shows up in the column head, and then the property field, which is the value that will display for each row in that column. If you want to make the values linkable, you can pass a URL in the href field. Like this!
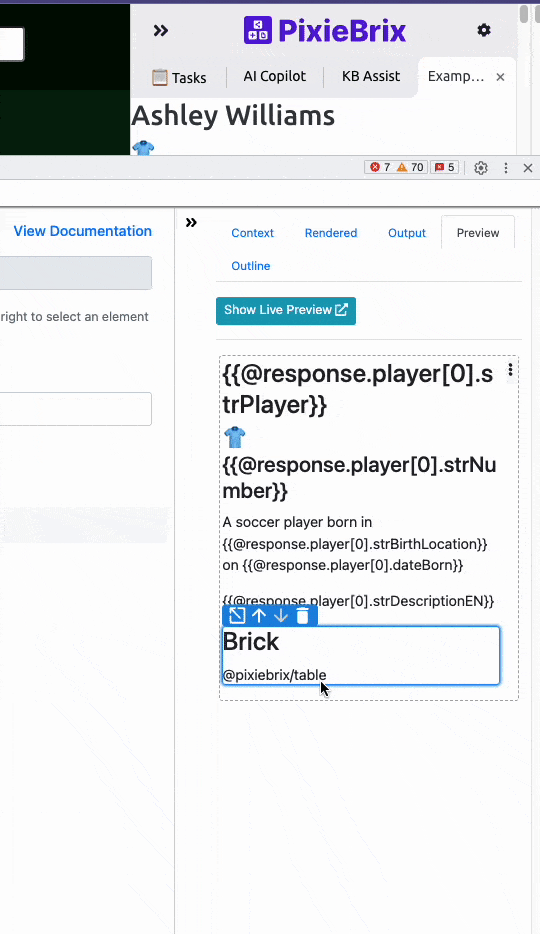
Here's how this configuration will display a table in the Sidebar.

Want to reorder something?
Maybe you want the table to come at the top and not below the block of text describing the player. You can easily reorder something by clicking the element in the Preview Panel (right side panel) and clicking the Up or Down arrow to move it.
If you feel like something is too close to another element, click the element, and then add a number from 0 to 5 in the Margin field. (Click the dropdown and you can specify applying a different margin to Top, Bottom, Left, and Right sides.)
Now try your sidebar!
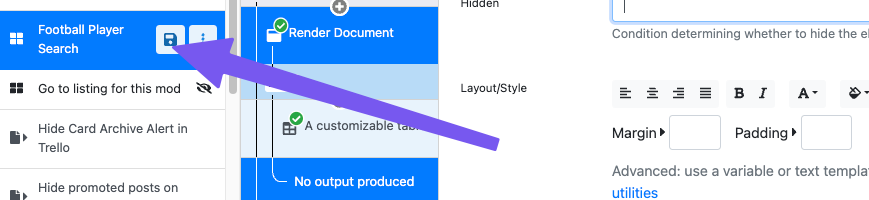
Save your mod by clicking the Save icon in the first panel on the right.
Now head to any page and highlight a player's name, then open the Quick Bar (press CMD/Ctrl + M), and select the Find this Football player action.

When it runs, you'll now see a sidebar appear returning the details about that player fetched from the API!
Congrats!
Ready to build your Sidebar Mod?
If you've made it to this point, you're ready to build your own custom sidebar fetching information from other tools and displaying it in a Sidebar from any page in Chrome!
This walkthrough illustrates just how deep you can go with PixieBrix, nesting and customizing things to meet your specific need.
If you're left with questions or want a second set of eyes on your brand new mod, pop into the PixieBrix Slack community! You'll find plenty of people willing to help you get set up.
You can also start with some of our Templates to hit the ground running:


