
Before you can customize, you'll need to get the template in an editable format.
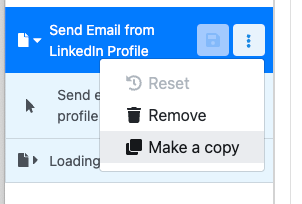
In the Page Editor, click the three dot menu next to the activated template. In the menu, select Make a Copy
You might be asked to create an alias if this is your first time copying a mod.
Optional: You can change the Mod ID, Name, and Description fields in the modal that appears
One of the first things you may want to customize is where your prompts come from. In the mod template, the prompts are defined in a Google Sheet, and we use the Lookup Google Sheet row brick (renamed Fetch prompts) to query a Google Sheet.
You can see how it works in this screenshot.
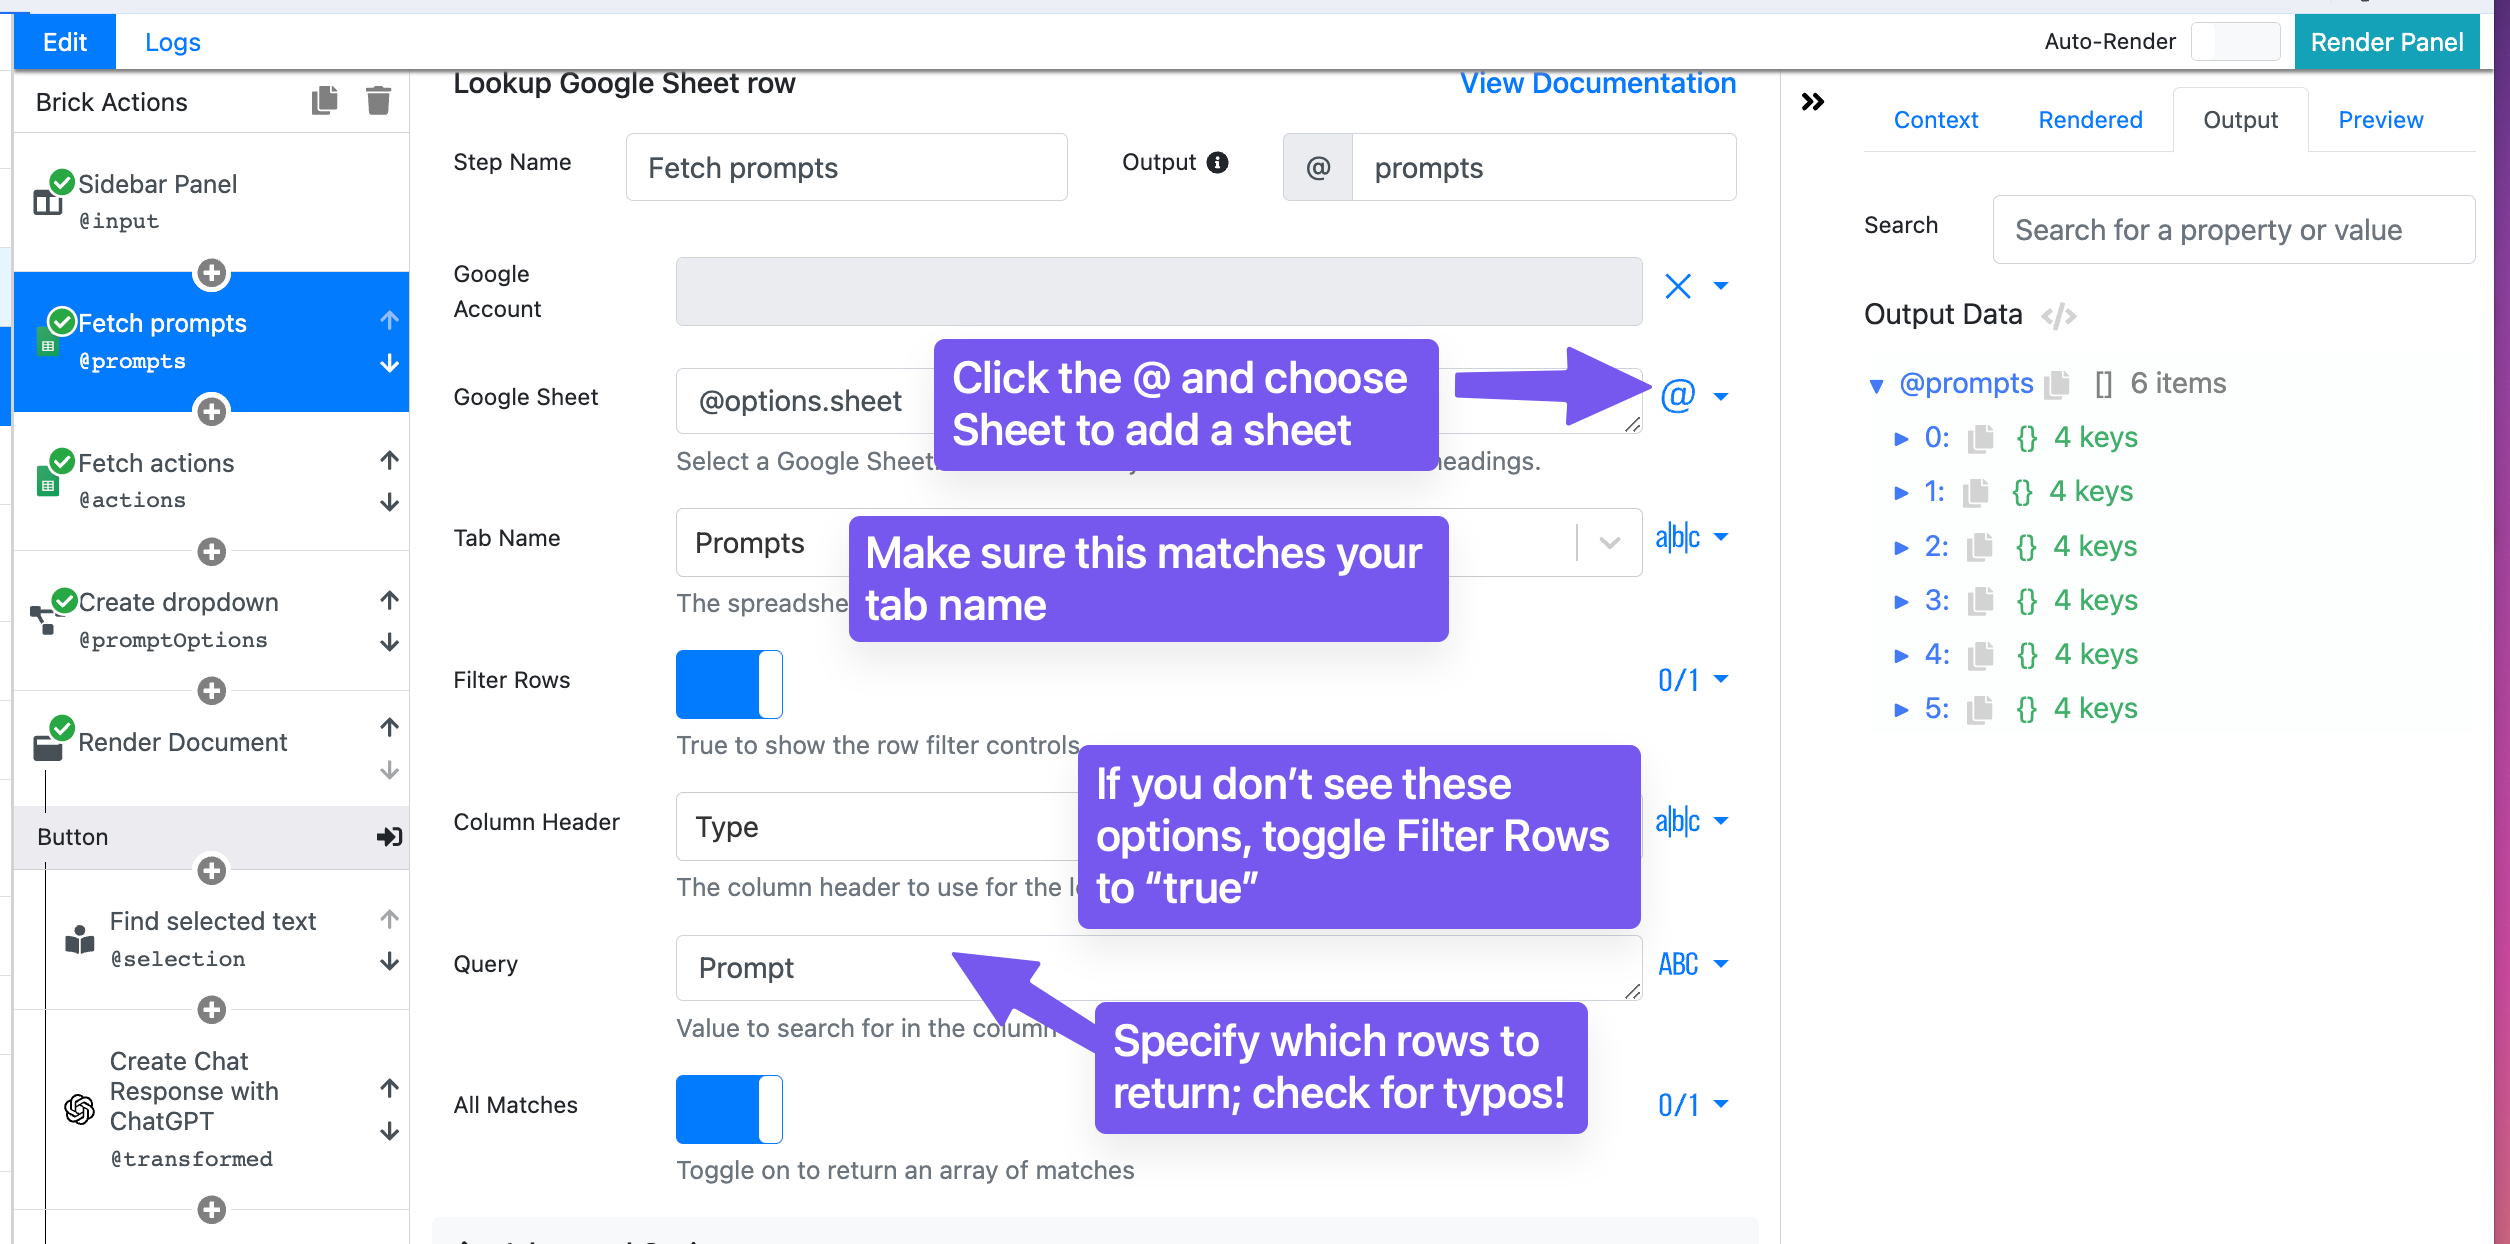
You might need to modify the query if your Google Sheet is set up differently than our template. Click the Fetch prompts brick and check out the Brick Configuration Panel in the middle of the Page Editor.
You'll notice we have two bricks like this, one for fetching the prompts (any items we want to appear in the dropdown, such as pre-set prompts to access quickly). And another similar brick that's instead fetching actions (prompts that will be applied to selected text on a page). This is how we distinguish between them in the Google Sheet.
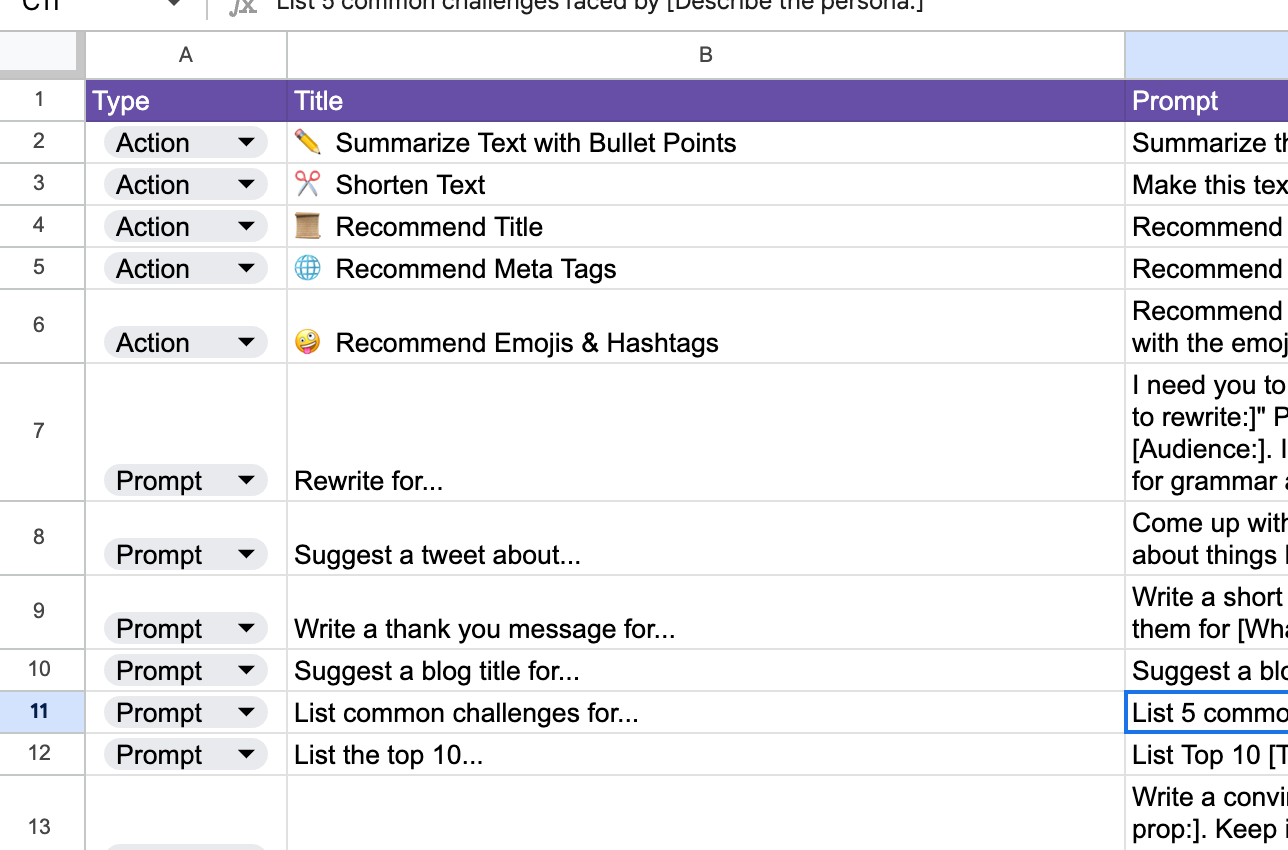
Configure your Google Sheet brick to match the spreadsheet, tab name, column header, and query that will return the prompts vs. actions, and you're all set!
You also might want to fetch prompts from other tools entirely, such as:
First, add an Airtable integration configuration. Use the Get Airtable Data brick to fetch prompts you've defined in an Airtable database. You'll need to add a jq - JSON processor brick afterward and use JQ to filter the data by prompts vs. actions.
.png)
You can store your prompts in a PixieBrix database and use the List All Records brick to return all your FAQs. PixieBrix databases have access control, allowing you to specify which team members should have access.
Like Airtable, you'll need to use the JQ brick to filter the data by prompts vs. actions.
If you want to use another tool to fetch your prompts, you can search for an existing brick by clicking the + button under any brick in the Brick Actions Pipeline.
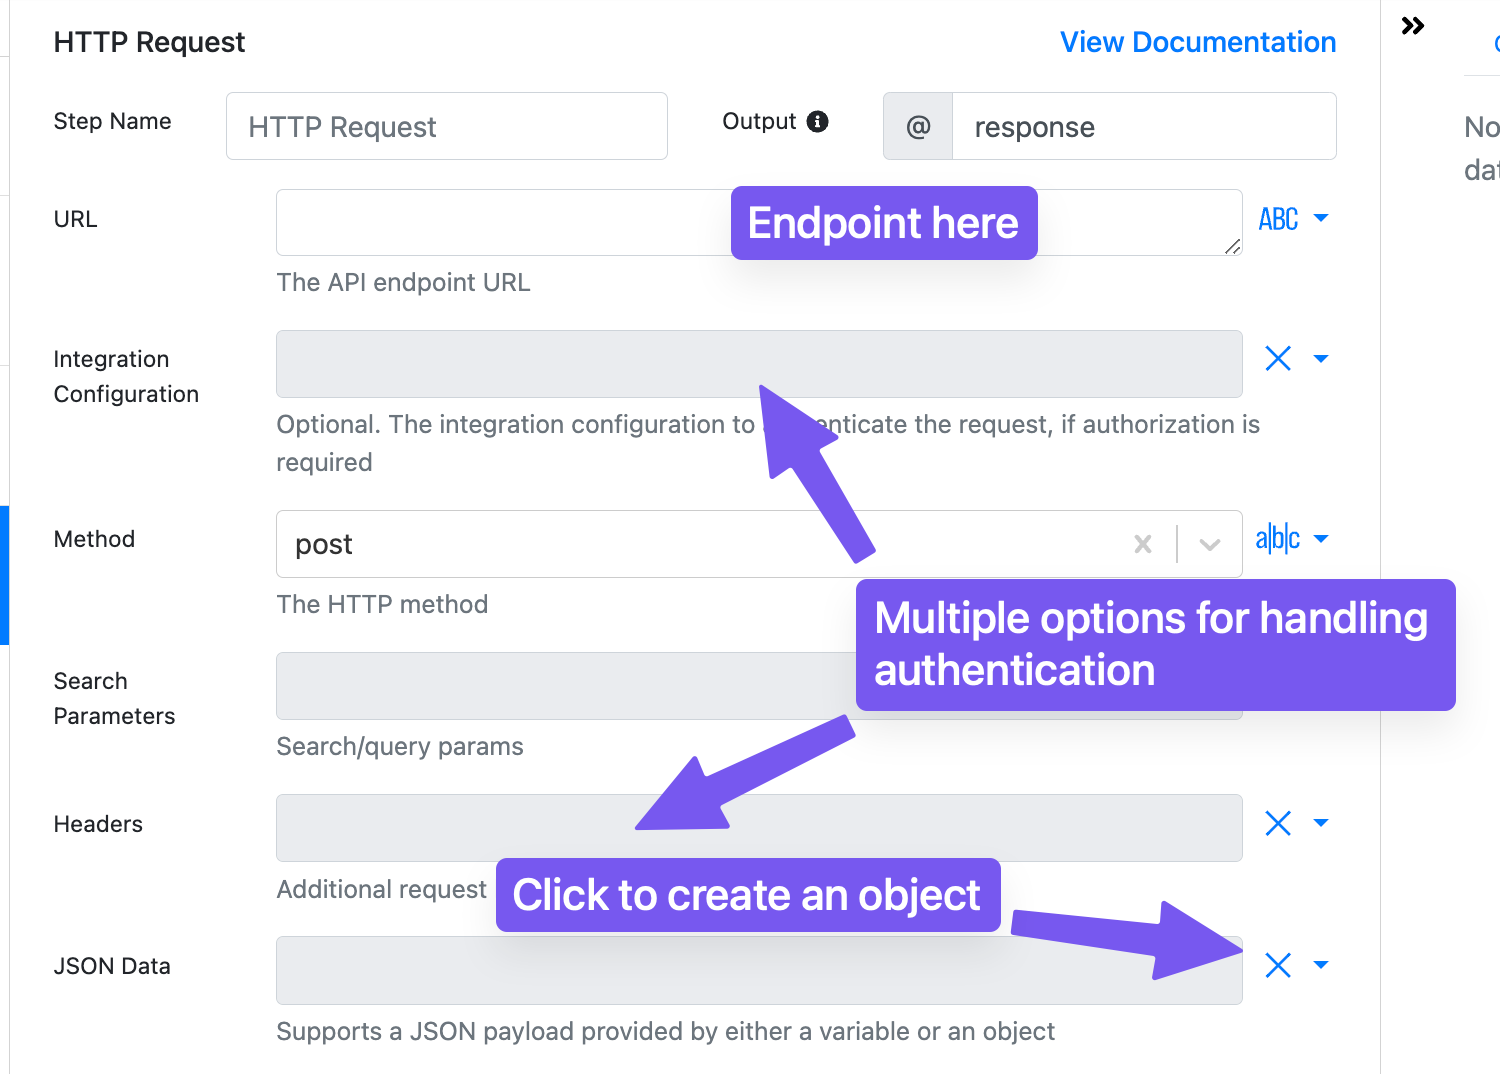
If the tool you're searching for isn't available as a brick, use the HTTP Request brick to fetch data from any API with PixieBrix.
A system prompt is predefined instructions for an LLM that explain what it needs to do with queries from users. In the mod template, AI Copilot has a very basic system prompt.
You can see the system prompt set in each Create Chat Response with ChatGPT brick.

Depending on how you might use your copilot, you can customize the system prompt to be more specific and give it more context and instructions for the task the LLM will complete.
For example, if you want to use an AI Copilot for categorizing text, you might adjust your system prompt to explain that it will receive text and needs to categorize it. You could provide the categories and a few examples of sample text and how it should be categorized.
Testing your prompts and ensuring they produce the desired output is always a good practice. If you get unexpected results, you may want to adjust your system prompt further. You can learn more about prompt engineering in our docs.
In this mod template, we use ChatGPT, but there are other LLMs out there that you might want to use.
In this case, we recommend using our HTTP Request brick and reviewing documentation for your favorite LLM's API. To do this, remove the Google Sheet bricks and click the + button. Search for the HTTP Request brick, then fill it out accordingly.
To test it out, click the Render Panel button in the top right corner of the Page Editor.
.png)
Check the output to confirm that you've received your expected response. If not, you may need to tweak the HTTP request.
Once you've confirmed your response is what you expect, you'll need to go to the bricks that display the AI response and update with the path from the HTTP request instead of the ChatGPT brick.
If you received the right response but need it in another format, you can use the JQ brick to filter and map the data.
You'll find these bricks nested inside Display Temporary Information bricks (renamed to Show response for... in this example). You'll know you're in the right place when you see Response and @chatpgtOutput.choices[0].message.content in the Preview Panel.
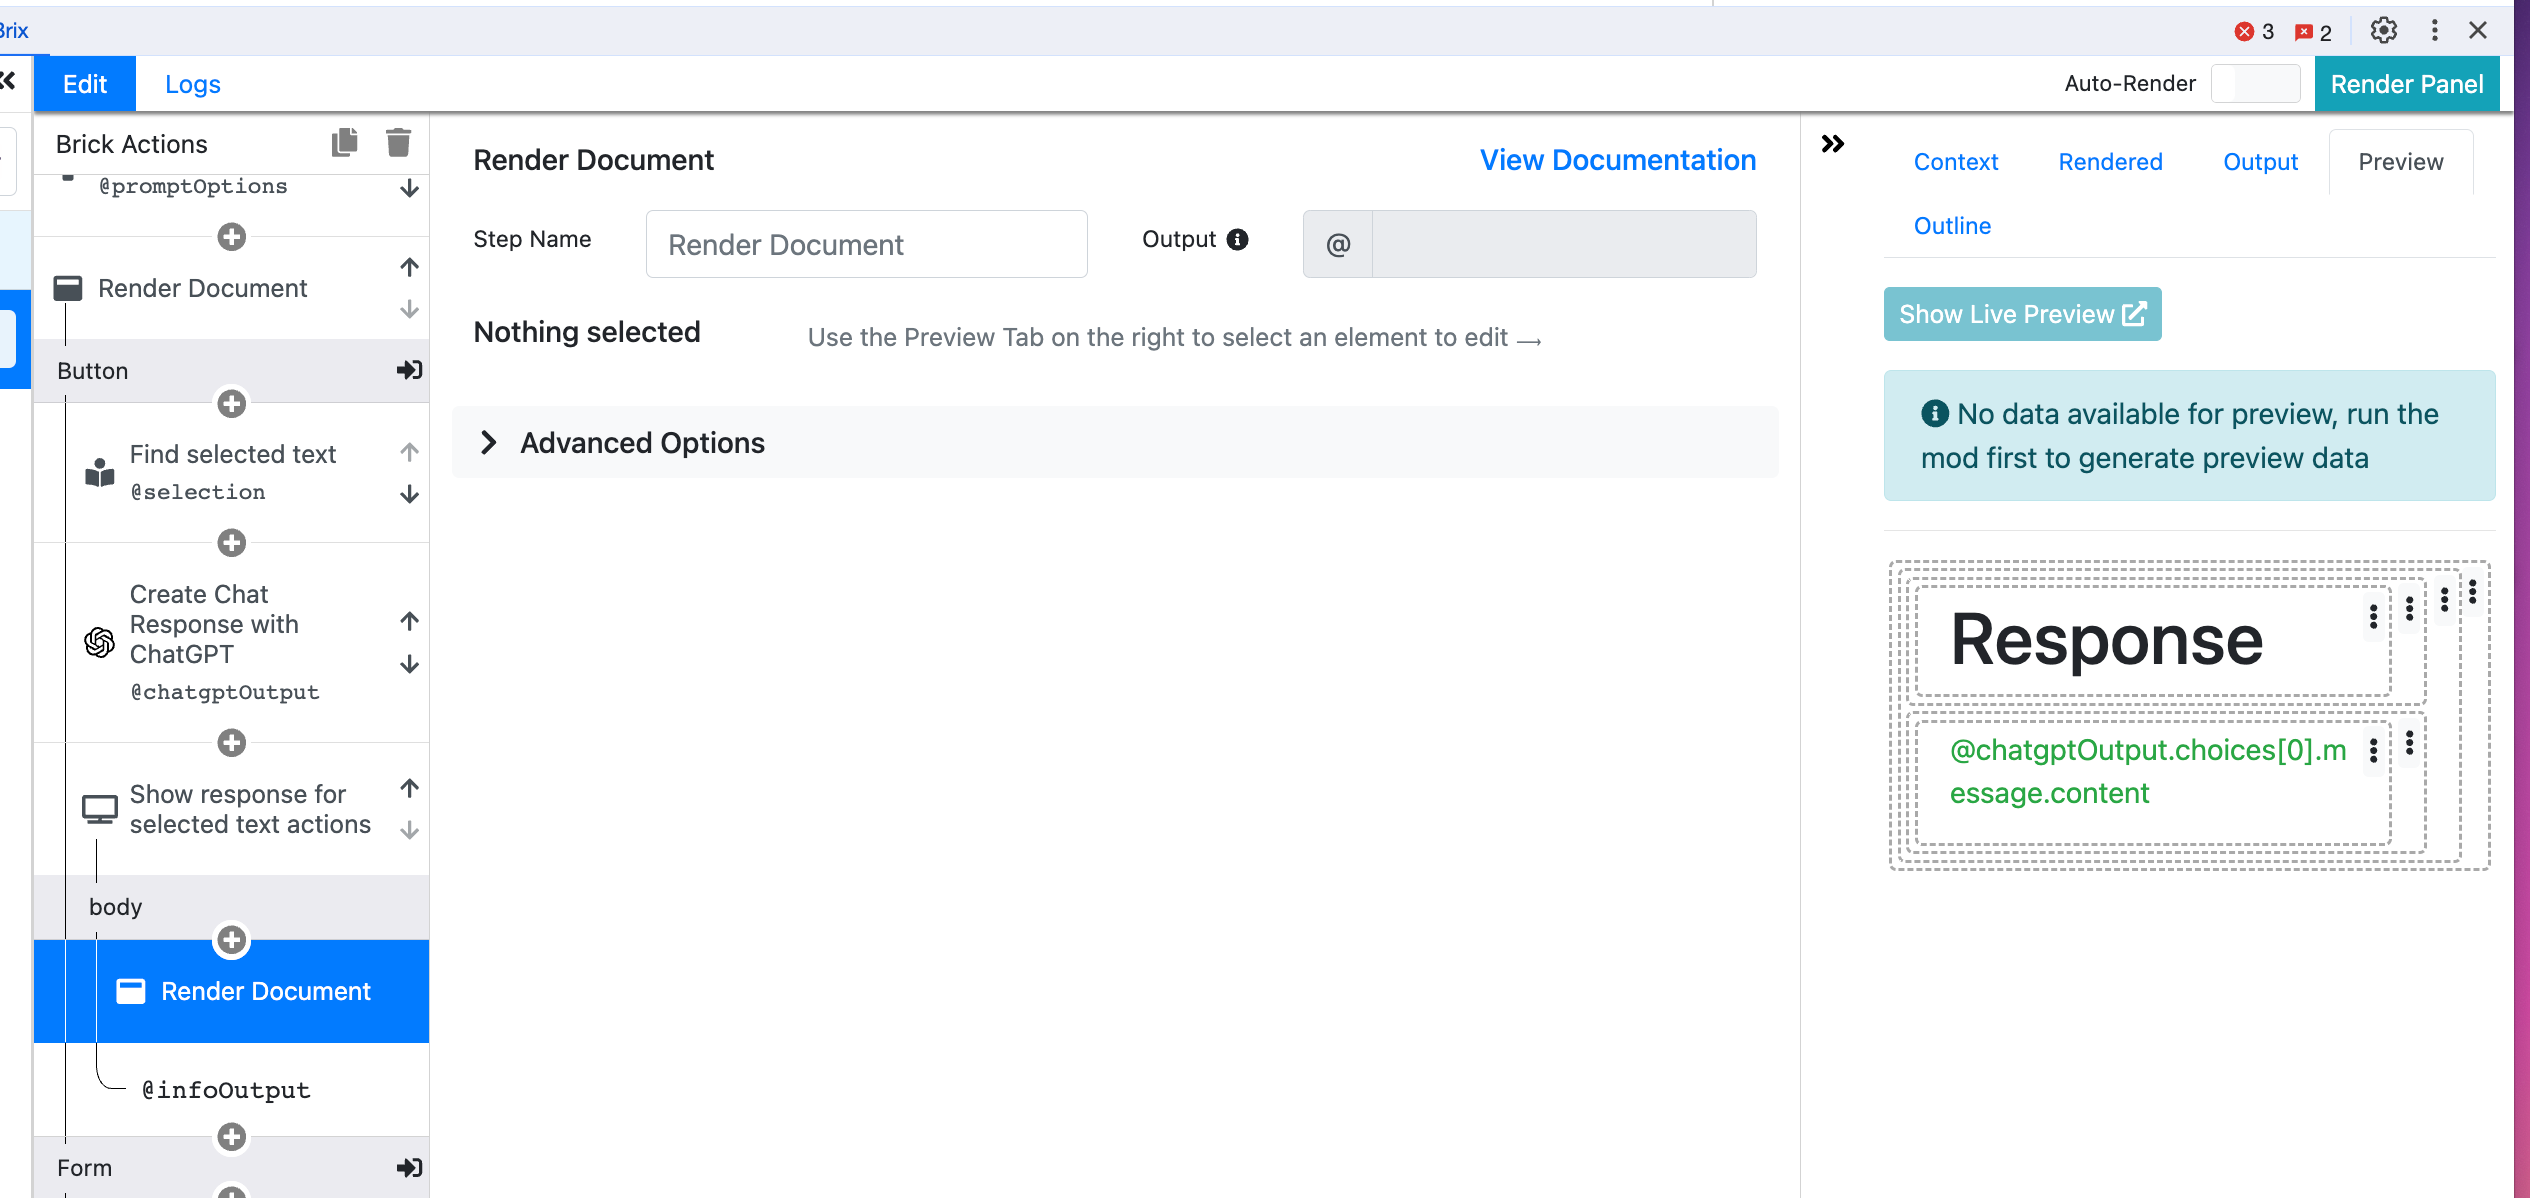
Keep scrolling because there are two others you'll need to update! Just keep looking inside every instance of Display Temporary Information (renamed to Show response for... in this mod template.)
Run your mod again, select a prompt, and confirm that you can view the response in your sidebar.
Robots aren't perfect; sometimes, they require a couple of tries to get something right. With the existing configuration in the template, your copilot will only return one response (called a completion) from ChatGPT, but you can set it to show more if you'd like.
Go to the ChatGPT brick that you want to change (or all of them!) and adjust the # Completions field (below Messages) from 1 to whatever you'd like, such as 2 or 3.

Go to the Display Temporary Information brick below the ChatGPT brick. Click the Render Document brick, click the green text element in the preview panels, and finally, click the trash icon to delete this text element.
Next, click the three-dot menu in the existing Column element and select a List element.
.png)
Click the newly created List element and set the Array value to @chatgptOutput.choices, which is the array containing responses from each completion.
Click the text element that appears inside and set the content to @element.message.content.
Re-render your panel; now you'll see three blocks of text with responses instead of just one!
Make sure to update the Render Document bricks inside the Display Temporary Information bricks for all the ChatGPT bricks you updated with multiple completions.
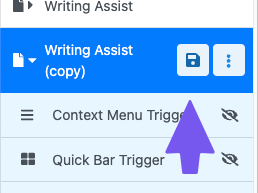
The last step is save your mod. PixieBrix will keep unsaved changes in the Page Editor, but for the changes to take affect when using the mod, you'll need to save. Click the save icon next to your mod to save the changes.
We can't wait to see what you build! Join the PixieBrix Slack Community if you need help or want to show off your latest creation.


