If you want to publicly recognize your teammates’ achievements in a super fashionable way, what’s a better way than doing so using the power of PixieBrix?
🤠 Let’s start building!
Open the PixieBrix Page Editor by right-clicking from anywhere on the page and clicking Inspect. Then head to the PixieBrix tab.
Click the teal Add button next to the PixieBrix logo in the top left corner.
.png)
Then select the Quick Bar Action brick. (This means you'll be able to trigger it by using a keyboard shortcut to open the Quick Bar and select the action. By default, this shortcut is CMD/CTRL + M.)
We need to configure a few details in the middle of our screen, like...
This is how your configuration should look:
.png)
And this is what you'll see in your browser when you press CMD/Ctrl + M!
.png)
Let’s add the Slack Get Users brick. This brick returns all users in our Slack workspace. The data returned includes their name, userId, and whether they’re bot users or not (bot users are mostly apps and integrations users). We’re going to use this data to populate a dropdown menu from where to select which Slack user we want to give kudos to.
To be more clear, let’s rename this output variable to @allSlackUsers
.png)
We're going to use jq to transform our list of users into a filtered list that only shows non-bot users and gives us an array that we can use to create a dropdown of other teammates we can select.
To do this, click the + button below the Slack Get Users brick and add the jq - JSON processor brick.
In the filter field, set the value to:
. | map(select(.is_bot == false and .name != "Slackbot") | {title: .name, const: .username})
And in the data field, set the value to @channels.
Lastly, rename the output to something more useful, like @userList
This will return the filtered data in a more useful format.
.png)
Now we have a list of your teammates that we can put in a form and create the message. Let's do it!
In this step we’re going add a modal to the mod, which will open every time this mod is run, allowing the user to pick a teammate to give kudos to, as well as a reason, which will then be posted to Slack.
Let’s get configuring!
Start by adding the Show a modal or sidebar form brick.
First, set the Form Title to Give some Kudos! 🎉 (or anything else you'd like!)
.png)
Now, we’re going to configure 2 fields in our form. We already have one example field by default, so let's edit it. Scroll below the Form Title to the Current Field and change the example text to something more useful. We need to choose our kudos recipient, so configure your new field with this info to get a list of the users from your Slack workspace.
.png)
Now scroll up again and click + Add new field.
We’re going to create another field and configure it like this:
.png)
That’s it! Our fields are ready!
Finally, we’ll configure the field called Submit Button Text, and we’ll change it to Send Kudos 💜
Now it's time to add the brick for sending the message. Click the + button and add the Send Simple Slack Message brick.
First, we'll need to select our Slack workspace, which we've already configured. (Leave the link names field to true; no need to change anything here.)
Next, we'll need to specify the text in the message.
Here, we'll piece together everything from the form to put together our message. Just set the text value to :clap: Kudos to<@{{@form.user}}> for {{ @form.message }}
Lastly, specify the channel we’re going to be sending the kudos. At PixieBrix, we have a channel called #kudos, so that's what we're using, but you can set it to any channel, such as your #general channel.
This is how your brick should look.
.png)
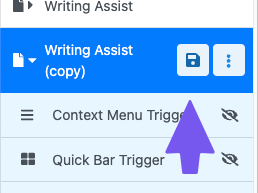
The last step is save your mod. PixieBrix will keep unsaved changes in the Page Editor, but for the changes to take affect when using the mod, you'll need to save. Click the save icon next to your mod to save the changes.
And this is it for this brick and for this mod!
Now go ahead and test what you built by using the Quick Bar shortcut! It should look something like this.
.gif)
Not working as expected? Join the PixieBrix Slack Community for help debugging!